Eagle Shawl Pattern

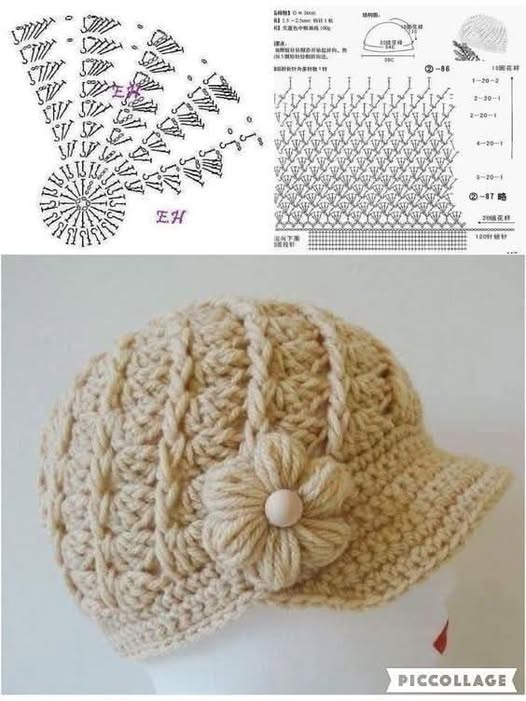
Circular Crochet Hat Pattern is a beautiful and versatile crochet project that begins with a simple circular crown and gradually develops into a comfortable hat with structured sides and a gently shaped brim. Inspired by the handmade hats in the reference image, this design is especially attractive because the construction is easy to understand once you learn how to control increases. The circular method also makes it possible to customize the hat for different head sizes, yarn weights, colors, and decorative stitch combinations.
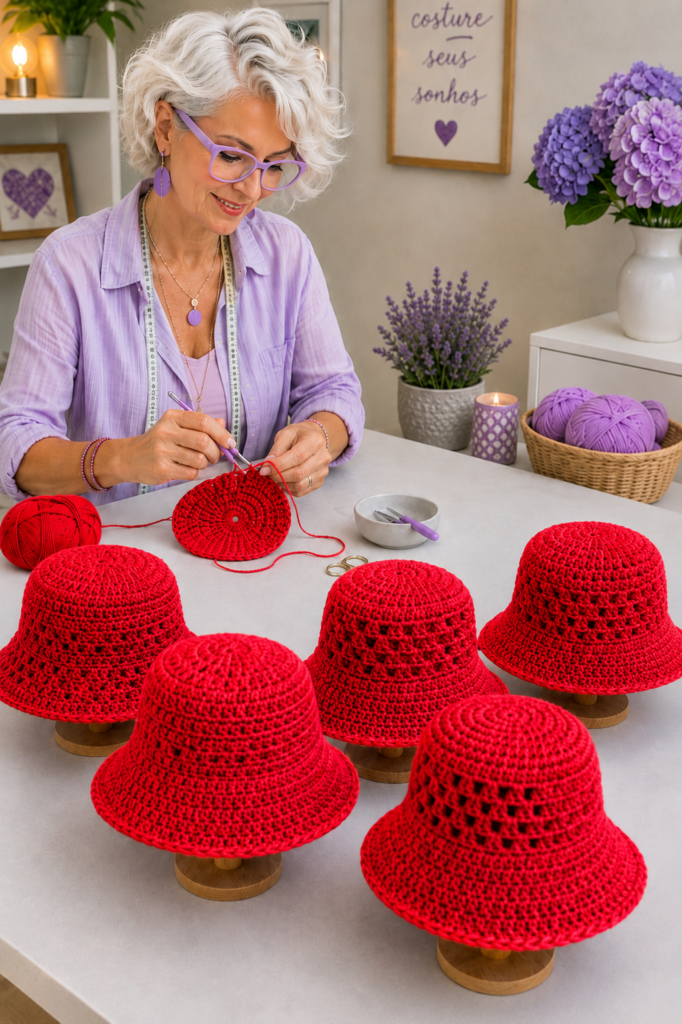
A handmade Circular Crochet Hat Pattern is an excellent project for crocheters who want to move beyond flat squares and learn how three-dimensional crochet shaping works. The crown starts as a flat circle, the side section is created by stopping or reducing the increases, and the brim is formed by introducing increases again. This simple construction principle can produce everything from a close-fitting sun hat to a relaxed crochet bucket hat. The red examples in the image also demonstrate how alternating solid and slightly open stitch sections can add texture without changing the fundamental structure.
Another advantage of this crochet hat pattern is its flexibility. You do not need to depend entirely on a fixed stitch count because the crown can be measured as you work. This makes the project easier to adapt for children, teenagers, and adults. The instructions below use U.S. crochet terminology and provide a practical foundation that you can modify according to your gauge. For best results, make a gauge swatch, measure the intended wearer, and remember that yarn fiber, hook size, tension, and stitch choice can all affect the finished dimensions.
For this Circular Crochet Hat Pattern, choose a medium-weight cotton or cotton-blend yarn if you want a structured summer hat similar to those shown in the image. Cotton creates defined stitches and helps the brim maintain its shape. Approximately 200–300 yards (183–274 m) will generally be suitable for an adult hat, although the exact amount depends on size, brim width, yarn weight, and stitch density.
A 4.0 mm to 5.0 mm crochet hook works well with many medium-weight cotton yarns. Always check the yarn label and adjust your hook according to your personal tension. You will also need scissors, a yarn needle, stitch markers, and a flexible measuring tape.
The principal stitches used are chain (ch), slip stitch (sl st), single crochet (sc), half double crochet (hdc), and double crochet (dc). The basic version can be completed mostly with double crochet, while decorative sections may incorporate chains and skipped stitches.
For an average adult hat, aim for a finished circumference of approximately 21–23 inches (53–58 cm). Crochet fabric stretches, so the actual hat may be slightly smaller than the head circumference depending on the yarn and stitch pattern.
Begin with a magic ring. Chain 2 or 3 according to your preferred starting method, then work approximately 12 dc into the magic ring. Pull the center closed and join with a slip stitch to the first stitch.
For Round 2, work 2 dc in each stitch around. This doubles the stitch count and begins creating the flat circular crown. Place a stitch marker at the beginning of each round so you can easily track your progress.
For Round 3, work 1 dc in the first stitch, 2 dc in the next stitch, repeating around. Round 4 can be worked as 1 dc in each of the next 2 stitches, 2 dc in the next stitch. Continue this logical increase sequence in subsequent rounds.
The important principle is that every new crown round places one additional regular stitch between increases. If your circle begins forming waves, you may be increasing too quickly. If it curls upward prematurely, additional increases may be necessary.
Continue until the crown reaches the diameter required for your size. Many adult hats will have a crown approximately 6.5–7.25 inches (16.5–18.5 cm) across, but use this only as a starting guideline because gauge and desired fit vary.
Once the circular crown has reached the correct diameter, stop making regular increases. This is the moment when the flat crochet circle begins transforming into a three-dimensional hat.
Work 1 dc in each stitch around without increasing. After several rounds, the fabric naturally begins descending around the head. This transition creates the rounded upper portion visible on the hats in the reference image.
Continue working evenly for approximately 2–3 inches (5–7.5 cm) before introducing a decorative section. Try the hat on periodically if possible. Measuring during construction is much more reliable than relying exclusively on a predetermined number of rounds.
To create an open textured band, work a simple sequence such as dc, ch 1, skip 1 stitch, dc in the next stitch. Repeat this sequence around while keeping the stitch pattern evenly distributed.
On the following round, you can work double crochet into the stitches and chain spaces. This produces small openings similar to the textured sections seen on some of the red hats in the image.
Another option is to alternate front post double crochet (FPdc) and regular double crochet. Front post stitches create raised vertical texture and can give the hat a more structured handmade appearance.
For a subtler texture, alternate rounds of hdc and dc. Half double crochet produces a denser fabric, while double crochet creates slightly more height. Combining the two can add visual interest without creating large openings.
Continue until the side section measures approximately 6.5–8 inches (16.5–20 cm) from the top center of the crown, depending on the intended fit. A deeper crown creates a relaxed bucket-hat silhouette, while a shorter crown produces a more fitted style.
Check the circumference before beginning the brim. If the hat feels too loose, a round containing a few evenly distributed decreases can improve the fit. If it feels tight, carefully add several increases across one round.
Keep your tension consistent throughout the side section. Uneven tension can cause one part of the hat to appear wider or narrower than another, particularly when switching between solid and openwork stitches.
The brim is where the Circular Crochet Hat Pattern begins expanding outward again. Unlike the side section, which is worked without increases, the brim requires carefully distributed increases to create its characteristic flare.
Begin the first brim round with single crochet or half double crochet. A denser stitch gives the lower edge more structure. Work evenly around while introducing increases at regular intervals.
For example, you might work 1 hdc in each of the next 5 stitches, 2 hdc in the next stitch, repeating around. The exact spacing should be adjusted according to your stitch count and how much flare you want.
On the following round, increase less frequently. You might work 6 regular stitches followed by an increase, then move to 7 stitches between increases on a later round.
Avoid increasing too aggressively. Excessive increases create a ruffled brim rather than the gently sloping shape associated with a crochet bucket hat.
If the brim begins curling downward more than desired, add slightly more increases. If it becomes excessively wavy, work one or more rounds without increases.
For a standard bucket-style hat, a brim approximately 2–3 inches (5–7.5 cm) wide is practical. For a dramatic sun hat, continue until the brim measures 3.5–5 inches (9–12.5 cm).
The reference hats feature relatively structured brims. Cotton yarn is helpful for achieving this effect. You can also crochet the final rounds using a slightly smaller hook if additional firmness is needed.
A round of single crochet near the edge provides extra stability. Work one sc in each stitch around without increasing unless the brim needs additional shaping.
For an especially clean final edge, finish with a round of reverse single crochet, sometimes called crab stitch. Alternatively, a simple slip-stitch edging produces a subtle finish.
Fasten off and leave a yarn tail approximately 6 inches (15 cm) long. Use a yarn needle to weave the tail securely through several stitches on the wrong side.
Gently shape the finished hat with your hands. If the yarn allows wet blocking, lightly dampen the hat, arrange the crown and brim into the desired shape, and allow it to dry completely.
One of the greatest strengths of the Circular Crochet Hat Pattern is that sizing can be adjusted directly through the crown. Instead of following the same number of rounds for every person, measure the circle while crocheting.
A useful estimate for determining crown diameter is to divide the desired finished head circumference by approximately 3.14. Because crochet fabric stretches, you may want the final circumference slightly smaller than the actual head measurement.
For a child, simply stop increasing the crown earlier. For a larger adult size, continue the established increase sequence until the crown reaches the necessary diameter.
The depth is equally customizable. Add additional side rounds for a deeper hat or remove rounds for a shallower design. Always make these adjustments before beginning the brim.
Color can completely transform this pattern. The vivid red shown in the reference creates a bold statement, but the same crochet bucket hat pattern works beautifully in lavender, turquoise, cream, sage green, coral, multicolor yarn, or psychedelic combinations.
You can also create stripes by changing colors every two or three rounds. For a cleaner transition, complete the final yarn-over of the previous stitch using the new color.
Decorative flowers can be attached to the side of the hat for a feminine finish. Small crocheted daisies, roses, leaves, or butterflies work particularly well with a solid-color background.
Another customization option is a contrasting brim. Crochet the crown and sides in one color and introduce a second color when beginning the brim. This technique is particularly useful for using leftover yarn.
For a more breathable summer hat, add additional openwork rounds around the side section. However, keep the crown and brim relatively dense if you want the finished hat to maintain its structure.
If you want a minimalist version, simply work the entire crown and side section in double crochet and the brim in half double crochet. The resulting easy circular crochet hat is ideal for beginners.
Before considering the project complete, examine the joining seam, weave in every yarn end, and confirm that the brim lies evenly. Small finishing details can dramatically improve the appearance of handmade crochet.
Is the Circular Crochet Hat Pattern suitable for beginners?
Yes. It is an excellent introduction to crocheting hats because the construction follows a predictable sequence: increase the crown, work the sides evenly, and increase again for the brim.
What yarn is best for a crochet bucket hat?
Cotton and cotton blends are excellent because they offer stitch definition and structure. Acrylic can also be used but may produce a softer hat.
How much yarn do I need?
Approximately 200–300 yards (183–274 m) is a reasonable estimate for many adult sizes. Wide brims and dense stitch patterns require more yarn.
What crochet hook should I use?
A hook between 4.0 mm and 5.0 mm is suitable for many medium-weight yarns, but always consider the yarn label and your gauge.
How do I make the circular crown larger?
Continue the established increase sequence, gradually placing more regular stitches between each increase.
Why is my crochet circle becoming wavy?
Too many increases are usually responsible. Work a round with fewer increases or no increases and check whether the fabric becomes flatter.
Why is my crown curling into a bowl too soon?
You may not have enough increases. Check your stitch count and increase distribution.
How do I turn a flat crochet circle into a hat?
Once the crown reaches the required diameter, stop increasing and crochet evenly around. The fabric will naturally begin forming the sides.
How wide should the brim be?
Approximately 2–3 inches (5–7.5 cm) creates a traditional bucket-hat look. A wider brim creates more of a sun-hat silhouette.
Can I make the brim stiffer?
Yes. Use dense stitches, cotton yarn, a smaller hook for the final rounds, or another suitable hat-brim reinforcement method.
Can I add openwork stitches?
Yes. Chain spaces, skipped stitches, and double crochet combinations are excellent for creating decorative ventilation around the crown.
Can I make this pattern in several sizes?
Absolutely. Adjust the crown diameter and side depth according to the intended head measurement.
Should I block the finished hat?
Blocking can help even the stitches and improve the brim shape, provided the technique is appropriate for your yarn fiber.
Can I use multicolored yarn?
Yes. Variegated and self-striping yarn can create an impressive circular effect because the colors naturally travel around the hat.
Can I make the hat in one solid color?
Certainly. A solid color emphasizes the crochet texture and gives the hat a clean, classic appearance similar to the striking red versions in the reference.
The Circular Crochet Hat Pattern is an adaptable project that demonstrates one of the most useful principles in crochet: shaping fabric through controlled increases. Starting from a small magic ring, the crown gradually expands into a flat circle. Once the correct diameter is reached, the increases stop to create the sides, and carefully distributed increases are introduced again to form the brim.
Throughout this tutorial, you learned how to construct the circular crochet crown, determine an appropriate diameter, crochet the sides, incorporate decorative openwork, shape a bucket-style brim, adjust sizing, and finish the edges professionally. These techniques can also serve as a foundation for many other handmade hat designs.
The pattern becomes especially interesting when you experiment with texture and color. Bright red creates the bold appearance shown in the reference image, while pastel shades, neutrals, stripes, variegated yarn, or psychedelic combinations can completely change the personality of the finished piece. Decorative flowers and contrasting brims provide even more possibilities.
PATTERN VIDEO:
Whether you make your Circular Crochet Hat Pattern as a colorful summer accessory, a handmade gift, or simply as an enjoyable crochet project, careful measuring and consistent tension will make the biggest difference in the final result. If you try this pattern, leave your sincere opinion and share your suggestions, favorite yarn colors, or creative changes you would make to your own circular crochet hat.