
Hunter's Star Quilt Block - Quick & Easy Tutorial

Creating a shoulder bag tutorial can be a rewarding experience for both beginners and advanced sewing enthusiasts. A shoulder bag is not just a functional accessory but also a versatile fashion statement that can be customized in countless ways.
Whether you want a casual everyday bag, a chic evening bag, or a durable bag for travel, learning how to make one from scratch opens up endless possibilities.
In this shoulder bag tutorial, we will explore each step of the process in detail, helping you understand the materials, techniques, and tips needed to create a professional-looking bag.
Making a shoulder bag involves more than just sewing pieces of fabric together. It requires careful planning, attention to detail, and an understanding of the tools and materials.
Many people are intimidated by bag-making because of its complexity, but this tutorial will break everything down into manageable steps. From choosing the right fabric to finishing the seams and adding hardware, each part of the process is essential for creating a high-quality shoulder bag that lasts.
In this shoulder bag tutorial, we will also cover design ideas, essential sewing skills, and ways to personalize your bag to reflect your style. By the end of this guide, you will have all the knowledge needed to create a beautiful and functional shoulder bag that stands out. This tutorial is perfect for anyone looking to improve their sewing skills or start a small craft project that combines creativity and practicality.
Selecting the correct fabric is one of the most crucial steps in making a shoulder bag. The type of fabric you choose will affect the bag’s durability, appearance, and ease of sewing. Popular options include cotton, canvas, leather, faux leather, denim, and linen. Canvas is ideal for casual and durable bags, while leather or faux leather can create a more polished and sophisticated look.
When choosing your fabric, consider the bag’s purpose. For an everyday bag, a sturdy and washable fabric like canvas or denim works well. For a fashion-forward evening bag, lighter and softer fabrics like satin or velvet may be appropriate. It’s essential to pick a material that complements the bag’s intended use and aesthetic.
Fabric weight is another important factor. Heavier fabrics provide more structure and durability but can be harder to sew. Lighter fabrics are easier to handle but may require interfacing or lining for support. Understanding how fabric weight affects your bag will help you make informed choices and achieve professional results.
It’s also wise to think about color and pattern when selecting fabric. Neutral colors are versatile and timeless, while bold patterns can make your bag stand out. Consider combining different fabrics to add texture and visual interest to your shoulder bag. A combination of solid colors and patterns often works beautifully.
Remember that the fabric lining is just as important as the exterior. Lining fabrics protect the inside of your bag, give it a finished look, and can even add extra pockets or compartments. Lightweight cotton or polyester lining is ideal for most shoulder bags, providing a clean and smooth interior.
Lastly, don’t forget to prewash fabrics that may shrink. Prewashing ensures that your shoulder bag retains its size and shape after washing. Taking the time to choose the right fabric carefully will make the sewing process smoother and the final product more professional.
Before starting your shoulder bag tutorial, it’s important to gather all necessary tools and materials. Having everything ready ensures a smooth workflow and prevents interruptions. Essential tools include a sewing machine, scissors, pins, measuring tape, seam ripper, and iron. High-quality tools make a significant difference in the final outcome.
Thread selection is vital for a strong and durable bag. Choose a heavy-duty polyester thread that matches or complements your fabric. Using the right thread reduces the risk of breakage and ensures clean, professional stitches. For leather or thick fabrics, a stronger upholstery or waxed thread may be necessary.
Other materials include interfacing, zippers, buttons, snaps, or magnetic closures. Interfacing adds structure to the bag, especially when working with lighter fabrics. Zippers and closures not only provide security but also enhance the bag’s design. Choosing high-quality hardware ensures that your shoulder bag remains functional over time.
Measuring tools are critical for accuracy. A clear ruler, measuring tape, and marking tools like chalk or fabric pens help you cut precise pieces. Accurate measurements prevent uneven seams and misaligned edges, which are common mistakes for beginners.
For decorative touches, consider adding ribbons, patches, or embroidery. Personalization elevates your bag from a simple accessory to a unique statement piece. This tutorial will show how to incorporate these decorative elements without compromising durability.
Finally, prepare a workspace with adequate lighting and a flat surface. Organization reduces stress and increases efficiency. Laying out all your tools and materials beforehand ensures that you can focus entirely on creating your shoulder bag.
Sewing a shoulder bag requires mastering several fundamental techniques. The first step is cutting your fabric according to your chosen pattern. Precision is key, as uneven cuts can affect the bag’s shape and alignment. Always double-check measurements before cutting.
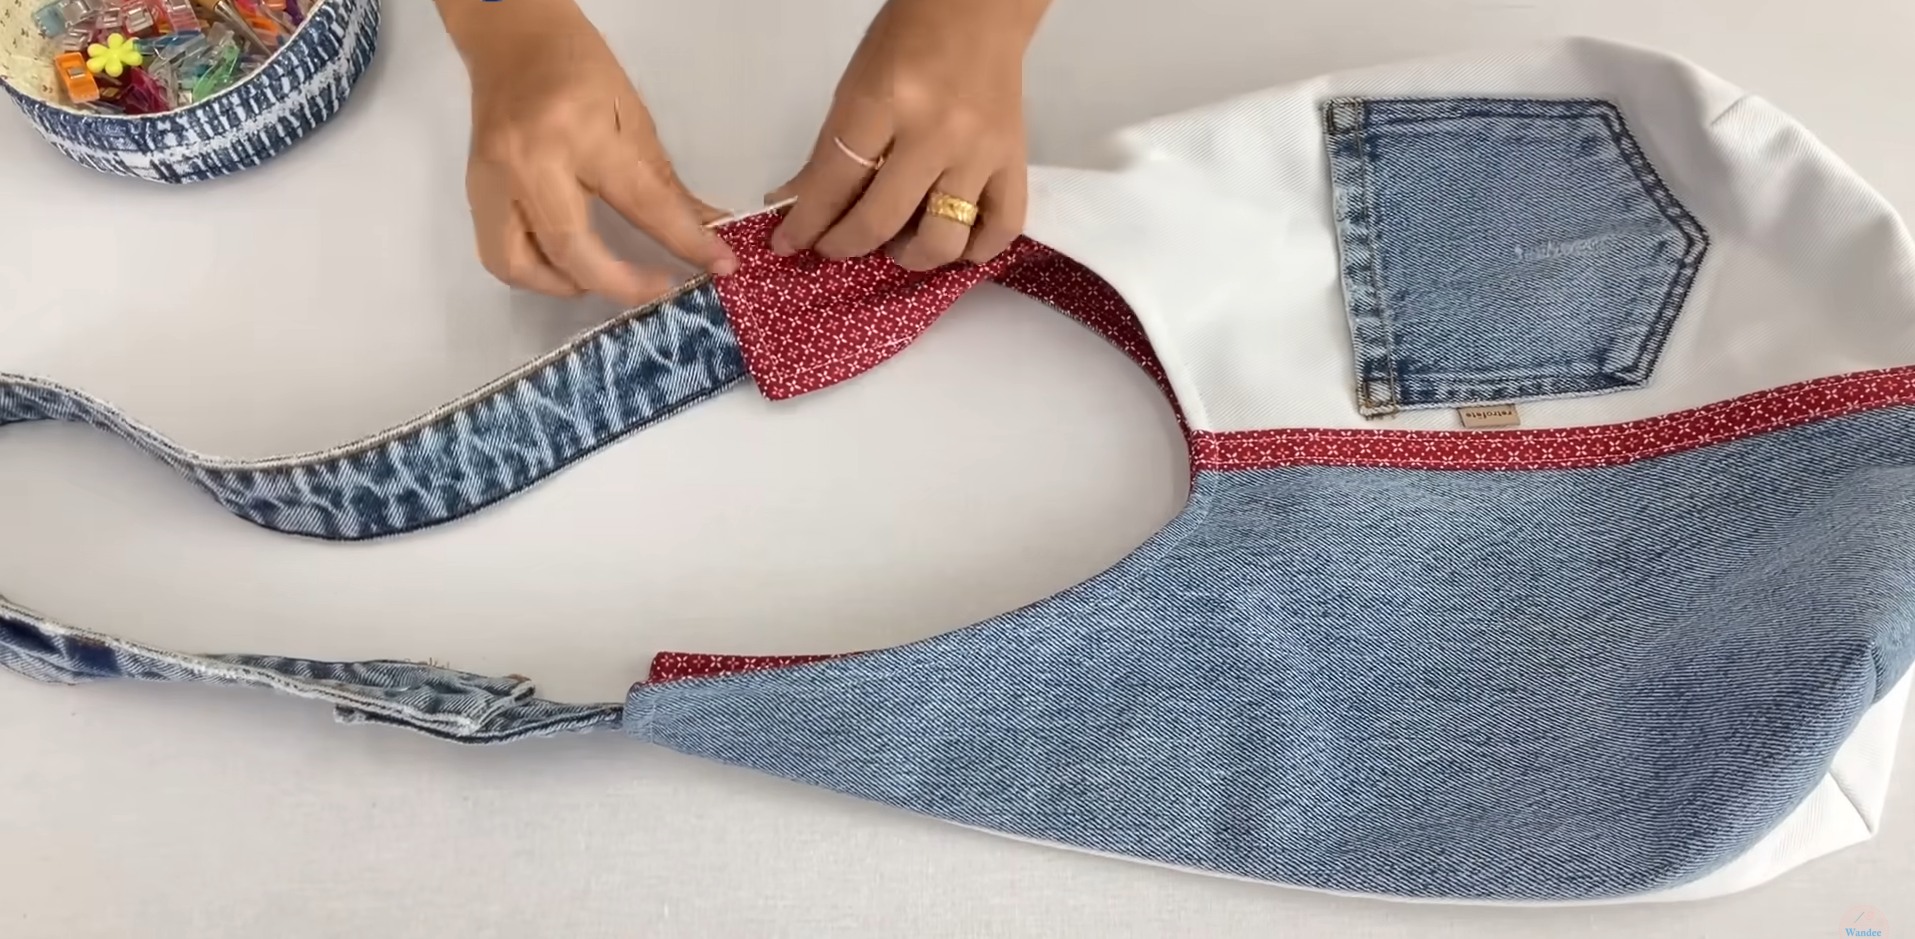
Next, assemble the main body of the bag by sewing the front, back, and side panels together. Use straight, even stitches and press seams with an iron for a polished appearance. Reinforcing stress points, such as strap attachments, ensures durability and prevents tearing.
Adding pockets and compartments enhances the bag’s functionality. Simple patch pockets can be sewn on the exterior, while interior pockets can hold small items securely. This shoulder bag tutorial encourages thoughtful placement of pockets to maximize usability.
Attaching the shoulder strap is another crucial step. Ensure that straps are evenly aligned and reinforced with multiple stitches or bar tacks. Adjustable straps provide versatility, making the bag suitable for different body types and carrying preferences.
Finishing techniques like hemming, topstitching, and edge binding give your bag a professional look. These details may seem small, but they significantly enhance the bag’s overall quality. Take your time to finish edges neatly and consistently.
Finally, press the entire bag one last time to remove wrinkles and define seams. A well-pressed bag looks crisp and polished, emphasizing the craftsmanship involved. This final step is essential in any shoulder bag tutorial to achieve a high-quality result.
Personalizing your shoulder bag allows you to express creativity and make a unique accessory. Adding embroidery, patches, or appliqués can transform a simple bag into a fashion statement. Consider monograms or thematic designs that reflect your personality.
Color coordination is another way to enhance your bag’s design. Mixing complementary colors or contrasting shades can create a visually appealing effect. Even small details like colored stitching or patterned lining add depth and interest to the finished bag.
Functional enhancements, like adding adjustable straps, detachable pouches, or reinforced bottoms, improve usability. Thoughtful design choices make your shoulder bag not only stylish but also practical for everyday use.
Experimenting with fabric textures and layers also contributes to uniqueness. Combining leather with canvas or mixing smooth and textured fabrics creates a dynamic and eye-catching accessory. This tutorial encourages exploring different combinations to achieve distinctive results.
Decorative hardware, such as stylish buckles, rings, or buttons, adds elegance and charm. Carefully chosen hardware complements the bag’s overall design and increases its perceived value. Avoid overloading the bag with hardware, as simplicity often enhances sophistication.
Finally, consider seasonal or themed designs. A shoulder bag can reflect seasonal colors or motifs, making it suitable for gifting or special occasions. Personalization ensures your bag stands out in a market of mass-produced accessories.
1. What fabric is best for a beginner’s shoulder bag?
Canvas or cotton are ideal for beginners because they are easy to handle, durable, and forgiving with mistakes. Lightweight fabrics may require interfacing for structure.
2. How long does it take to make a shoulder bag?
Time varies based on complexity and experience. A simple bag can take 2-4 hours, while detailed designs with pockets and hardware may take 6-8 hours or more.
3. Can I use a regular sewing machine for a leather shoulder bag?
Yes, but you will need a leather needle and possibly a walking foot. Heavy-duty machines are recommended for thicker materials to prevent damage.
4. How do I reinforce shoulder bag straps?
Use multiple stitching lines, bar tacks, or small squares of fabric at stress points to prevent tearing and increase durability.
5. Can I wash a homemade shoulder bag?
It depends on the fabric. Cotton and canvas bags are usually machine washable, while leather or delicate fabrics should be spot-cleaned only.
6. How do I prevent fabric fraying?
Use pinking shears, serging, or fold-and-stitch techniques to secure edges. Adding lining also protects against fraying and gives a professional finish.
In this shoulder bag tutorial, we explored everything from fabric selection and essential tools to sewing techniques and design personalization. By carefully choosing materials, mastering basic sewing skills, and adding creative touches, anyone can create a functional and stylish shoulder bag. The key is to plan meticulously, practice patience, and enjoy the process of crafting.
We hope this tutorial helps you feel confident in your sewing journey. Please leave a sincere opinion and suggestions about your experience or ideas for future tutorials. Your feedback is invaluable for creating even better guides.


