
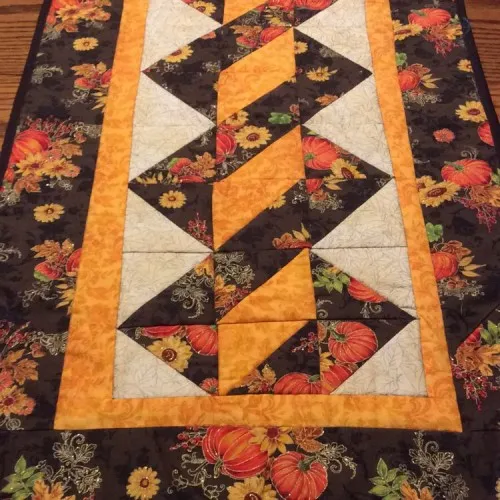
Spicy Spiral Table Runner - Pattern

Professional Double Oven Glove – FREE Tutorial provides a detailed, step-by-step guide for creating a high-quality, heat-resistant glove suitable for any kitchen.
This DIY oven glove is designed to protect your hands and wrists from burns while handling hot cookware, baking trays, and pots.
Unlike regular oven mitts, a professional double oven glove features double layers of durable fabric and insulation, making it safer and more reliable for everyday cooking. Following this free tutorial, you can craft your own glove that combines functionality, comfort, and style.

Creating a handmade oven glove allows you to personalize materials, colors, and patterns to match your kitchen décor. Using cotton fabrics for the outer layer and heat-resistant batting for the inside ensures your glove is both soft to the touch and effective at protecting against heat.
Whether you are a beginner or experienced sewist, this DIY oven glove project can be completed with basic sewing skills and equipment, making it accessible and practical.
The double-layer oven mitt design enhances protection, with two layers of fabric and padding strategically sewn together to cover the fingers, palms, and wrist area. This design ensures that even if you handle very hot trays or pots, your hands remain safe. The free tutorial also guides you through creating a neat and professional finish, including reinforced seams and optional hanging loops for convenient storage.
Before starting your professional double oven glove, gather all necessary materials to ensure a smooth crafting process. High-quality cotton fabric is recommended for the exterior layer. Choose fabrics that are durable, machine washable, and aesthetically pleasing to create a glove you’ll be proud to use.
For the interior, heat-resistant batting or insulating fabric is essential. This padding is the core of your double-layer oven mitt, providing protection against high temperatures. Avoid using materials that melt or are too thin, as they won’t adequately shield your hands from heat.
Thread in a coordinating color is required to sew the layers together. Strong, durable thread ensures that your glove maintains its structure after repeated use. A sewing machine is ideal for stitching layers efficiently, but hand sewing can also be used for those who prefer a traditional approach.
Additional tools include fabric scissors, pins or clips, a ruler, and a fabric marker to outline the glove pattern. These help with accuracy and allow for clean, precise assembly. If desired, you can add a small loop of fabric to one side of the glove, enabling easy hanging storage.
Optional materials like decorative trims or contrasting fabrics can be used to personalize your DIY oven glove, making it both functional and stylish. Following this free tutorial ensures that all necessary materials are accounted for, reducing mistakes and ensuring a professional final product.
Start by printing or drawing the glove pattern provided in the free tutorial. Ensure the pattern matches your hand size, allowing for ease of movement while maintaining a snug fit. Cut two layers of fabric and two layers of heat-resistant batting for the double-layer design.
Pin the batting between the exterior and interior fabric layers, making sure the edges align perfectly. This will create the protective double layer that distinguishes your professional double oven glove from standard single-layer mitts.
Sew the layers together carefully, following the glove outline. Reinforce the seams along the fingers, thumb, and palm areas for added durability. Using a sewing machine ensures strong, even stitching, but meticulous hand stitching can achieve similar results.
Once the main glove body is complete, add finishing touches such as topstitching around the edges and optionally attaching a hanging loop. This adds both a professional appearance and practical functionality to your handmade oven glove.
Check for any uneven seams or loose threads, and trim them to maintain a clean, polished look. Your DIY oven glove should be flexible enough to move with your hand but firm enough to provide heat protection.
Finally, test your glove carefully with moderately hot cookware to ensure it offers adequate protection. Adjust padding or stitching as necessary for optimal performance. Following this free tutorial, you’ll achieve a high-quality glove ready for daily kitchen use.
Customizing your professional double oven glove allows you to create a personalized and practical kitchen accessory. You can select fabrics that match your kitchen décor, including patterns, colors, and textures that reflect your personal style.
Consider adding decorative topstitching, contrasting trim, or embroidered initials for a unique touch. These small enhancements can turn a practical DIY oven glove into a stylish statement piece.
Adjust the glove size to fit your hands perfectly. A snug fit ensures maximum protection and dexterity when handling hot items, while an oversized glove may reduce precision and comfort.
Experiment with additional layers of heat-resistant batting for maximum safety. Thicker padding improves protection against burns, especially when handling very hot cookware or ovens.
You can also create a matching pair of gloves for symmetry or even a full set with pot holders and apron for a cohesive kitchen set. This turns your handmade oven glove into part of a coordinated, functional collection.
Finally, consider adding features such as a magnetic strip or clip for easy storage. This ensures your glove is always accessible while keeping your kitchen organized. Customizations enhance both the appearance and functionality of your double-layer oven mitt.
One common mistake when making a professional double oven glove is using fabrics that are too thin or not heat-resistant. This compromises protection and increases the risk of burns. Always choose quality materials recommended in the free tutorial.
Another issue is misalignment of layers during sewing. Take time to pin or clip fabric and batting carefully before stitching to prevent uneven edges or gaps.
Inaccurate pattern sizing is another frequent mistake. Measure your hand and adjust the template to ensure a comfortable, functional glove. Oversized or undersized gloves may reduce usability and safety.
Skipping reinforcement along the seams can lead to weak areas that may tear with regular use. Reinforce key areas such as fingers, thumb, and palm to ensure durability.
Rushing through the sewing process can cause uneven stitches, loose threads, and reduced overall quality. Take your time and follow the free tutorial step by step to achieve a professional result.
Finally, neglecting testing before regular use can result in insufficient heat protection. Test your glove carefully to ensure it provides adequate insulation and adjust padding or construction if necessary.
Q1: Is this project suitable for beginners?
Yes, the free tutorial provides step-by-step instructions, making it accessible for both beginners and experienced sewists.
Q2: What fabrics should I use?
Use high-quality cotton for the exterior and heat-resistant batting for the interior to ensure protection and durability.
Q3: Can I adjust the size of the glove?
Absolutely. Measure your hand and adjust the pattern to fit comfortably while maintaining a snug fit for safety.
Q4: How long does it take to make one glove?
Depending on skill level, creating a DIY oven glove typically takes 2–4 hours.
Q5: Can I make matching pairs?
Yes. Making a pair or a full kitchen set is easy and adds a professional touch to your kitchen accessories.
Q6: How do I care for my glove?
Machine wash on a gentle cycle with mild detergent. Avoid bleach or harsh chemicals to preserve fabric integrity.
Creating a Professional Double Oven Glove – FREE Tutorial is a practical and enjoyable project that produces a functional, safe, and stylish kitchen accessory. This DIY oven glove protects your hands and wrists from heat while allowing full mobility and comfort. Following the free tutorial, you can craft a double-layer glove that combines durability, flexibility, and aesthetic appeal.
We hope this guide inspires you to sew your own handmade oven glove. Share your experiences, leave a sincere opinion, and suggest any improvements or variations you would like to see.
Your feedback helps build a vibrant community of creative and practical home sewists who enjoy making useful and beautiful kitchen accessories.


