
Hunter's Star Quilt Block - Quick & Easy Tutorial

If you are looking to add a festive touch to your dining space, the Patriotic Table Runner Tutorial is the perfect guide for your next craft project.
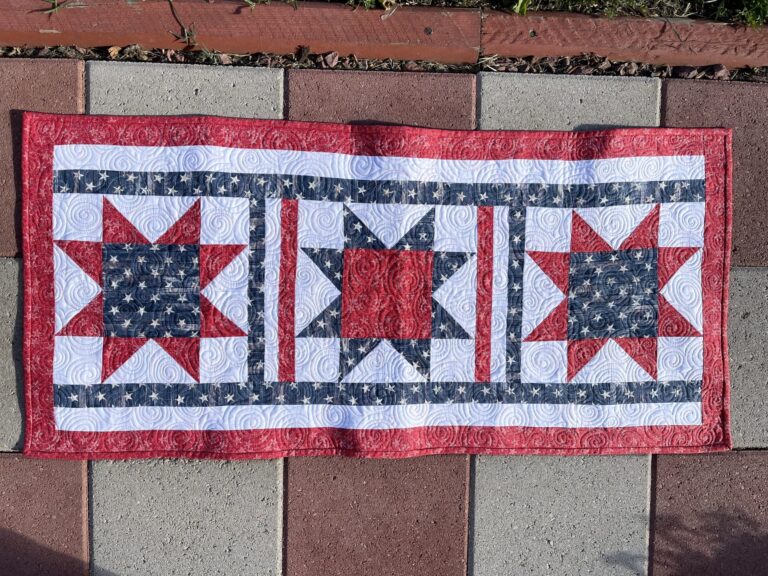
This tutorial allows you to create a beautiful, handmade table runner that celebrates national pride, ideal for holidays, family gatherings, or special events.
By following this Patriotic Table Runner Tutorial, you can craft a stylish centerpiece that combines creativity, skill, and practicality. Whether you are an experienced crafter or a beginner, this project is both enjoyable and rewarding.
Creating a table runner using this Patriotic Table Runner Tutorial is more than just a decorative endeavor; it is a way to express your personality and style.
You can incorporate traditional colors such as red, white, and blue, or add creative patterns and embellishments to suit your preferences. Handmade table runners add warmth and character to any dining setting, making your celebrations feel more personalized and memorable.
This Patriotic Table Runner Tutorial also provides an opportunity to improve your crafting techniques. Whether you are sewing, quilting, or using a no-sew method, this project enhances your attention to detail, precision, and patience. By completing this table runner, you will gain a sense of accomplishment while creating a functional piece that will be admired by family and friends.
The first step in this Patriotic Table Runner Tutorial is selecting the right materials. Fabric choice greatly influences the final look, durability, and ease of assembly. Cotton or cotton-blend fabrics are ideal because they are easy to work with, hold their shape well, and provide a classic, polished appearance. For a more luxurious finish, you may choose linen or canvas, but keep in mind that heavier fabrics can be more challenging to manipulate.
Color selection is crucial for a patriotic theme. Traditional red, white, and blue hues are classic, but you can also incorporate stars, stripes, or other symbolic patterns to enhance the festive feel. Mixing prints and solids adds depth and visual interest to your table runner. Ensure that the colors complement each other and suit your overall décor.
Other materials include thread, scissors, pins, measuring tape, and optionally, a sewing machine. Using high-quality materials ensures your Patriotic Table Runner Tutorial results in a durable and attractive product. Gathering all supplies before starting prevents interruptions and allows for a smoother crafting process.
Fabric layout is another important consideration. Plan your design carefully to determine how much of each color or pattern you need. This preparation helps minimize waste and ensures a cohesive and balanced design. Proper planning is key to achieving a polished and professional-looking table runner.
Finally, think about additional embellishments such as lace, buttons, or embroidery. These can enhance the table runner’s visual appeal and make it stand out as a unique centerpiece. Accessories should be chosen carefully to complement the patriotic theme without overwhelming the overall design.
After selecting materials, the next step in the Patriotic Table Runner Tutorial is cutting and preparing your fabric. Accurate measurements and precise cutting are essential for a professional result. Begin by measuring your table to determine the desired length and width of your runner. Typically, a table runner extends about 6 to 12 inches over the edges of the table, but you can adjust based on personal preference.
Once you have determined the dimensions, lay your fabric on a flat surface and mark the measurements using fabric chalk or a washable marker. Cut carefully along the lines to ensure straight edges. Accurate cutting is vital, especially if you plan to incorporate multiple colors or patterns, as uneven pieces can affect the overall design.
Next, prepare the fabric edges. Folding and pressing the edges before sewing or assembling prevents fraying and creates a neat finish. Hemming the edges can add durability and a polished appearance. If you are using a no-sew method, fabric glue or fusible tape can achieve a similar effect.
Arrange your fabric pieces according to your design plan. Laying out the pieces beforehand helps visualize the final product and allows for adjustments before permanent assembly. This step ensures that your Patriotic Table Runner Tutorial maintains symmetry and balance in its design.
Finally, double-check all measurements and alignment before sewing. Precision in this stage ensures that your table runner will look professional and visually appealing once completed. Proper preparation is the foundation of a successful project.
The assembly stage is where your Patriotic Table Runner Tutorial begins to take shape. If sewing, start by joining fabric pieces together using straight stitches. Ensure that seams are aligned properly and that the fabric lies flat. Pressing seams after sewing enhances the finished look and ensures durability.
For no-sew options, use fabric glue or fusible tape to attach pieces. Apply adhesive carefully, following the manufacturer’s instructions, and allow sufficient drying time. The goal is a strong, clean bond that holds the fabric securely in place.
Consider adding decorative elements such as lace trims, appliqués, or embroidery. These enhancements make your table runner more visually striking and unique. Use embellishments strategically to complement the Patriotic Table Runner Tutorial without overwhelming the overall design.
Check the dimensions and symmetry of your table runner periodically during assembly. Adjust as necessary to ensure a balanced and polished appearance. This attention to detail elevates the quality of your finished piece.
Finally, finish the edges by hemming or securing with decorative trims. This step not only improves durability but also adds a refined look. Your Patriotic Table Runner Tutorial is now ready to display and enhance any dining setting.
Customization is a key feature of the Patriotic Table Runner Tutorial. You can adjust size, color, and pattern to fit your personal style or specific event. For example, a longer table runner is ideal for banquet tables, while a shorter one works well for casual dining.
Colors and patterns can be tailored to specific holidays or themes. Incorporating stripes, stars, or other patriotic symbols enhances the celebratory effect. You can even mix fabrics with different textures to create a dynamic, layered look.
Adding embellishments like embroidery, buttons, or lace can personalize your table runner further. Small decorative details can make a simple design look more sophisticated and unique. Balance aesthetics with functionality to ensure your table runner remains practical for daily use or special occasions.
Fabric choice and maintenance should also be considered. Selecting machine-washable fabrics makes cleaning easy, while delicate fabrics may require gentle hand washing. This ensures longevity and preserves the vibrant colors of your Patriotic Table Runner Tutorial.
Finally, consider gifting your table runner. Handmade patriotic table runners make thoughtful gifts for housewarmings, holidays, or family gatherings. Personal touches and careful craftsmanship enhance the sentimental value of your project.
Q1: Can beginners follow this tutorial?
Yes! The Patriotic Table Runner Tutorial includes step-by-step instructions suitable for beginners.
Q2: What fabrics work best?
Cotton or cotton blends are ideal for easy handling, durability, and a polished look. Linen or canvas are options for a more luxurious finish.
Q3: Can I make a no-sew table runner?
Absolutely! Use fabric glue or fusible tape to assemble the pieces instead of sewing.
Q4: How do I maintain the table runner?
Machine wash on gentle cycle or hand wash, depending on the fabric type, and avoid excessive heat when drying.
Q5: Can I customize colors and patterns?
Yes! Mix solids, prints, stripes, and stars to create a unique patriotic theme.
Q6: How long should the table runner be?
Typically, it should extend 6–12 inches over each edge of the table, but adjust based on table size and personal preference.
The Patriotic Table Runner Tutorial is a fun, creative, and rewarding project that enhances your dining space with a personal touch. From choosing materials to cutting, assembling, and customizing, this tutorial provides a step-by-step guide to crafting a beautiful, handmade table runner. By following this guide, you can create a durable, stylish, and patriotic centerpiece perfect for any occasion.
We hope this tutorial inspires you to create your own Patriotic Table Runner Tutorial and showcase your creativity.
Don’t forget to leave a sincere opinion and suggestions in the comments—your feedback helps others and encourages future craft projects. Celebrate your creativity and bring festive charm to your table with this handmade masterpiece.


