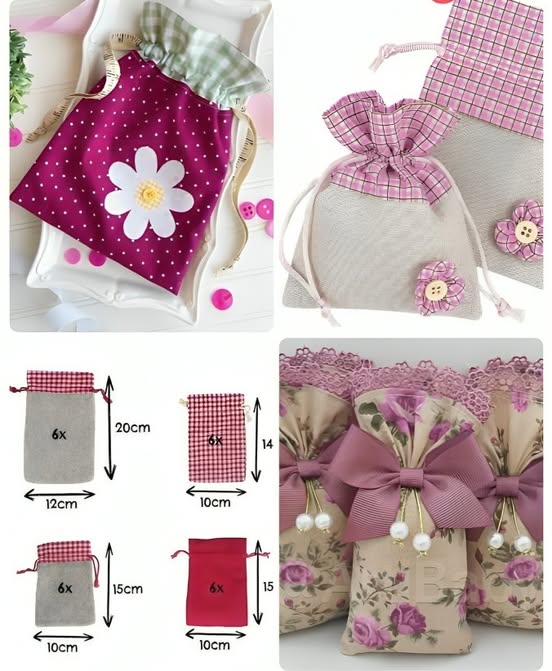
How to Make Retro Style Fabric Bags is a fun and creative project for anyone interested in sewing, fashion, or DIY crafts. Retro style fabric bags bring a nostalgic touch to your wardrobe while offering practicality and individuality.
These bags are perfect for shopping, gifting, or simply expressing your personality through handmade accessories. The beauty of making your own retro bag lies in the freedom to choose fabrics, patterns, and embellishments that match your personal style.
Creating retro style fabric bags may seem challenging at first, but with the right guidance and tools, anyone can achieve professional-looking results.

This guide will take you through the process step by step, making it simple even for beginners. Along the way, we’ll explore essential sewing techniques, fabric choices, and design tips that will help your bag stand out with a genuine retro vibe.
Whether you’re making these bags for personal use or as gifts, learning how to make retro style fabric bags allows you to develop your sewing skills while producing unique, eco-friendly accessories. From selecting the right materials to finishing touches, every step contributes to creating a bag that is functional, durable, and aesthetically pleasing. By the end of this guide, you’ll have all the knowledge you need to confidently make your own retro-inspired fabric bags.
Selecting the right fabrics for retro style bags is essential to achieving the look and feel of a vintage accessory. Retro fabrics often feature bold patterns, floral prints, geometric designs, or muted color palettes that evoke a sense of nostalgia. Popular fabric choices include cotton canvas, denim, corduroy, and linen, as these materials are sturdy yet versatile.
When selecting fabric for your bag, consider both aesthetics and functionality. Sturdy fabrics like cotton canvas or denim provide structure, ensuring your bag can hold items without sagging. Lightweight fabrics, while less rigid, allow for creative folding and layering, making them ideal for tote-style or soft slouch bags.
Another consideration is the pattern or print of the fabric. Retro prints such as polka dots, paisley, or vintage floral designs instantly convey a nostalgic look. Mixing patterns and textures can also create a unique statement piece, but be mindful of color harmony and balance.
Don’t forget to consider lining fabric. A coordinating lining enhances durability and adds a polished finish to your retro fabric bag. Soft cotton, satin, or even lightweight canvas are excellent choices for lining, as they support the structure of the bag without adding excessive bulk.
Accessories such as ribbons, buttons, or patches can complement your fabric selection. Incorporating these elements reinforces the retro aesthetic and allows for more personalized touches.
Finally, pre-washing your fabric is recommended to avoid shrinkage after your bag is complete. Pre-washing also removes excess dye and chemicals, making your bag safer and longer-lasting.
Before you start making retro style fabric bags, it’s important to gather the right tools and materials. Having everything ready ensures a smoother and more enjoyable sewing experience. Essential tools include a sewing machine, fabric scissors, pins, needles, measuring tape, and chalk or fabric markers for marking patterns.
Choosing quality sewing threads that match your fabric is crucial. Polyester thread is strong and versatile, while cotton thread works well with natural fabrics. Make sure your sewing machine is equipped with the appropriate needles for the fabric weight, especially if you’re working with thicker materials like denim or corduroy.
Other materials include bag straps, zippers, buttons, or snaps. These functional elements complete your retro fabric bag and contribute to its overall style. Wooden or leather handles can enhance the retro look, while adjustable straps provide practicality.
Templates and patterns are extremely helpful for consistent bag shapes. You can purchase pre-made bag patterns or create your own. A well-designed pattern guides cutting and sewing, making it easier to achieve professional results.
Don’t forget about interfacing. This material reinforces fabric, giving your bag structure and longevity. Lightweight fusible interfacing works for tote-style bags, while medium-weight or heavy-duty options are ideal for structured handbags.
Finally, ensure you have an organized workspace. Keeping tools and fabrics neatly arranged will save time and reduce frustration, allowing you to focus on creativity and design.
Now that you have your fabrics and tools ready, let’s dive into the step-by-step process of making retro style fabric bags. The first step is cutting your fabric pieces according to your chosen pattern. Accuracy is key, as precise cutting ensures that your bag pieces align perfectly during sewing.
Once cut, prepare your fabric pieces by ironing them flat and marking sewing lines. This step helps avoid uneven seams and puckering. Start by attaching interfacing to the main fabric pieces, reinforcing areas that need extra support, such as the bottom panel or bag sides.
Next, sew the main body of the bag. Begin with side seams, then attach the bottom panel if applicable. Press seams open for a clean finish, and consider topstitching along edges to reinforce structure and add a professional touch.
After constructing the main body, focus on the bag opening and straps. Attach straps securely, either sewing them directly to the bag or using reinforced stitching for durability. For bags with closures, add zippers, buttons, or snaps at this stage, ensuring they are aligned and functional.
The final steps involve assembling lining and any decorative elements. Sew the lining to the main bag, leaving a small gap to turn the bag inside out. Once turned, close the gap with a discreet hand stitch. Add embellishments like patches, ribbons, or embroidered designs to enhance the retro aesthetic.
Finally, inspect your bag for loose threads, uneven seams, or minor adjustments. This attention to detail ensures that your retro style fabric bag looks polished, functional, and ready for use.
To create truly eye-catching retro style fabric bags, follow these practical tips and tricks. First, pay attention to color coordination. Retro designs often incorporate complementary or contrasting colors to evoke a vintage feel. Experiment with patterns and textures for a unique outcome.
Second, focus on seam finishing. Clean seams not only improve durability but also elevate the overall look of your bag. Techniques like serging, pinking shears, or bias tape can prevent fraying and add a professional touch.
Third, consider customizing your bag with vintage-inspired embellishments. Buttons, lace trims, embroidered patches, or retro-themed prints add character and charm to your finished product. Small details make a big difference in achieving an authentic retro style.
Fourth, choose bag shapes wisely. Classic tote, bucket, or structured handbags often suit retro designs best. Experimenting with unconventional shapes can be fun, but maintaining functionality is crucial.
Fifth, practice patience and precision. Sewing a high-quality retro fabric bag requires careful measurement, accurate cutting, and consistent stitching. Take your time to achieve a polished result.
Finally, don’t hesitate to mix fabrics and textures. Combining denim with floral cotton or linen with corduroy can produce visually striking results. Just ensure the fabrics are compatible in weight and structure.
Q1: What fabric is best for retro-style bags?
A1: Sturdy fabrics like cotton canvas, denim, corduroy, or linen work best. These materials provide durability while maintaining flexibility for sewing. Retro prints and patterns enhance the nostalgic look.
Q2: Can beginners make retro fabric bags?
A2: Yes! Beginners can successfully make these bags by following step-by-step guides, using simple patterns, and practicing basic sewing techniques. Starting with a tote bag is recommended.
Q3: Do I need a sewing machine to make these bags?
A3: While a sewing machine speeds up the process and ensures strong seams, hand-sewing is possible. It may take more time but can still produce beautiful results.
Q4: How can I add a retro touch to a plain fabric bag?
A4: Add embellishments like vintage buttons, lace trims, embroidered patches, or retro-themed prints. Mixing textures and patterns also enhances the retro aesthetic.
Q5: Can I sell handmade retro bags online?
A5: Yes! Handmade retro bags are popular in online marketplaces. Focus on quality materials, professional finishing, and unique designs to attract buyers.
Q6: How do I make my bag more durable?
A6: Use sturdy fabrics, reinforce seams with topstitching, add interfacing, and ensure straps are securely attached. Proper finishing techniques enhance longevity.
Learning how to make retro style fabric bags is a rewarding journey that combines creativity, craftsmanship, and nostalgia. By carefully selecting fabrics, gathering the right tools, following a structured sewing process, and incorporating thoughtful design touches, you can create bags that are both functional and visually striking.
Throughout this guide, we covered essential techniques, fabric choices, and step-by-step instructions to help you achieve professional results, regardless of your sewing experience. With patience and practice, your retro fabric bags can become a signature part of your wardrobe or a thoughtful handmade gift.
We’d love to hear your thoughts! Share your experiences, suggestions, or creative ideas in the comments. Your feedback helps improve future guides and inspires others to embark on their own DIY retro bag projects.
