
Learning how to make a tote bag with a stylish zipper and multiple pockets is an exciting and rewarding project for anyone who loves sewing and DIY crafts.
Whether you are a beginner or an experienced crafter, creating a personalized tote bag allows you to combine practicality with style.
A well-designed tote bag can serve multiple purposes—from everyday use to a chic accessory for special occasions. In this guide, we will walk you through the process step by step, ensuring that your tote bag is both functional and fashionable.
One of the main reasons many people choose to create a DIY tote bag is the ability to customize it exactly to their needs.
You can choose fabrics that reflect your personality, select a zipper that matches your style, and design multiple pockets for optimal organization. Unlike store-bought bags, a handmade tote bag offers unique features tailored to your lifestyle, making it a truly one-of-a-kind creation.
Before diving into the sewing process, it’s essential to gather all the necessary materials. The right tools and fabrics can make a huge difference in the final outcome. In addition to fabric, thread, and sewing machine, you’ll need a sturdy zipper, interfacing for structure, and patterns to guide your construction. With proper preparation, your tote bag with multiple pockets and a stylish zipper will come together seamlessly.
Choosing the Right Fabric and Materials for Your Tote Bag
Selecting the perfect fabric is a critical first step when learning how to make a tote bag. The type of fabric you choose will impact both the durability and appearance of your finished bag. Cotton, canvas, denim, and linen are excellent options for sturdy, long-lasting tote bags. Consider patterns and colors that suit your style, whether bold prints, muted tones, or classic neutrals.
The zipper you choose also plays a major role in your tote bag’s functionality and style. A high-quality zipper ensures smooth operation and adds an attractive element to the design. Metal zippers tend to be durable and stylish, while nylon zippers are lightweight and versatile. Selecting a zipper in a coordinating color can enhance the overall aesthetic of your bag.
In addition to fabric and zipper, you’ll need thread, interfacing, and other sewing essentials. Matching thread creates a polished look, while interfacing adds structure and support to your tote bag. Pocket lining fabric is another consideration; using contrasting colors can make the pockets stand out and add a fun design element.
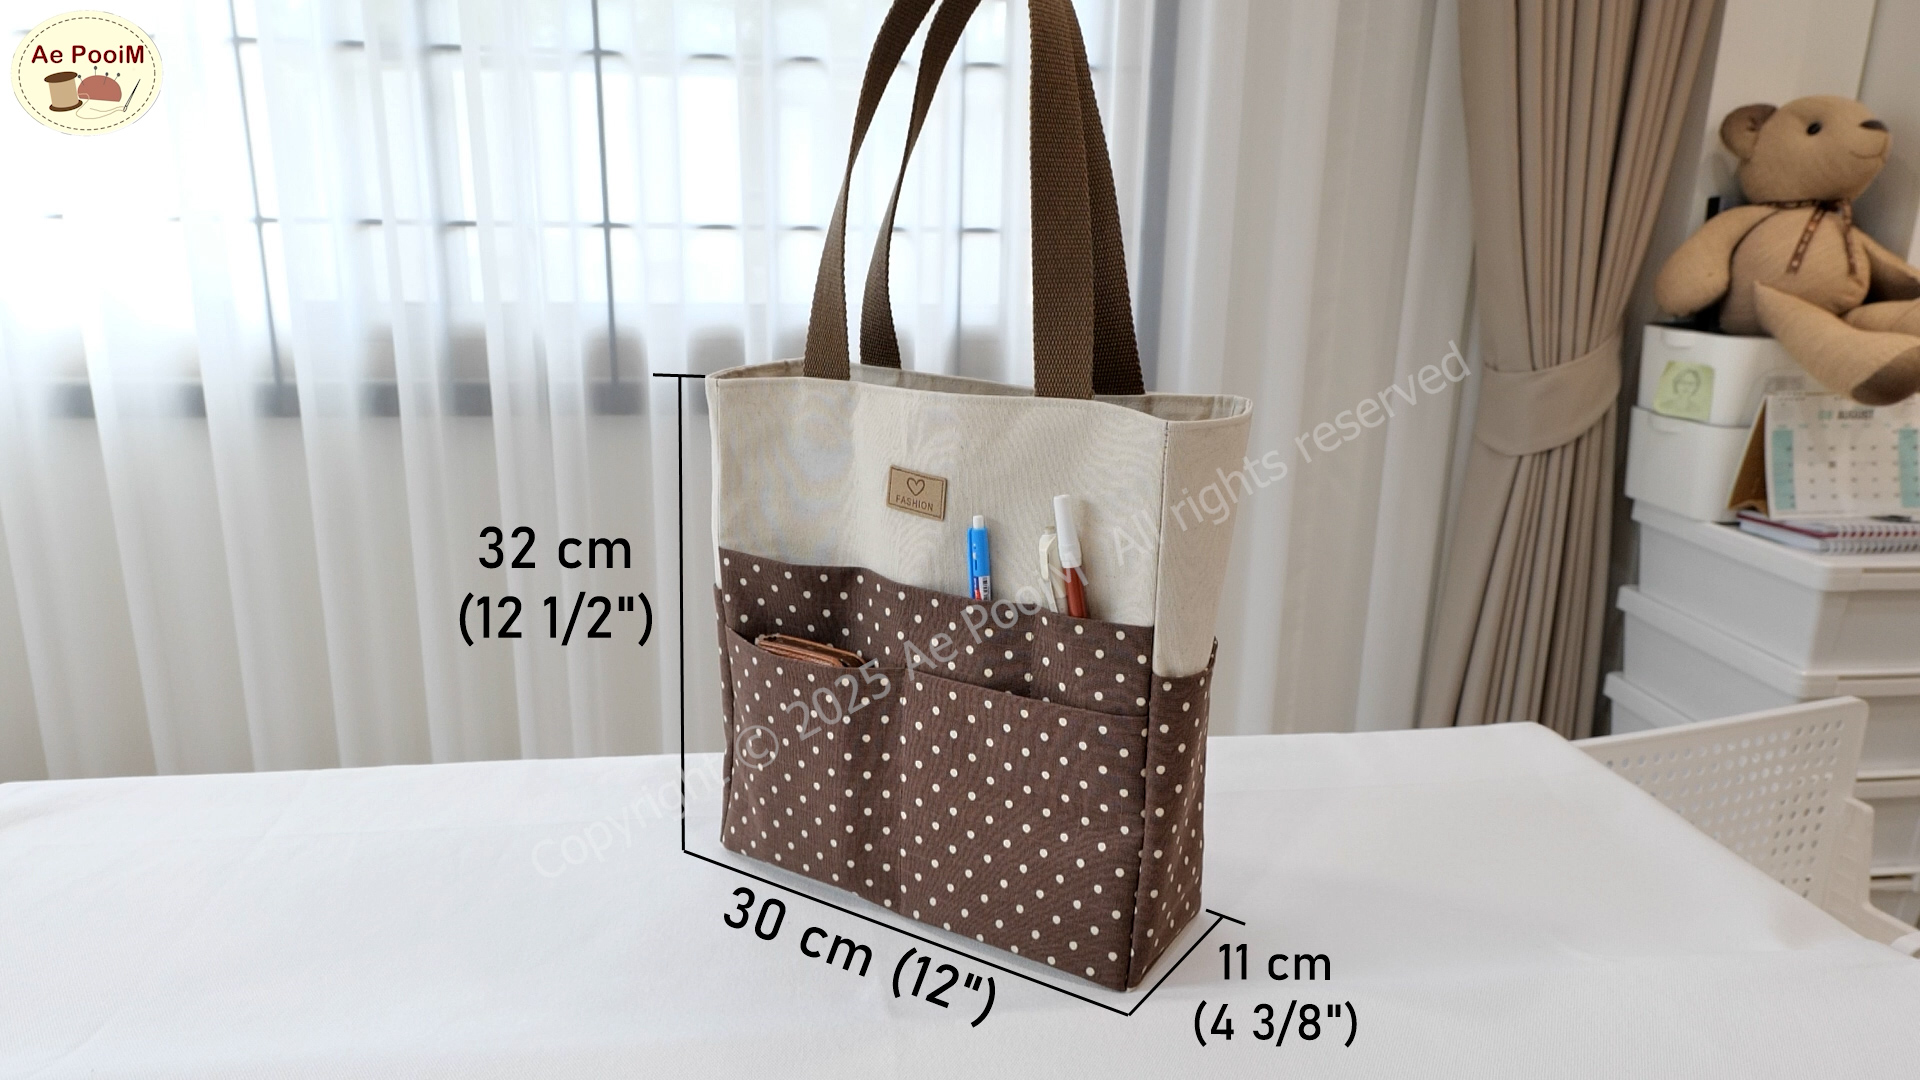
When planning your tote bag with multiple pockets, think about how you intend to use each pocket. Some may be ideal for storing phones, keys, or pens, while others might hold larger items like notebooks or wallets. Proper planning at this stage ensures your bag is practical and organized.
Another important aspect of your materials is durability. For a bag that will withstand daily use, choose fabrics that resist tearing, fading, and wear. Reinforcing stress points with additional stitching can also extend the life of your handmade tote bag.
Finally, ensure all your materials are prepped before sewing. Wash and iron fabrics, cut patterns carefully, and organize zippers and pockets. This preparation saves time and reduces errors during construction, making your DIY tote bag project smooth and enjoyable.
Step-by-Step Sewing Process for a Tote Bag
Once you have gathered all your materials, you can start the actual sewing process. Begin by cutting the main body fabric according to your pattern dimensions. Make sure each piece is accurately measured to avoid uneven seams or mismatched edges. Accuracy at this stage ensures your tote bag with a stylish zipper and multiple pockets will look professional.
Next, prepare the pockets. Whether you want internal or external pockets, carefully cut and interface each piece. Sew the pockets onto the main body fabric, following your planned layout. This step allows you to customize the functionality and style of your tote bag according to your personal needs.
After attaching the pockets, it’s time to install the zipper. Place the zipper on the top edge of the bag and pin it in place. Sew slowly and carefully, ensuring that the zipper operates smoothly and aligns perfectly with the bag edges. A neatly sewn zipper enhances both aesthetics and functionality.
With the pockets and zipper in place, sew the sides and bottom of the tote bag together. Reinforce the corners and stress points with additional stitching. This step adds durability and ensures your bag can carry heavier items without tearing.
Attach handles to your tote bag, selecting a length that is comfortable for carrying on your shoulder or by hand. Reinforce the handle attachment points to prevent wear and maintain strength over time. Handles can be made from matching fabric, contrasting material, or even leather for a premium look.
Finally, finish all raw edges with a zigzag stitch or bias tape. Inspect your bag for any loose threads or imperfections and make final adjustments. By taking your time and paying attention to detail, you will achieve a polished, high-quality DIY tote bag that is both practical and stylish.
Adding Style with Zippers and Multiple Pockets
Creating a tote bag with a stylish zipper allows you to incorporate both functionality and design. Zippers can be sewn in contrasting colors to create a statement piece, or hidden neatly for a subtle, elegant finish. Consider adding decorative pulls or charms to enhance the visual appeal of your zipper.
Multiple pockets are a game-changer for organizing your tote bag. Interior pockets can hold essentials like smartphones, pens, or makeup, while exterior pockets offer easy access to frequently used items. Layering pockets of different sizes and shapes adds both utility and visual interest.
For a creative touch, consider using fabric scraps to create patchwork pockets. This technique introduces a personalized, handcrafted feel while making the bag unique. Mixing textures and colors in pocket design also enhances the overall aesthetic.
Strategically placed pockets improve accessibility and efficiency. For example, a zippered pocket on the interior keeps valuables secure, while open pockets on the exterior provide quick access. Think about your daily routines and tailor pocket placement to your needs.
Another stylish option is decorative stitching around pocket edges. Topstitching, embroidery, or contrasting thread can make pockets stand out, giving your tote bag a professional finish. These details highlight craftsmanship and add personality to your creation.
Finally, consider combining style and practicality in your choice of zipper. Reversible zippers, decorative tapes, and metallic finishes can all elevate your bag’s look. By focusing on both function and design, your tote bag becomes a stylish accessory that meets all your organizational needs.
Tips and Tricks for a Professional Finish
To make your tote bag look professionally made, always prioritize precision in your sewing. Straight, even seams and accurate pattern alignment are key indicators of quality craftsmanship. Take time during each step to ensure measurements and stitches are consistent.
Using the right needle and thread for your fabric is essential. Heavy fabrics like canvas require thicker needles and strong thread, while lighter fabrics can be sewn with standard needles. The correct tools prevent skipped stitches, puckering, and fabric damage.
Pressing seams as you sew creates a crisp, clean finish. Iron each seam flat before moving to the next step, and consider using a pressing cloth to protect delicate fabrics. This simple technique dramatically improves the final appearance of your tote bag.
Reinforce stress points, especially at handles, pocket edges, and zipper ends. Double stitching or using bartack stitches ensures durability, particularly for bags that will carry heavier items. Reinforcement prevents premature wear and tear.
Experiment with design elements like lining, piping, or contrasting fabrics to elevate your bag’s style. A lined tote bag not only looks polished but also adds strength and longevity. Piping along edges provides a neat, structured appearance.
Finally, don’t rush the finishing touches. Trim loose threads, check zipper alignment, and inspect seams for imperfections. Attention to detail distinguishes a handmade tote bag that looks professional from one that appears amateurish. By following these tips, your DIY tote bag will impress both in style and functionality.
Frequently Asked Questions (FAQ)
Q1: Can beginners make a tote bag with a zipper and multiple pockets?
Yes! While it requires patience, even beginners can follow a step-by-step pattern to create a functional and stylish tote bag. Start with simple fabrics and basic pocket layouts to build confidence.
Q2: What type of fabric is best for a durable tote bag?
Canvas, denim, and cotton blends are ideal for sturdy tote bags. Interfacing adds extra structure, making the bag more resilient for everyday use.
Q3: How do I choose the right zipper for my tote bag?
Select a zipper that matches the bag’s length and coordinates with the fabric. Metal zippers are stylish and durable, while nylon zippers are lightweight and versatile.
Q4: Can I add as many pockets as I want?
Absolutely! The number of pockets depends on your needs and bag size. Plan their placement carefully for easy access and aesthetic balance.
Q5: How do I make the tote bag look professional?
Use precise measurements, even stitching, and reinforce stress points. Press seams as you go and finish raw edges with bias tape or zigzag stitching.
Q6: Is it possible to customize the tote bag for gifts?
Yes, you can personalize your tote bag with monograms, embroidery, or patchwork designs, making it a thoughtful and unique gift.
Conclusion
Creating a tote bag with a stylish zipper and multiple pockets is a rewarding project that combines practicality and creativity.
By selecting the right materials, carefully following a sewing pattern, and paying attention to details like zippers and pockets, you can craft a durable and fashionable accessory.
This guide has walked you through every step, from choosing fabrics to finishing touches, ensuring your DIY tote bag is both functional and stylish.
We’d love to hear your thoughts! Leave a sincere opinion or suggestions about your experience making tote bags, or share creative ideas to inspire others. Your feedback helps improve future tutorials and encourages the community of DIY enthusiasts.