
Hunter's Star Quilt Block - Quick & Easy Tutorial

If you’ve ever wondered how to make a cute tote bag, you’re in the right place. Whether you’re new to sewing or already an experienced crafter, creating your own tote bag with a free pattern is a fun, affordable, and rewarding project.
Tote bags are not only practical for everyday use, but they also allow you to express your personal style. With just a few basic materials, you can design a beautiful handmade bag that’s perfect for shopping, school, the beach, or as a thoughtful gift.
Making a cute tote bag is easier than you might think. With the right pattern and a bit of patience, you can transform simple fabric into something stylish and useful.
Plus, sewing your own bag gives you the creative freedom to choose colors, prints, and finishes that reflect your personality. This DIY project can also be an eco-friendly choice, helping you reduce plastic use and promote sustainable living — all while having fun crafting.
In this complete step-by-step guide, you’ll learn everything about how to make a cute tote bag from scratch. We’ll go through the materials you’ll need, how to prepare your pattern, sewing tips, and design ideas to make your bag stand out. You’ll also find a free pattern that’s easy to follow, suitable for beginners, and adjustable for different styles. So, grab your fabric, thread, and scissors — let’s get started with this creative adventure!
Before starting your project, it’s essential to gather all the necessary materials and tools. Preparation is key when it comes to sewing, as it saves time and helps you stay organized throughout the process. To make your own cute tote bag, you won’t need much — just a few basic items that most crafters already have at home.
First, you’ll need fabric. Cotton canvas, linen, or denim are great choices because they are durable and easy to sew. For a softer look, you can also use lightweight cotton with a lining. Choose a fabric with a cute pattern or color that suits your style. You’ll also need lining fabric, especially if you want your bag to be more structured and long-lasting.
Next, gather your sewing tools. You’ll need a sewing machine, scissors, pins, an iron, measuring tape, and matching thread. Make sure your machine is in good condition, as even a basic model works perfectly for this project. If you prefer hand-sewing, that’s also possible — it will just take a little more time.
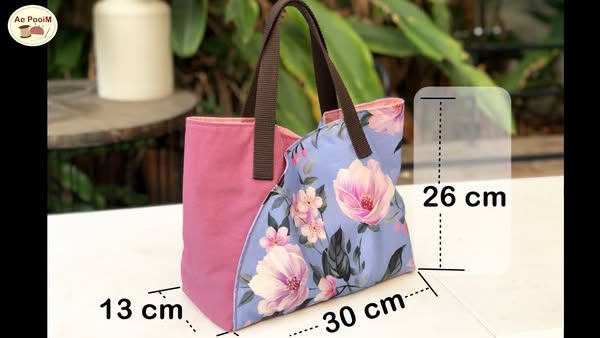
Don’t forget your tote bag pattern. You can draw your own or use the free pattern that typically includes the main body pieces and handles. The pattern can easily be adjusted for different sizes, depending on whether you want a small everyday bag or a larger shopping tote. Lastly, prepare optional extras like fusible interfacing (for structure), buttons, or decorative elements if you want to personalize your design.
Once you have everything ready, lay out your materials on a flat surface. Double-check your measurements, pre-wash your fabric to prevent shrinkage, and press it with an iron to remove wrinkles. Now, you’re ready to move to the fun part — cutting and sewing!
Now that you have all your materials, it’s time to start cutting and preparing your fabric using the free tote bag pattern. This step is crucial because accuracy will ensure that all your pieces fit together perfectly, resulting in a professional-looking bag.
Begin by laying your fabric flat on a clean, smooth surface. Pin the pattern pieces on top of your fabric, following the grain line direction. Use a fabric marker or chalk to trace the outline. Carefully cut around the lines with sharp fabric scissors, making sure to include the seam allowance. For most tote bags, a seam allowance of 1 cm (⅜ inch) works well.
Next, repeat the same process with your lining fabric. If you’re using interfacing, cut those pieces as well — they’ll be the same size as your main fabric pieces. Fuse the interfacing to the wrong side of the fabric using an iron according to the manufacturer’s instructions. This will make your cute tote bag more durable and sturdy, perfect for carrying books or groceries.
Now, cut your bag handles. These are usually two long rectangles, about 22 inches long and 2 inches wide, but you can adjust the length depending on how you like to carry your bag. If you want reinforced handles, fold them in half, press with an iron, and topstitch along both sides.
Once all your fabric pieces are cut, double-check that they match up correctly. Stack them neatly and get ready to sew. Preparation might take a bit of time, but it will make the sewing process smoother and more enjoyable.
This is the most exciting part — it’s time to start sewing your tote bag! Follow these steps carefully to assemble your cute tote bag using your free pattern.
Start with the main body of the bag. Place the right sides of your outer fabric together and sew along the sides and bottom, leaving the top open. Use a straight stitch and make sure to backstitch at the beginning and end for extra strength. Press the seams open with an iron to flatten them.
Next, it’s time to create the box corners, which give your bag depth. To do this, pinch each bottom corner of the bag so that the side seam and bottom seam align, forming a triangle. Measure about 2 inches from the tip of the triangle and draw a line. Sew along this line and trim the excess fabric. Repeat for the other corner.
Repeat the same steps for your lining fabric, but leave a small opening at the bottom so you can turn your bag right-side out later. Once both the outer and lining bags are sewn, it’s time to attach them together.
Insert the outer bag inside the lining with right sides facing each other. Pin around the top edge, aligning the seams carefully. Sew all around the top edge. Then, pull the outer bag through the opening left in the lining and sew the opening closed with a small hand stitch or a topstitch.
Finally, press your bag neatly and topstitch around the upper edge to give it a clean, professional finish. Now you have a fully assembled cute tote bag that looks amazing and is ready to use!
Now that your cute tote bag is complete, it’s time to make it truly unique! Adding decorations and personal touches is what makes DIY projects so much fun. Here are some creative ways to customize your tote bag with a free pattern and turn it into something special.
You can start by adding embellishments such as buttons, lace, or ribbons. Sew them along the seams or at the corners for a delicate look. If you prefer a minimalist style, you can use contrasting thread to create visible stitching that gives your bag a modern, handmade appearance.
Another fun idea is to use fabric paint or embroidery. Paint your initials, favorite quote, or a small drawing to make the bag personal. Embroidery adds an elegant touch, especially when using floral or geometric patterns. This is also a great way to cover small sewing imperfections!
If you love pockets, consider adding extra compartments to your tote bag. You can sew a simple pocket inside to hold keys or a phone, or even add an external pocket for quick access. These small details make your bag more functional and stylish.
For those who enjoy mixing materials, you can experiment with patchwork designs. Combine different fabric scraps into one unique creation. This not only looks cute but also helps you use leftover materials from other projects.
Lastly, don’t forget the finishing touches — iron your bag, check all the seams, and trim any loose threads. Your cute tote bag is now ready to show off, gift to a friend, or even sell at a local market. Handmade bags are always appreciated because of the care and creativity that go into them.
1. How much fabric do I need to make a tote bag?
Typically, you’ll need about half a yard (0.5 meters) of outer fabric and the same amount for the lining, depending on your bag’s size.
2. Can I make a tote bag without a sewing machine?
Yes! You can hand-sew your tote bag using backstitch and running stitch techniques, although it will take more time.
3. What’s the best fabric for a tote bag?
Durable fabrics like cotton canvas, denim, or linen are ideal for tote bags because they are strong and easy to sew.
4. How can I make my tote bag stronger?
Use interfacing for extra support, double-stitch the handles, and reinforce seams with topstitching.
5. Can I wash my handmade tote bag?
Yes, most fabric tote bags can be machine washed on a gentle cycle. Always check your fabric care label before washing.
6. Can I resize the free pattern?
Absolutely! You can scale the pattern up or down depending on whether you want a small handbag or a large shopping tote.
Making a cute tote bag with a free pattern is one of the most enjoyable and practical sewing projects you can try. You’ve learned how to choose materials, cut and prepare your fabric, assemble your bag, and add your personal touch. With these steps, anyone — even a beginner — can create a beautiful handmade tote that’s stylish, durable, and eco-friendly.
Now that you know how to make a cute tote bag, why not give it a try today? Remember, creativity has no limits — experiment with colors, fabrics, and decorations until your design feels uniquely yours. We’d love to hear your thoughts! Share your honest opinion and suggestions about this guide, and let us know how your tote bag turned out.


