
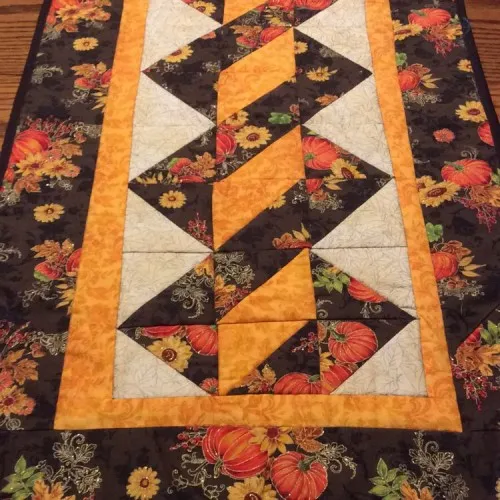
Spicy Spiral Table Runner - Pattern

Creating a fabric bag can be both a fun and practical DIY bag tutorial that anyone can follow, even if you are a beginner in sewing.
How to make a cute fabric bag with three inner compartments is a popular question among craft enthusiasts, as having organized compartments makes the bag not only stylish but also functional.
With the right materials, simple techniques, and step-by-step guidance, you can create a beautiful handmade accessory that fits your personal style.
Sewing your own handmade bag allows you to choose fabrics, colors, and patterns that match your personality. Unlike store-bought bags, a fabric bag with inner compartments provides a level of customization that can perfectly suit your daily needs.
Whether you want it for school, work, or casual outings, the satisfaction of creating something with your own hands is unmatched.
In this article, we will guide you through the process, explaining each step in detail. From selecting fabrics to sewing techniques and organizing your compartments, this tutorial will provide all the information you need. By following these tips, you’ll be able to make a practical and charming fabric bag that stands out from the crowd.
Selecting the right fabric bag material is crucial to ensuring durability and style. Cotton, canvas, and denim are popular choices due to their strength and ease of sewing. For a more luxurious look, you can also use lightweight fabrics like linen or even patterned quilting fabric.
When planning your DIY bag tutorial, consider the color combination carefully. Neutral tones can make your bag versatile, while bright patterns can add a playful touch. Matching the lining and outer fabric will also enhance the visual appeal.
Another essential material is the interfacing. Interfacing helps your handmade bag maintain its shape, especially when adding three inner compartments. Choose a medium-weight interfacing that balances structure with flexibility.
Don’t forget the sewing tools: needles, thread, pins, scissors, and a sewing machine (if available). Each tool plays an important role in creating a clean and professional finish.
For the inner compartments, you might also want to use smaller pieces of fabric in complementary colors. These can help differentiate the sections and make organizing your items easier.
Finally, additional accessories like zippers, buttons, or Velcro can be added based on your design preference. These small details can elevate your fabric bag with inner compartments from simple to charmingly unique.
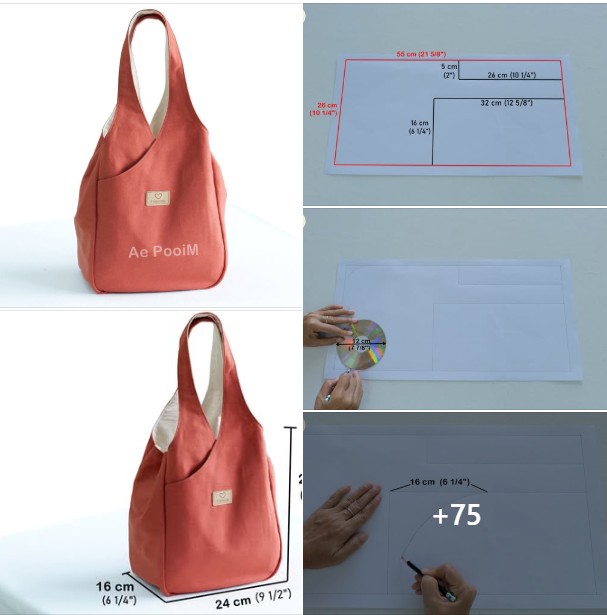
Once you have chosen your materials, the next step is to cut the fabric accurately. Precision in cutting ensures that all pieces align perfectly during sewing, which is essential for a DIY bag tutorial that includes three inner compartments.
Measure and mark each piece carefully using a ruler and fabric chalk. For the outer bag, you’ll typically need two large rectangles for the front and back, and one for the bottom if you want a boxy structure.
For the inner compartments, cut smaller pieces according to the size you want for each section. Usually, three rectangles of equal size work well, but feel free to adjust based on your needs.
The lining fabric should mirror the dimensions of the outer fabric. Having a properly sized lining will make your bag look professional and tidy, hiding raw edges and seams.
Don’t forget to cut the interfacing according to the outer fabric pieces. Attaching the interfacing before sewing ensures a sturdier bag and easier assembly of the inner compartments.
Finally, label each piece to avoid confusion during assembly. This simple step can save a lot of time and frustration in a handmade bag with inner compartments project.
Now comes the fun part: assembling your fabric bag. Start by sewing the inner compartments first. Attach the smaller fabric pieces to the lining fabric, creating neat pockets or sections. Using a straight stitch works best for durability.
Ensure that each compartment is evenly spaced and securely stitched. This step is key for a functional DIY bag tutorial, as poorly sewn compartments can make the bag less useful.
Once the inner compartments are complete, attach the lining to the outer fabric. Pin them together carefully, making sure the edges align. Sewing slowly and steadily will prevent mistakes and fabric bunching.
After sewing the sides and bottom, turn the bag right-side out. Check that all seams are neat and reinforced. Reinforcing stress points, such as the top edges and compartment divisions, will make your handmade bag last longer.
Adding handles or straps comes next. Choose a sturdy material and attach securely to the bag. Handles can be sewn directly onto the outer fabric or reinforced with extra stitching for added strength.
Finally, finish with any embellishments, zippers, or closures. These finishing touches make your fabric bag with inner compartments both practical and stylish.
One of the biggest advantages of a handmade bag is the ability to customize it completely. You can choose colors, patterns, and sizes that fit your personal style and needs.
For organization, consider labeling each inner compartment. This is especially useful if you plan to carry multiple types of items, such as makeup, stationery, or tech accessories.
Adding small zippered pockets inside the compartments increases security and prevents small items from falling out. Velcro or magnetic closures are also options for convenience.
Decorative elements like patches, embroidery, or fabric paint can make your DIY bag tutorial unique. Personal touches not only improve aesthetics but also give your bag character.
Adjusting the size of each inner compartment allows you to create a bag suitable for everyday use, school, or even travel. Flexibility in design ensures that your fabric bag with inner compartments is versatile.
Lastly, consider the weight of materials. Heavier fabrics provide structure but may be less comfortable to carry, while lighter fabrics are easy to transport but may need additional interfacing. Balancing these factors is key to creating a successful bag.
Q: Can beginners make a fabric bag with three inner compartments?
A: Yes, beginners can create this bag by following a structured DIY bag tutorial and taking time with each step. Using simple fabrics and tools makes the process easier.
Q: What fabric is best for durability?
A: Canvas, denim, and cotton are excellent for durable handmade bags. These fabrics withstand daily use and support multiple compartments.
Q: How can I ensure compartments are evenly sized?
A: Measure carefully and mark your fabric before sewing. Using a ruler or measuring tape ensures precise, even compartments.
Q: Do I need a sewing machine?
A: While a sewing machine speeds up the process, you can hand-sew this project with patience. Ensure your stitches are consistent for a neat finish.
Q: Can I add zippers to inner compartments?
A: Absolutely. Zippers improve security and functionality, especially for storing small items in your fabric bag with inner compartments.
Q: How do I prevent the bag from sagging?
A: Use interfacing to add structure and reinforce stress points, especially at the top edges and handles. This helps the bag maintain its shape.
Learning how to make a cute fabric bag with three inner compartments allows you to combine creativity, practicality, and style in one project. By choosing the right fabrics, carefully cutting pieces, sewing with attention, and customizing your compartments, you can create a functional and beautiful handmade bag.
This tutorial not only teaches sewing techniques but also encourages personal expression through fabric selection and decorative touches. With patience and practice, anyone can make a bag that is both charming and highly practical.
We hope this article has inspired you to start your own DIY bag tutorial. Feel free to leave a sincere opinion and suggestions in the comments — your feedback is invaluable and can help improve future tutorials.


