
Hunter's Star Quilt Block - Quick & Easy Tutorial

If you are looking for a creative and structured quilting project, the Hidden Wells Quilt Pattern Tutorial is perfect for both beginners and experienced quilters.
This pattern provides a visually stunning design while being practical and approachable. By following this tutorial, you can create a quilt that is not only beautiful but also functional, adding warmth and charm to your home or serving as a thoughtful handmade gift.
The Hidden Wells Quilt Pattern Tutorial emphasizes careful alignment and color selection, which allows each block to stand out while maintaining the harmony of the overall quilt.
Using a combination of traditional quilting techniques and modern tips, this tutorial guides you step by step through the process, ensuring a polished final product.
Working on the Hidden Wells Quilt Pattern also encourages experimentation with colors, fabrics, and textures. Each quilt becomes unique, reflecting your personal style and creative choices. Whether you prefer soft pastels or bold contrasts, this pattern adapts beautifully to different design preferences, making it a versatile addition to any quilter’s repertoire.
To successfully complete the Hidden Wells Quilt Pattern Tutorial, gather all necessary materials before starting. Having everything ready ensures a smooth crafting experience and prevents interruptions.
You will need fabric in multiple colors or patterns, coordinating threads, quilting needles, a rotary cutter, cutting mat, and quilting ruler. Choosing high-quality cotton fabrics is recommended for durability and ease of sewing.
Additional supplies include batting, pins, and safety scissors. Batting provides the quilt with softness and structure, while pins help maintain alignment when piecing the blocks together.
For beginners, it may be helpful to print or trace a template of the Hidden Wells block. Templates guide accurate cutting and help maintain consistent sizes across the quilt.
Optional embellishments such as embroidery thread, appliqué, or decorative stitching can add personality and unique details to your quilt. These small touches enhance the overall aesthetic and make the quilt truly one-of-a-kind.
Finally, make sure to have an iron and ironing board available. Pressing seams as you sew ensures a clean and professional finish, helping the quilt lay flat and look polished.
Start the Hidden Wells Quilt Pattern Tutorial by cutting fabric pieces according to your template or pattern. Accuracy in cutting is critical to ensure blocks align perfectly during assembly.
Once pieces are cut, begin piecing the blocks together. Sew small sections using a ¼-inch seam allowance to maintain uniformity. Press seams after each step to avoid bulky intersections.
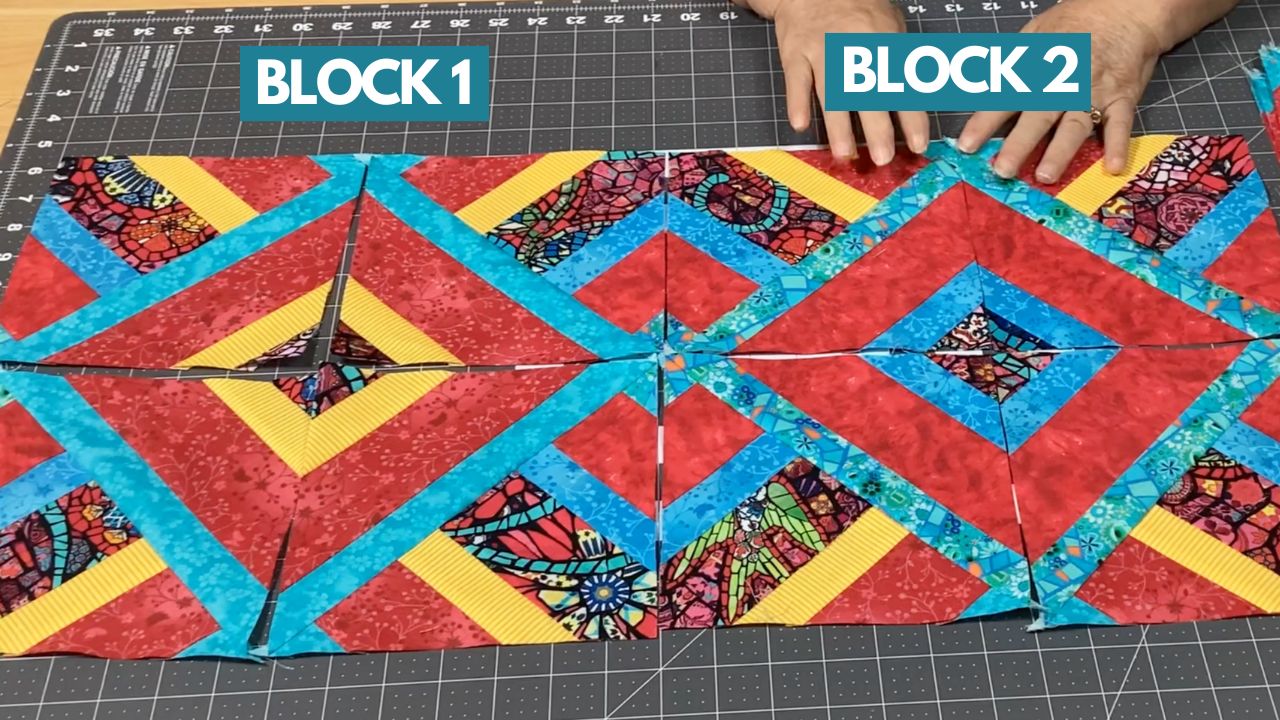
As you assemble the blocks, pay attention to color placement. The Hidden Wells design relies on contrasting shades to create depth and dimension, so careful arrangement of light, medium, and dark fabrics is essential.
After completing individual blocks, join them to form rows. Consistency in seam alignment ensures the quilt maintains straight lines and a professional appearance.
Next, assemble the rows to complete the quilt top. Double-check block alignment and seam intersections, adjusting if necessary to maintain precision.
Finally, layer the quilt top with batting and backing fabric. Pin or baste the layers together, then quilt using your preferred technique, whether by hand, machine, or a combination of both. Finish with binding to complete the quilt edges neatly.
One of the most enjoyable aspects of the Hidden Wells Quilt Pattern Tutorial is personalization. You can select fabrics that reflect your style, home décor, or gift recipient preferences.
Experiment with different quilting techniques, such as free-motion quilting or stitch-in-the-ditch, to add texture and dimension to the quilt. The choice of technique can dramatically influence the final aesthetic.
Try varying block sizes to create smaller or larger quilts. Miniature versions can be used as table runners or wall hangings, while full-sized quilts provide warmth and comfort.
Incorporate appliqué, embroidery, or decorative stitching to make your quilt unique. Adding initials, motifs, or themed designs can enhance the quilt’s charm and personalization.
Consider blending solid fabrics with patterned prints to create a dynamic visual effect. The Hidden Wells design allows for creative color combinations, making each quilt truly distinctive.
Finally, press seams carefully and consistently throughout the project. Well-pressed seams improve block alignment and make quilting easier, resulting in a polished and professional finish.
Even experienced quilters can encounter challenges when following the Hidden Wells Quilt Pattern Tutorial. Awareness of common mistakes helps achieve a smooth crafting experience.
One frequent mistake is inaccurate cutting, which can cause blocks to misalign. Always measure twice and cut once, using a rotary cutter and ruler for precision.
Improper seam allowance is another common issue. Consistent ¼-inch seams are critical for maintaining block dimensions and achieving the intended design effect.
Neglecting to press seams after each step may result in bulky intersections and uneven rows. Pressing ensures blocks lay flat and the quilt maintains a professional appearance.
Color misplacement can diminish the depth effect of the Hidden Wells design. Carefully plan your fabric arrangement to maintain contrast and visual interest.
Skipping the basting step may lead to shifting layers during quilting. Properly pin or baste the quilt sandwich to prevent movement and ensure even stitching.
Finally, rushing the binding process can affect the quilt’s edges. Take time to attach and finish the binding neatly for a polished, long-lasting result.
Q1: Is this pattern suitable for beginners?
Yes, the Hidden Wells Quilt Pattern Tutorial is suitable for beginners with basic sewing knowledge. Following the step-by-step instructions ensures success.
Q2: What fabrics are recommended?
Cotton fabrics are recommended for durability and ease of sewing. You can mix solid and patterned fabrics for a dynamic effect.
Q3: How long does it take to complete the quilt?
Completion time varies depending on the quilt size and your experience. Small quilts may take a few days, while larger quilts can take several weeks.
Q4: Can I customize the colors?
Absolutely. The pattern is versatile and allows for endless color combinations to match your personal style or décor.
Q5: What quilting techniques work best?
You can use hand quilting, machine quilting, or free-motion quilting. Each technique offers different textures and finishes, allowing you to customize your quilt’s look.
Q6: Can this quilt be used as a gift?
Yes, handmade quilts make thoughtful and unique gifts. Personalizing fabrics, colors, or adding embroidered details increases the sentimental value.
The Hidden Wells Quilt Pattern Tutorial is a versatile and rewarding project for quilters of all levels. By following the instructions carefully, paying attention to detail, and experimenting with colors and techniques, you can create a quilt that is both beautiful and functional. Personalization options, from fabrics to embellishments and stitching techniques, allow each quilt to reflect your creativity and style.
Creating a quilt with the Hidden Wells pattern provides both a sense of accomplishment and a practical item that can be cherished for years. By avoiding common mistakes and exploring customization tips, your quilt will have a professional finish and lasting big durability.
We encourage you to try this tutorial, experiment with your own designs, and share your experiences. Your feedback, suggestions, and creative insights help inspire others and enrich the quilting community, thank you very much.


