
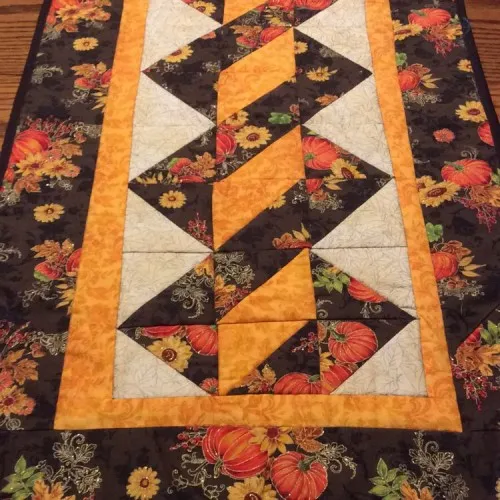
Spicy Spiral Table Runner - Pattern

Creating a Heirloom Hearts Quilt – Tutorial is a wonderful way to celebrate craftsmanship, preserve family memories, and design a unique, meaningful piece for your home.
Quilting is an art that combines creativity, patience, and skill, and following this Heirloom Hearts Quilt – Tutorial allows beginners and experienced quilters alike to produce a beautiful heirloom-quality quilt.
This tutorial focuses on breaking down complex techniques into manageable steps while offering tips for a polished finished product.
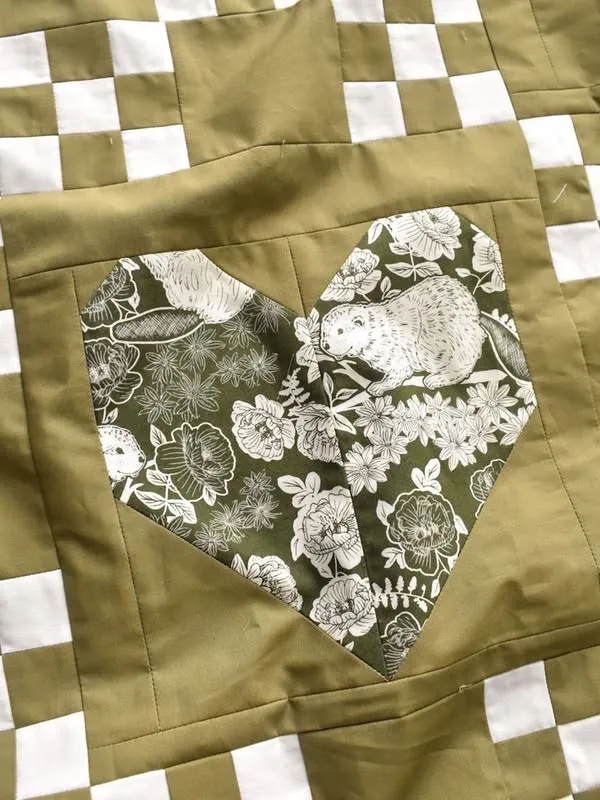
A Heirloom Hearts Quilt – Tutorial emphasizes both aesthetic appeal and technical precision. The heart motifs add a romantic, classic charm, making this quilt a perfect gift for weddings, anniversaries, or special occasions.
Beyond its decorative appeal, quilting also provides a meditative and rewarding crafting experience, giving you a sense of accomplishment as each piece comes together.
The beauty of an Heirloom Hearts Quilt – Tutorial is that it can be customized in countless ways. From color palettes to fabric textures, every quilter has the opportunity to inject personal style into their work. By following this tutorial, you’ll learn essential quilting skills while creating a piece that can be passed down for generations, truly embodying the term “heirloom.”
To start your Heirloom Hearts Quilt – Tutorial, gathering the right materials is crucial. High-quality fabrics, batting, and threads make a significant difference in the finished product’s look and durability. Quilting cotton is highly recommended for this pattern because it is both easy to work with and long-lasting.
Selecting the right cutting and sewing tools also matters. A rotary cutter, cutting mat, quilting ruler, and sharp scissors ensure accurate cuts, which are essential for the precise heart shapes in the Heirloom Hearts Quilt – Tutorial. Consistency in piece sizes allows the quilt to align beautifully once assembled.
Batting is another important component. A medium-weight cotton or cotton-blend batting provides structure without adding unnecessary bulk, making your Heirloom Hearts Quilt – Tutorial both soft and visually appealing. Choose batting that is compatible with your sewing machine and quilting techniques.
Thread selection plays a vital role as well. High-quality cotton or polyester threads in coordinating colors ensure strong seams and smooth quilting lines. Using contrasting thread for topstitching can also highlight the heart motifs, adding a professional touch to your Heirloom Hearts Quilt – Tutorial.
Other helpful materials include pins, seam ripper, marking tools, and an iron for pressing seams. Proper pressing of each seam is essential to maintaining the quilt’s shape and ensuring crisp, well-aligned heart motifs throughout the Heirloom Hearts Quilt – Tutorial.
Finally, creating a comfortable workspace with adequate lighting is crucial. Quilting often requires extended periods of focus and precision, so a well-lit, organized area improves both efficiency and enjoyment while working on your Heirloom Hearts Quilt – Tutorial.
The first step in the Heirloom Hearts Quilt – Tutorial is preparing the fabric. Wash and iron all fabrics to prevent shrinkage and color bleeding. Then, carefully cut the heart shapes and square or rectangular blocks following the measurements in the pattern.
Next, arrange the heart motifs and background pieces on a flat surface. This layout stage allows you to experiment with color combinations and placement before sewing. Creating a visually balanced design ensures that your Heirloom Hearts Quilt – Tutorial has a harmonious and appealing final appearance.
Sewing the pieces together is the next phase. Begin by stitching the heart shapes onto the background blocks using a precise applique or machine embroidery technique. Consistent seam allowance and careful alignment are key to achieving neat, professional results in the Heirloom Hearts Quilt – Tutorial.
Once the hearts are securely attached, join the blocks to form rows and then assemble the rows into the quilt top. Maintaining straight, evenly spaced seams ensures that the quilt lays flat and looks polished. At this stage, it’s helpful to reference the pattern layout from the Heirloom Hearts Quilt – Tutorial.
The quilting stage involves layering the quilt top, batting, and backing fabric, then securing them with basting pins or spray adhesive. Using a sewing machine or hand quilting, stitch along the edges of each heart and throughout the quilt to add texture and durability to your Heirloom Hearts Quilt – Tutorial.
Finally, finish the quilt with binding. Carefully fold and sew the edges to encase the raw edges, giving your Heirloom Hearts Quilt – Tutorial a clean, finished look. After binding, give the quilt a final press and inspect for loose threads or minor adjustments.
Creating a flawless Heirloom Hearts Quilt – Tutorial requires attention to detail and some expert tips. Maintaining a consistent seam allowance ensures that each heart motif aligns correctly, resulting in a uniform and professional appearance.
Using contrasting thread for applique stitching can highlight the heart motifs, making them stand out beautifully on your Heirloom Hearts Quilt – Tutorial. Conversely, matching thread colors can create a more subtle, elegant effect.
Precision cutting of all pieces is essential. Even slight inaccuracies can accumulate, leading to misaligned blocks. Using a rotary cutter and ruler helps maintain exact dimensions, which is crucial for the Heirloom Hearts Quilt – Tutorial.
Pinning or basting pieces before sewing is highly recommended. This step prevents shifting during stitching and ensures accurate alignment, which is particularly important for intricate heart designs in the Heirloom Hearts Quilt – Tutorial.
Regularly pressing seams throughout the quilting process keeps the quilt flat and reduces bulk, ensuring clean lines and crisp heart motifs. This simple step greatly enhances the overall presentation of your Heirloom Hearts Quilt – Tutorial.
Lastly, take breaks and work methodically. Quilting is a time-intensive process, and rushing can lead to mistakes. Enjoying each step of the Heirloom Hearts Quilt – Tutorial improves both your experience and the quality of the finished quilt.
The Heirloom Hearts Quilt – Tutorial can be adapted in numerous ways to match your personal style. One option is to use different fabric prints for each heart, creating a playful and colorful patchwork effect. This variation is perfect for modern, eclectic designs.
Another creative approach is experimenting with quilt size. By adding or reducing the number of blocks, you can create baby quilts, lap blankets, or full-sized bed quilts. The modular design of the Heirloom Hearts Quilt – Tutorial makes this adjustment simple and effective.
Incorporating embroidery or decorative stitching into the hearts adds an extra layer of detail. Personalized initials, dates, or small motifs can make your Heirloom Hearts Quilt – Tutorial a cherished gift for loved ones.
Mixing textures is another exciting variation. Combining smooth cotton with textured fabrics, such as linen or flannel, creates visual interest and a tactile experience in your Heirloom Hearts Quilt – Tutorial.
Color gradients and ombre effects can also enhance the design. Arranging heart motifs from light to dark shades produces a striking visual impact that elevates the overall quilt aesthetic.
Finally, combining the Heirloom Hearts Quilt – Tutorial with other traditional quilting blocks, such as stars or squares, allows you to create a more complex and unique quilt. This flexibility ensures that every quilt is a one-of-a-kind creation.
Q1: Is this quilt suitable for beginners?
A1: Yes, the Heirloom Hearts Quilt – Tutorial can be simplified for beginners by using larger blocks and basic applique techniques.
Q2: How long does it take to complete the quilt?
A2: Completion time varies depending on skill level and size. Smaller quilts may take a few days, while full-sized heirloom quilts can take several weeks.
Q3: Can I use any type of fabric?
A3: Quilting cotton is recommended for the Heirloom Hearts Quilt – Tutorial, but other fabrics can be used as long as they are compatible with sewing and quilting techniques.
Q4: How do I quilt the layers together?
A4: You can hand quilt, machine quilt, or use a combination. Stitch along the heart edges and throughout the quilt for both durability and decoration.
Q5: Can I customize the heart shapes?
A5: Absolutely. You can adjust the size, shape, and color of each heart in the Heirloom Hearts Quilt – Tutorial to suit your design preferences.
Q6: How do I care for the finished quilt?
A6: Wash on a gentle cycle or hand wash, depending on fabric types. Always air dry or use low heat to preserve the quilt’s shape and colors.
The Heirloom Hearts Quilt – Tutorial offers a rewarding and creative experience, combining timeless charm with practical quilting skills. By following the step-by-step instructions, using quality materials, and applying expert tips, you can create a quilt that is both beautiful and durable. This tutorial encourages personalization, creativity, and attention to detail, making each quilt a treasured piece.
Share your feedback, leave your honest opinion, and suggest any improvements or variations. Your insights help enrich the quilting community and inspire future creations.


