
Creating festive decorations for the holiday season has never been easier or more fun than with the Candy Striped Holly Star. This charming design adds a cheerful, handcrafted touch to your Christmas décor, gifts, and even DIY projects.
With this free tutorial, anyone can make a Candy Striped Holly Star, regardless of skill level, turning ordinary materials into a dazzling holiday ornament.
By following this guide, you’ll bring color, creativity, and festive spirit into your home while crafting a piece that will be cherished year after year.
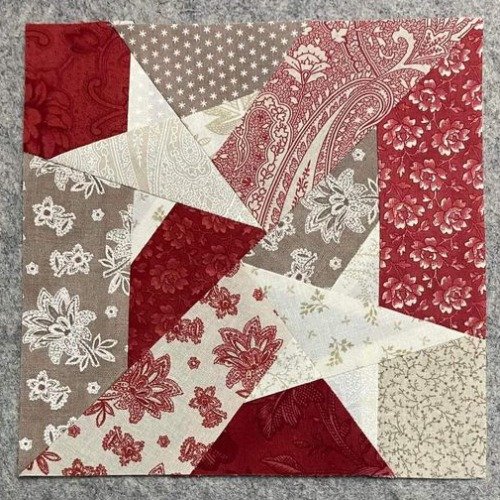
A Candy Striped Holly Star is a versatile decoration that combines the classic holiday colors of red, green, and white in a fun, striped pattern.
Its holly-inspired design makes it perfect for wreaths, table centerpieces, garlands, or even as standalone ornaments for your Christmas tree. The appeal of this star lies in its simplicity and charm—perfect for both beginners and experienced crafters who want to add a personalized touch to their holiday decorations.
This free tutorial also provides creative inspiration for exploring variations of the Candy Striped Holly Star. By adjusting colors, materials, and sizes, you can produce a unique collection of stars that match your holiday theme. The tutorial will guide you step by step, explain essential crafting techniques, and offer helpful tips to make your crafting experience enjoyable and stress-free.
Materials Needed for Candy Striped Holly Star
Before starting your Candy Striped Holly Star, gathering the proper materials is crucial. Having everything ready ensures a smooth crafting process and a polished final product.
- Yarn or Ribbon: Use festive yarn in red, white, and green for a crochet or knitted star. Alternatively, ribbons in these colors work well for non-crochet versions.
- Crochet Hook or Needle: Choose a hook that suits your yarn weight. For ribbon-based stars, a needle for hand stitching may be needed.
- Scissors: Sharp scissors are essential to cut yarn or ribbon neatly without fraying.
- Stuffing Material: If you want a three-dimensional star, fiberfill or cotton is ideal for stuffing.
- Glue or Thread: Depending on your method, fabric glue or sewing thread will help secure layers and embellishments.
- Optional Embellishments: Tiny beads, buttons, or sequins can add extra sparkle and charm.
Having these materials on hand ensures you can focus on creativity without interruptions while making your Candy Striped Holly Star.
Step-by-Step Guide to Making Candy Striped Holly Star
In addition to being a charming decoration, the Candy Striped Holly Star can also become a fun and educational activity for the whole family. Children can learn about colors, patterns, and fine motor skills while helping create small details like felt leaves or colorful stripes. Involving the little ones in the process not only creates unique decorations but also creates memorable moments that celebrate creativity and the holiday spirit. This hands-on experience makes each star even more special, as every detail carries the personal touch of those who helped craft it.
This free tutorial is designed for crafters of all skill levels. Follow these six detailed steps to make your Candy Striped Holly Star:
1. Preparing the Base
Start by creating the star’s base. For crochet, work in rounds using basic stitches to form a five-pointed star shape. For fabric or ribbon stars, cut a star template from cardboard and use it as a guide.
Crochet Option: Begin with a magic ring, work several rounds of single or double crochet, increasing at points to shape each star tip.
Fabric/Ribbon Option: Fold ribbons and stitch along the edges using your template for structure.
2. Creating Candy Stripes
Candy stripes give the star its signature look. Alternate colors in a striped pattern across each arm of the star.
Crochet Option: Switch yarn colors every few stitches to create even stripes.
Fabric Option: Layer ribbons in alternating colors, sewing or gluing them securely.
3. Adding Holly Leaves
The holly leaves add festive flair. Cut small leaf shapes from green felt or crochet tiny leaves to attach to the star.
Placement Tip: Position leaves near the star’s center or along tips to balance the design.
4. Attaching Berries or Accents
Red beads or small pom-poms make perfect holly berries. Sew or glue these accents onto the star for a polished holiday look.
Optional Detail: Embroidery thread can be used to add stitching patterns for additional texture.
5. Assembling the Star
Combine the base, stripes, holly leaves, and accents into one cohesive decoration. Ensure all elements are firmly attached to prevent shifting or fraying.
6. Finishing Touches
Trim any loose threads or yarn ends and shape the star for symmetry. For a hanging decoration, attach a loop using yarn, ribbon, or thread.
Creative Uses for Candy Striped Holly Star
The Candy Striped Holly Star is highly versatile and can be incorporated into numerous festive projects:
- Christmas Tree Ornaments: Hang the stars on your tree for a handmade holiday vibe.
- Holiday Garlands: String multiple stars together for a colorful garland.
- Gift Decorations: Add a star to wrapped presents for an extra special touch.
- Wreath Embellishments: Attach stars to your wreaths for a bright, cheerful look.
- Table Centerpieces: Arrange stars in bowls or trays as part of a festive display.
- Holiday Crafts for Kids: Simple variations of the star are perfect for crafting with children.
These creative uses allow crafters to explore different colors, materials, and sizes to match their holiday aesthetic.
Tips for Perfect Candy Striped Holly Star
To ensure your Candy Striped Holly Star turns out beautifully, follow these tips:
- Use high-quality materials: Soft yarn, sturdy felt, or smooth ribbons make the finished product look professional.
- Keep stripes even: Measure yarn or ribbon lengths to ensure consistent stripes.
- Secure embellishments: Ensure beads, pom-poms, or embroidery details are attached firmly.
- Experiment with sizes: Small stars work well as ornaments, while larger stars make stunning table displays.
- Personalize colors: While red, green, and white are traditional, feel free to use colors that match your holiday décor.
- Practice before final piece: Try a small prototype to refine your technique and pattern alignment.
Following these tips guarantees a polished and festive Candy Striped Holly Star.
FAQ About Candy Striped Holly Star
Q1: Can I make a Candy Striped Holly Star without crochet skills?
Yes! You can create it using ribbons, felt, or fabric and basic hand stitching.
Q2: Can I customize the colors?
Absolutely. While red, white, and green are classic, any color scheme can be used to match your décor.
Q3: Is this project suitable for beginners?
Yes. This free tutorial is beginner-friendly with step-by-step instructions.
Q4: Can I make multiple stars at once?
Yes. Making several stars in different sizes and colors is a great way to create a coordinated holiday set.
Q5: How do I ensure the stripes are even?
Use measured lengths of yarn or ribbon and secure each change carefully.
Q6: Can I use this star for non-holiday projects?
Definitely. By changing colors, the star can be adapted for other festive or decorative themes year-round.
Conclusion
The Candy Striped Holly Star – Free Tutorial is an enjoyable and creative way to bring festive cheer into your home. From tree ornaments to table centerpieces, this charming star allows you to personalize your holiday decorations with a handmade touch. By following this tutorial, gathering the right materials, and experimenting with colors and embellishments, you can create a stunning star that adds warmth and joy to your holiday celebrations.
Share your finished creations, leave your honest feedback, and suggest ideas for future tutorials to inspire fellow crafters. Your contributions make the crafting community brighter and more festive for everyone.