
Crocheted house-shaped cookie for Christmas tree

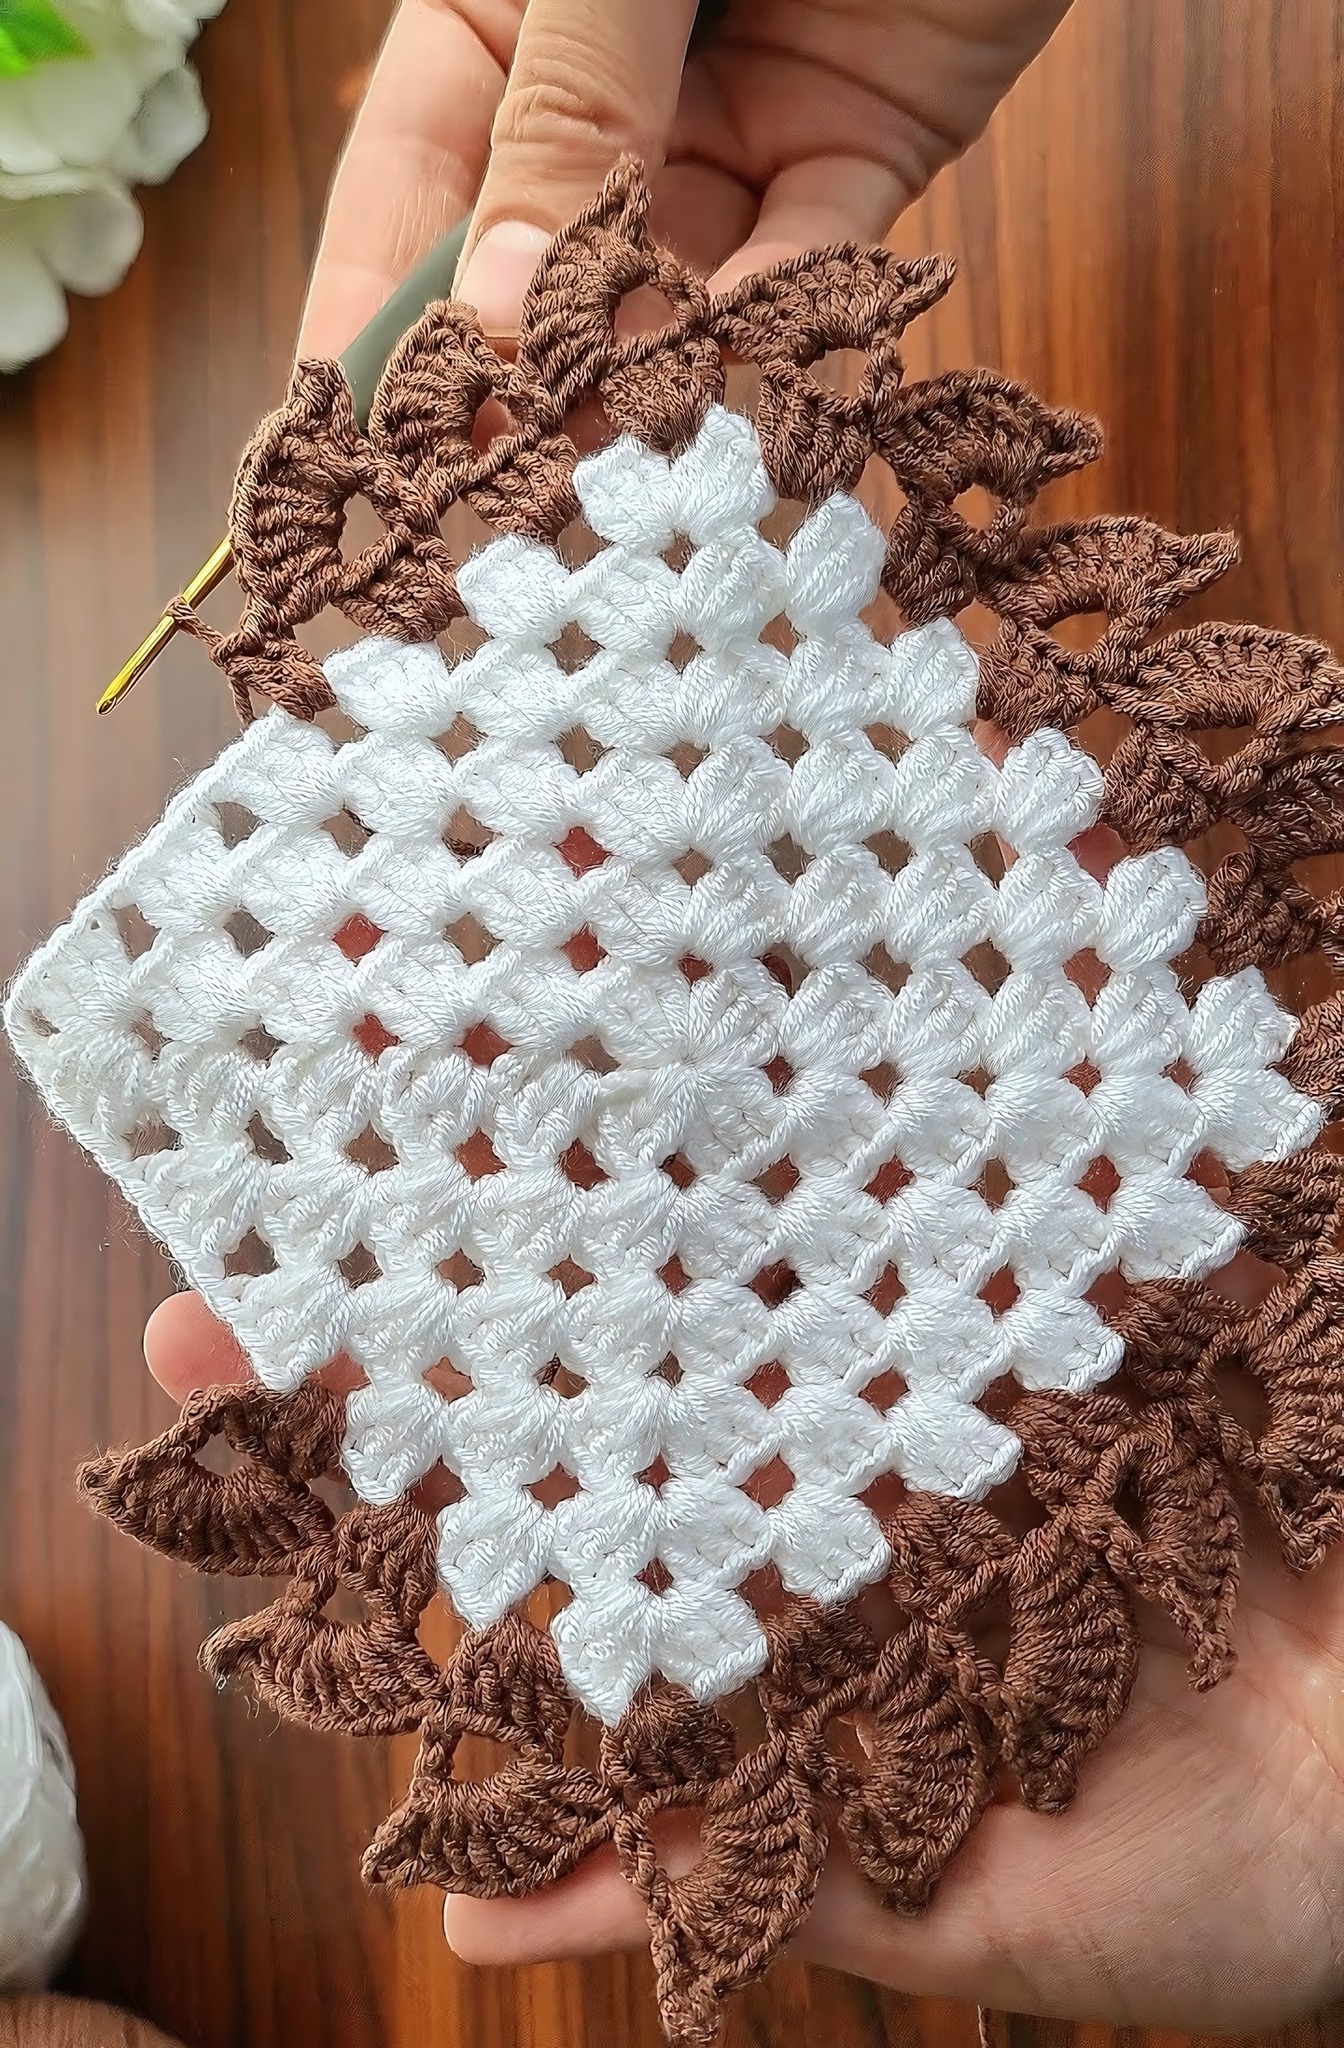
Learning to create a SUPER EASY & LOVELY Granny Square for Beginners is one of the most enjoyable and rewarding experiences for anyone interested in crochet.
This classic pattern has been loved for generations and remains a favorite among crafters because of its versatility and charm. Whether you are a complete beginner or someone looking to refresh your crochet skills, mastering the granny square can open the door to endless creative projects.
From blankets to cushions, bags, and even clothing, these small, colorful squares can transform simple yarn into something truly special.
One of the main reasons why the SUPER EASY & LOVELY Granny Square for Beginners is so popular is because it combines simplicity with endless possibilities.
The pattern is repetitive and easy to follow, making it perfect for those just starting their crochet journey. Additionally, the modular nature of granny squares allows you to experiment with different colors, textures, and combinations. This makes each piece unique and adds a personal touch to your handmade creations.
Another advantage of learning the granny square technique is that it helps beginners build essential crochet skills. You will practice basic stitches, counting, and tension control, all while creating a beautiful project you can be proud of. The satisfaction of completing your first square encourages continued learning and inspires more complex projects in the future. For anyone looking for a relaxing yet productive hobby, starting with a SUPER EASY & LOVELY Granny Square is a wonderful choice.
The first step in creating a granny square is understanding the basic stitches and structure. At its core, a granny square is built from simple stitches, usually chains and double crochets, arranged in a square pattern. This basic foundation allows beginners to practice consistency and stitch control while still producing something visually appealing. It’s important to master these basic stitches before attempting larger or more complex designs.
Starting with the center of the square, you typically work in rounds. The center forms a small loop, which then expands outward with repeated clusters of stitches. Each round increases the size of the square and provides a framework for adding colors and textures. Learning to read and follow a simple diagram or written pattern is crucial at this stage, as it helps ensure your square remains even and symmetrical.
Another key aspect of the SUPER EASY & LOVELY Granny Square for Beginners is choosing the right yarn and hook. Soft, medium-weight yarns are often recommended because they are easy to handle and provide good stitch definition. Pairing this with an appropriately sized hook ensures that your stitches are neither too tight nor too loose, creating a square that is easy to work with and looks professional.
Granny squares are highly versatile. Once you master the basic construction, you can experiment with various stitch patterns, color combinations, and techniques like joining squares together or adding decorative borders. This makes the granny square a fantastic starting point for a wide range of projects and a stepping stone to more advanced crochet skills.
Consistency is crucial when working on granny squares. Each stitch should have uniform tension, and each round should maintain a balanced shape. By practicing these principles in your SUPER EASY & LOVELY Granny Square, you build a solid foundation for future crochet projects that are both beautiful and structurally sound.
Finally, the joy of completing your first granny square cannot be overstated. The sense of accomplishment encourages you to continue practicing, exploring new designs, and eventually creating full blankets, scarves, or other decorative items from your squares.
Creating a SUPER EASY & LOVELY Granny Square for Beginners may seem daunting at first, but breaking it down into steps makes the process straightforward and enjoyable. Start by making a simple slip knot and a chain of four stitches to form a small ring. This ring will act as the foundation for your square.
Once your ring is formed, begin the first round by working clusters of three double crochet stitches separated by chains. This forms the basic square shape and establishes the pattern you will follow in subsequent rounds. Remember to count your stitches carefully to maintain even corners.
The second round builds on the first by adding additional clusters into the corners of the square. These corners are essential for keeping your square flat and ensuring it grows evenly. Use chains to separate the clusters and create a clean, sharp corner.
For the third round, continue adding clusters while changing colors if desired. This is a great opportunity to experiment with contrasting or complementary colors to give your granny square a vibrant and unique appearance. Changing colors is easy and adds a professional touch to your finished piece.
As you add more rounds, keep your tension consistent and check that your square remains flat. If you notice curling or uneven edges, adjust your stitch count or tension to correct the issue. Practice will make these adjustments intuitive over time.
Finally, finishing your SUPER EASY & LOVELY Granny Square for Beginners involves weaving in loose ends and blocking your square to shape it properly. Blocking helps to flatten the square, highlight the stitches, and prepare it for joining with other squares in larger projects.
One of the most exciting aspects of a SUPER EASY & LOVELY Granny Square for Beginners is the freedom to choose colors. Color selection can dramatically change the look and feel of your project. Beginners are encouraged to start with two or three complementary colors before experimenting with more complex combinations.
Yarn choice also plays a crucial role. Soft, medium-weight yarns like acrylic or cotton blends are excellent for beginners because they are easy to handle and durable. Avoid overly slippery or textured yarns, as they can be difficult to control when working with small stitches.
Mixing colors within a single square or across multiple squares allows for creative expression. You can create a rainbow effect, alternating light and dark shades, or stick to a monochromatic palette for a classic and elegant look. Color theory basics can help guide your choices and improve the visual impact of your squares.
Another consideration is the contrast between your yarn colors. High-contrast combinations make the pattern stand out more clearly, which is helpful for beginners learning to see and count stitches. Conversely, low-contrast colors create a subtle, sophisticated appearance that is pleasing for decorative projects.
Texture is also important when selecting yarn. Smooth yarns show off the stitch pattern clearly, while textured or novelty yarns add a tactile element but may obscure small stitch details. For a SUPER EASY & LOVELY Granny Square, a smooth, uniform yarn is generally recommended for your first attempts.
Lastly, the weight and type of yarn you choose will affect the final size of your square. Make sure to keep the hook size consistent with the yarn to avoid uneven stitches or a square that is too loose or tight. Experimentation is part of the learning process, and over time, you’ll discover your preferred combinations.
Once you’ve mastered your SUPER EASY & LOVELY Granny Square for Beginners, there’s a world of projects to explore. One of the most popular uses is creating blankets or throws by joining multiple squares together. This is a rewarding project that grows quickly and produces a visually striking result.
Granny squares can also be turned into home décor items such as cushion covers, table runners, and wall hangings. These smaller projects are perfect for practicing color combinations and experimenting with different square sizes. They make excellent gifts or stylish accents for your home.
For wearable projects, granny squares can be combined to create scarves, ponchos, cardigans, or even bags. Each square acts as a building block, and by joining them in different arrangements, you can craft unique garments or accessories. This versatility makes the granny square a favorite among beginner and experienced crocheters alike.
Another creative application is using granny squares for seasonal or themed projects. For example, squares can be made in holiday colors for decorations or gifts, or designed in specific motifs to reflect personal interests. The possibilities are limited only by your imagination.
Joining granny squares can be done using various techniques, such as whip stitch, slip stitch, or sewing with a yarn needle. Choosing the right method affects both the appearance and durability of your finished project. Beginners may start with the simplest method and progress to more intricate joining techniques as confidence grows.
Finally, adding borders or edging to your completed squares or joined projects can enhance the overall look. Simple single or double crochet borders are ideal for beginners, while more decorative edgings can provide an extra touch of elegance to your work.
Q: How long does it take to make a granny square?
A: The time varies depending on your experience and the size of the square. Beginners might take 30-60 minutes for a small square, while experienced crocheters can finish one in 15-20 minutes.
Q: What size yarn and hook are best for beginners?
A: Medium-weight yarn (like worsted) with a corresponding hook, usually size 5-6mm, works well. It provides good stitch definition and is easy to handle.
Q: Can I use different colors in one square?
A: Absolutely! Granny squares are perfect for experimenting with colors. Many beginners enjoy creating multi-colored squares for a vibrant effect.
Q: How do I keep my square even and flat?
A: Consistent tension and careful counting of stitches are key. Blocking your square at the end also helps maintain a neat shape.
Q: Can granny squares be used for clothing?
A: Yes! Once you’re comfortable with the technique, you can join squares to make scarves, sweaters, cardigans, and other wearable projects.
Q: What is the easiest way to join multiple squares?
A: For beginners, sewing with a yarn needle or slip stitching together is simple and effective. More advanced joinings can be done as skills improve.
Creating a SUPER EASY & LOVELY Granny Square for Beginners is a wonderful starting point for anyone interested in crochet. By understanding the basic stitches, choosing the right yarn and colors, and following a simple step-by-step process, even beginners can achieve beautiful, professional-looking results. Granny squares are versatile, fun, and provide endless opportunities for creative projects, from blankets to garments and home décor.
Now that you’ve learned the essentials, give it a try and see your skills grow with each square. Don’t forget to share your experience and leave a sincere opinion or suggestions for others starting their crochet journey. Your feedback can inspire fellow beginners and help everyone enjoy the joy of creating granny squares.


