
Crocheted house-shaped cookie for Christmas tree

Quick and easy crochet cup – Free Pattern is the perfect project for beginners and experienced crafters alike who want to create beautiful, functional items in a short amount of time.
Whether you’re looking for a handmade gift, a cozy addition to your kitchen, or a fun craft to relax with, this pattern is designed to be simple, enjoyable, and rewarding.
Crocheting has become increasingly popular because it combines creativity with practicality, and making your own crochet cup is a great way to showcase your skills.
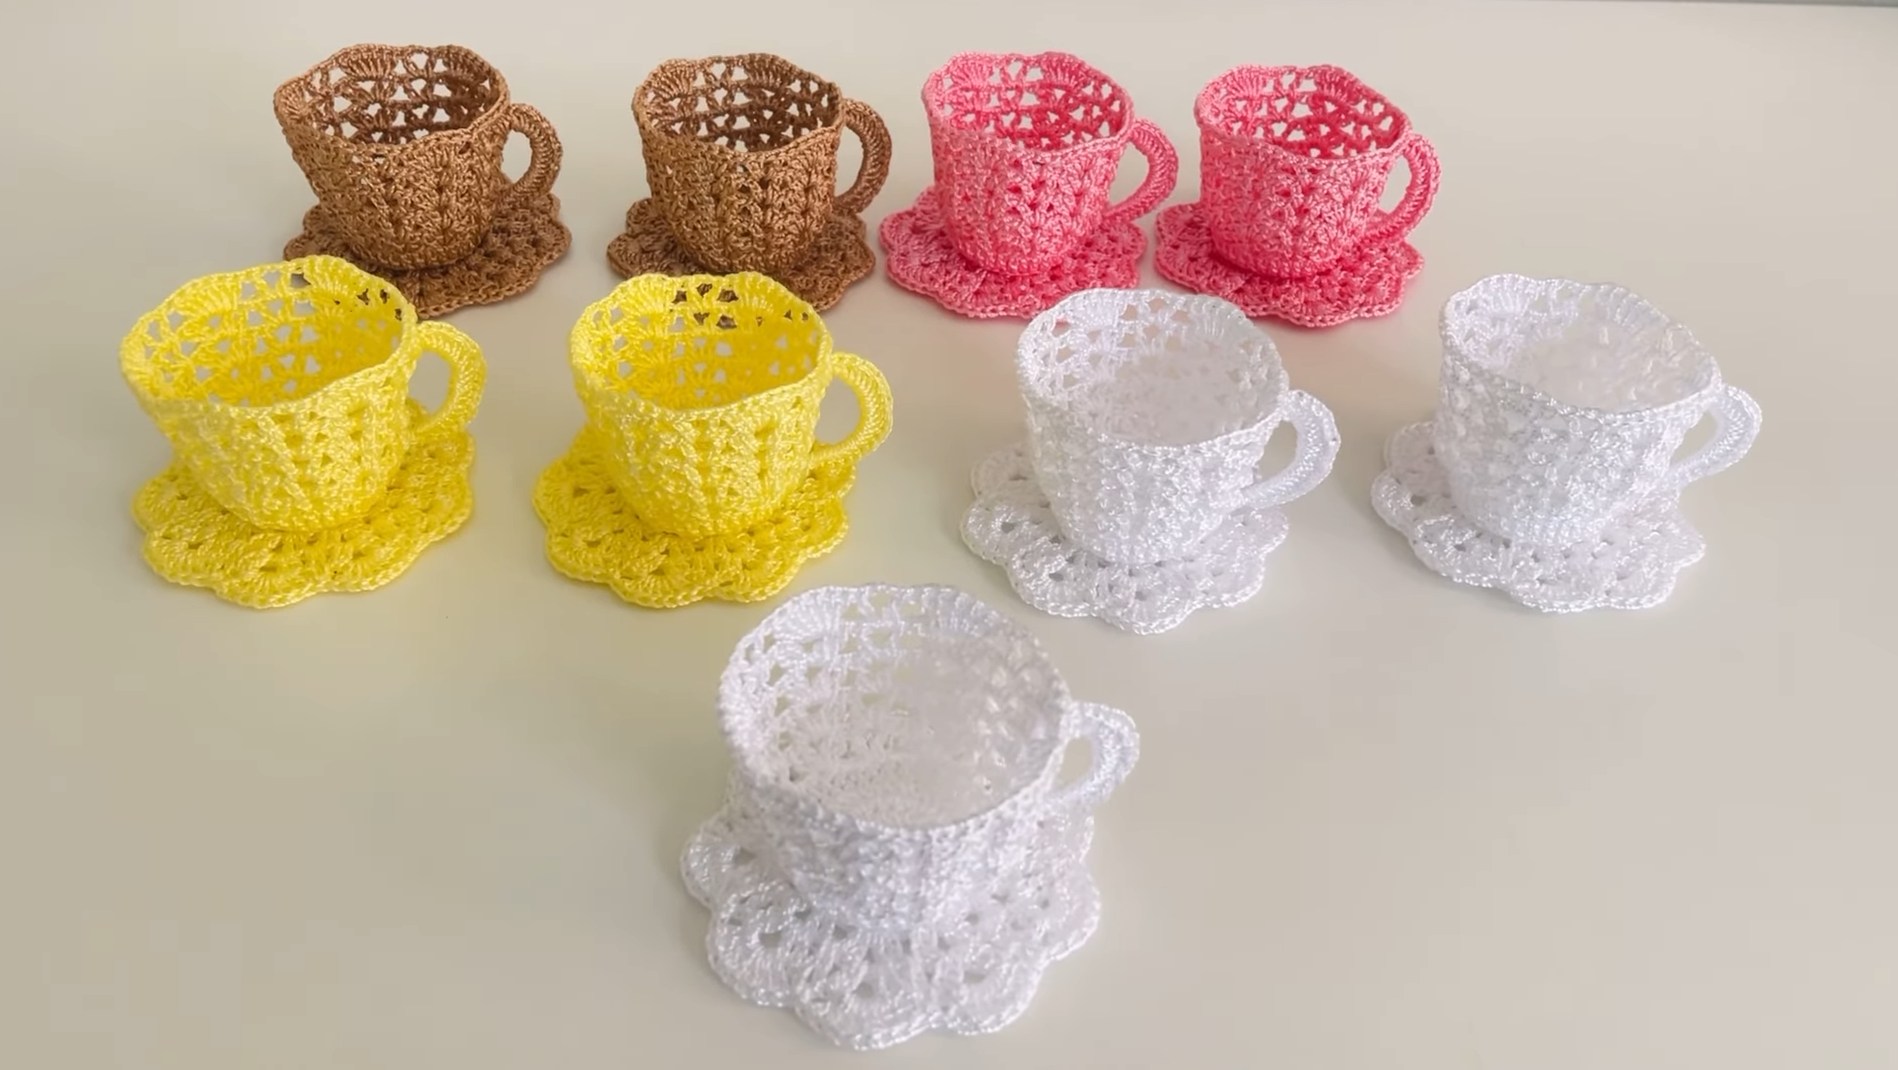
This quick and easy crochet cup not only looks charming but is also practical for everyday use. It can serve as a decorative holder for pens, a cozy for your coffee cup, or even a small planter for your favorite succulents.
The beauty of crochet lies in its versatility, and with this free pattern, you can experiment with different yarn types, colors, and stitches to create a truly personalized item.
Many crafters often search for projects that are both quick and easy, as busy schedules can make long, complicated patterns overwhelming. This crochet cup pattern has been specifically designed to be beginner-friendly, yet it offers enough customization for those who are more experienced. By following this guide, you’ll be able to complete your project in a few hours and enjoy a sense of accomplishment that only handmade crafts can provide.
Creating a quick and easy crochet cup starts with gathering the right materials. The right yarn, hook, and accessories can make a big difference in the final look and durability of your cup. For this project, you’ll need medium-weight yarn, preferably cotton for sturdiness and easy washing. Cotton yarn provides a smooth texture that holds its shape well, which is ideal for a functional crochet cup.
You will also need a crochet hook that matches your yarn weight. Typically, a 4.0 mm or 4.5 mm hook works well with medium-weight cotton yarn. Choosing the right hook ensures that your stitches are even and tight enough to give the cup structure. Loose stitches may make the cup floppy, while overly tight stitches can make crocheting more difficult.
Additional tools like stitch markers, scissors, and a yarn needle are helpful for this project. Stitch markers help keep track of rounds, especially when working in the round, which is common for cup patterns. A yarn needle will allow you to weave in ends neatly, giving your crochet cup a polished and professional appearance.
The versatility of this pattern allows you to experiment with different colors and textures. You can choose a single-color design for a classic look or mix and match yarns for a playful, vibrant cup. The materials you choose will influence not only the appearance but also the feel and usability of your quick and easy crochet cup, making this project uniquely yours.
Understanding your materials and how they interact with your chosen stitch pattern is essential. Different yarn types and hook sizes can drastically change the size and texture of the final product. By carefully selecting materials, you ensure that your free pattern crochet cup will be both visually appealing and functional, providing lasting enjoyment.
Finally, keeping all materials organized before starting your project will save time and reduce frustration. Having your yarn, hook, scissors, and stitch markers at hand allows you to focus entirely on the joy of crocheting, making the creation of your quick and easy crochet cup an enjoyable and stress-free experience.
The beauty of this quick and easy crochet cup lies in its simplicity. This pattern has been carefully designed to be beginner-friendly while producing a professional-looking result. The cup is created in rounds, starting from the base and working upward to form the sides. This method ensures even shaping and a smooth finish.
Start by creating a magic ring or chaining 2 and working single crochets into the ring. The base is typically worked in continuous rounds, gradually increasing stitches to form a flat, circular bottom. Properly counting your stitches during this step is crucial to avoid uneven edges or wobbly sides.
Once the base reaches the desired diameter, you’ll begin working on the sides of the cup. The pattern usually involves single crochet stitches without increases, allowing the sides to rise straight up. This technique gives the crochet cup its structured shape while maintaining simplicity for beginners.
To add a decorative touch, you can experiment with different stitch patterns, such as half-double crochet or shell stitches, for the upper rounds. This customization allows your cup to reflect your personal style while still being quick and easy to make.
Finishing your crochet cup involves closing off the last round neatly and weaving in any loose ends. This step is essential for durability, ensuring that your cup maintains its shape and can withstand regular use. Taking the time to finish carefully will give your project a polished, professional appearance.
Finally, you can block your crochet cup if desired. Blocking helps even out stitches and shapes the cup perfectly. While not always necessary for a functional item, it enhances the overall look, especially if you plan to give your quick and easy crochet cup as a gift or display it at home.
Creating a quick and easy crochet cup can be a rewarding experience, especially with a few helpful tips. First, always count your stitches carefully. This simple habit ensures uniformity and prevents mistakes that can become frustrating later in the project.
Choosing the right yarn is also essential. While cotton is ideal for structure, experimenting with acrylic or blends can give a different texture and feel. However, ensure the yarn is sturdy enough to maintain the cup’s shape.
Tension is another key factor. Crocheting too loosely can result in a floppy cup, while too tight stitches can make crocheting difficult. Practicing a consistent tension will make your crochet cup more professional-looking and durable.
If you’re new to working in rounds, using a stitch marker at the beginning of each round can prevent confusion. It’s easy to lose track, especially in a circular pattern, and markers help maintain alignment and structure.
For added personalization, consider experimenting with color changes. Creating stripes or patterns adds visual interest to your quick and easy crochet cup and allows you to match your home décor or gift theme.
Finally, don’t rush the process. Crocheting is as much about enjoying the journey as it is about the finished product. Take breaks, relax, and savor the satisfaction of creating your own handmade crochet cup.
Once you’ve completed your quick and easy crochet cup, the possibilities are endless. One popular use is as a coffee or tea cozy, protecting your hands from hot beverages while adding a personal, handmade touch.
You can also use your crochet cup as a decorative holder for pens, pencils, or craft tools. Its sturdy design makes it a practical and stylish organization solution for desks or craft rooms.
Another creative option is to transform the cup into a small planter for succulents or other small plants. The crochet texture provides a unique aesthetic, and by lining the cup with a waterproof material, you can safely use it for greenery.
Gift-giving is another area where your crochet cup shines. Handmade gifts are always appreciated, and a quick and easy crochet cup can be customized with colors, patterns, and embellishments to suit the recipient’s tastes.
For seasonal or festive occasions, you can create themed cups with holiday colors or motifs. This makes your project not only practical but also a fun way to celebrate special events and holidays.
Finally, combining multiple cups into sets can create a charming home décor collection. Matching colors or patterns can bring cohesion to your space, demonstrating the versatility and creativity inherent in crocheting.
Q1: How long does it take to make a quick and easy crochet cup?
It typically takes 2–4 hours, depending on your experience level and the complexity of any decorative stitches you choose.
Q2: Can beginners make this crochet cup?
Absolutely! This pattern is designed for beginners and uses simple stitches, making it accessible to anyone with basic crochet knowledge.
Q3: What type of yarn is best for this project?
Medium-weight cotton yarn is ideal for durability and structure, but acrylic or yarn blends can also be used depending on personal preference.
Q4: Can the cup hold liquids?
This crochet cup is primarily decorative or functional as a cozy or holder. It is not recommended for holding liquids directly without a liner.
Q5: How can I customize my crochet cup?
You can change colors, stitch patterns, or add embellishments like buttons or embroidery to make your cup unique.
Q6: Is blocking necessary for this project?
Blocking is optional but helps even out stitches and shape the cup perfectly for a polished finish.
Creating a quick and easy crochet cup – free pattern is a rewarding project that combines creativity, functionality, and relaxation. Throughout this article, we explored the materials needed, step-by-step instructions, tips for beginners, and creative uses for your crochet cup. By following this guide, you can craft a beautiful, practical item that reflects your personal style.
We hope you enjoyed this tutorial and found it helpful for your next crochet project. Don’t forget to share your experiences, leave your honest opinions, and provide suggestions for future patterns.
Your feedback helps create an even more vibrant crafting community and inspires new ideas for quick and easy crochet projects.


