
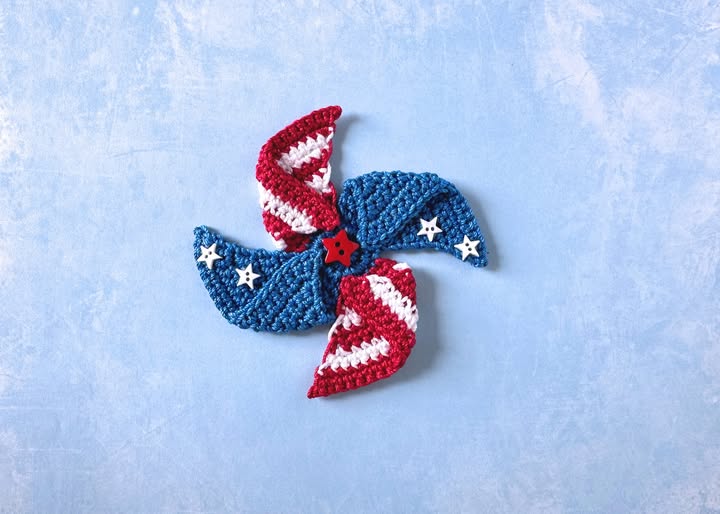
Pinwheel for the 4th of July – Pattern by Goldenlucycrafts is a charming and fun craft idea that brings the spirit of Independence Day right into your home.
Whether you are planning a festive decoration for your garden, a creative project for kids, or a vibrant centerpiece for your 4th of July celebration, this DIY pinwheel pattern is the perfect choice.
With its colorful design and simple instructions, anyone can make a beautiful pinwheel that embodies the joy and excitement of the holiday.
Creating a pinwheel for the 4th of July is more than just a craft project; it’s an opportunity to bring family and friends together. Using the pattern by Goldenlucycrafts, you can enjoy a step-by-step process that guarantees a flawless and stunning pinwheel.
The design is straightforward, making it suitable for both beginners and experienced crafters. Additionally, incorporating the traditional red, white, and blue colors will make your pinwheel truly patriotic and eye-catching.
Many people underestimate the joy of simple crafts, but a DIY pinwheel can transform ordinary spaces into festive wonderlands. From front porches to party tables, these handcrafted pinwheels add charm, movement, and a touch of creativity to your holiday celebrations. By following the pattern by Goldenlucycrafts, you ensure precision and an aesthetically pleasing result every time. This craft project not only enhances your decoration but also serves as a fun educational activity for children, teaching them about art, design, and the spirit of Independence Day.
Materials Needed for Your Pinwheel for the 4th of July
Creating a pinwheel for the 4th of July begins with gathering the right materials. The pattern by Goldenlucycrafts outlines everything you need, ensuring that your project goes smoothly. Essential items include colorful cardstock or paper, scissors, glue, a pushpin or brad, and a stick or straw for the handle. Choosing high-quality materials will make your pinwheel sturdier and more vibrant, which is especially important for outdoor displays.
When selecting your colors, focus on the classic patriotic palette of red, white, and blue. This will make your DIY pinwheel instantly recognizable as a festive 4th of July decoration. While the pattern is versatile, sticking to these colors enhances the holiday theme and ensures your pinwheel fits seamlessly into any patriotic setup.
The pattern by Goldenlucycrafts also recommends optional embellishments, such as glitter or stickers, to add extra sparkle and personality. These small details can make a significant difference, elevating a simple craft into a show-stopping decoration. You can let your creativity flow while still following the step-by-step guide, balancing structure and freedom in your crafting.
Another key consideration is the durability of your pinwheel. Using cardstock that is too thin may result in a flimsy product, whereas thicker paper ensures the pinwheel spins properly and withstands outdoor conditions. The pattern provides guidance on the ideal thickness to make your DIY pinwheel both functional and attractive.
Having all your materials ready before starting your project saves time and reduces frustration. The pattern by Goldenlucycrafts is designed for convenience, making sure that each step is clear and straightforward. This preparation ensures a smooth crafting experience and a pinwheel you can proudly display.
Finally, don’t forget safety tools, especially if children are involved. Safety scissors, protective surfaces, and adult supervision will make crafting enjoyable and safe. With these precautions, your pinwheel for the 4th of July becomes a fun and worry-free activity for the whole family.
Step-by-Step Instructions to Make the Pinwheel
Following the pattern by Goldenlucycrafts, creating your pinwheel for the 4th of July is simple and rewarding. Start by cutting the cardstock according to the pattern’s measurements, ensuring precision for symmetrical results. Accuracy in this step guarantees that your pinwheel spins correctly and looks polished.
Next, fold the corners toward the center as instructed in the pattern by Goldenlucycrafts. This step gives the pinwheel its signature shape and prepares it for assembly. Folding carefully and evenly is crucial to achieving a professional-looking result.
Once the folds are complete, secure the center with a brad or pushpin. The pin should allow rotation, as this is what makes your DIY pinwheel functional. Testing the spin at this stage ensures everything is aligned correctly before final assembly.
Attach your pinwheel to the handle or stick, ensuring it is tight enough to hold but loose enough to rotate freely. This step transforms your paper design into a dynamic decoration that can twirl in the breeze, capturing attention wherever it’s displayed.
Optional: Add finishing touches such as glitter, stickers, or small embellishments to enhance your pinwheel’s visual appeal. These creative additions let you personalize the design while still following the pattern by Goldenlucycrafts.
Finally, display your pinwheel for the 4th of July proudly in your garden, on your porch, or as a table centerpiece. Its movement and bright colors will instantly brighten any space, making your holiday celebration more festive and memorable.
Creative Ideas for Using Your Pinwheel for the 4th of July
Once your DIY pinwheel is complete, there are countless ways to incorporate it into your 4th of July celebrations. You can use multiple pinwheels to create a patriotic centerpiece that draws the eye and serves as a conversation starter for guests.
Outdoor decoration is another fantastic option. Place pinwheels along walkways, in garden beds, or lining your porch to create a lively, festive atmosphere. The movement of the spinning pinwheels adds energy and excitement to your space.
Pinwheels can also enhance party tables. Arrange them in jars or small vases for a creative and patriotic table display. This is particularly effective for family gatherings or community events, where decorative details make a big impression.
Craft fairs and children’s activities are perfect settings for your pinwheels. Kids love assembling their own DIY pinwheel, and it doubles as an interactive craft and holiday souvenir. Using the pattern by Goldenlucycrafts ensures a fun and successful crafting experience.
You can also incorporate pinwheels into patriotic gift baskets. A handmade pinwheel adds charm and personal touch, making your 4th of July gift memorable and unique.
Finally, don’t hesitate to experiment with sizes and designs. Mini pinwheels, large statement pieces, or combinations of patterns can all be used to create dynamic and eye-catching displays that celebrate Independence Day in style.
Tips and Tricks for Perfecting Your Pinwheel
To make the most of your pinwheel for the 4th of July, follow a few key tips. Always measure and cut carefully to ensure symmetry, which is essential for smooth spinning. Accuracy is the foundation of a professional-looking result.
When folding your pinwheel, take your time to create crisp, clean folds. This not only improves the appearance but also enhances the functionality of your DIY pinwheel. A well-folded pinwheel spins more freely and lasts longer.
Use high-quality materials to prevent bending or tearing. Sturdy cardstock, reliable brads, and durable sticks are essential for outdoor displays. The pattern by Goldenlucycrafts recommends materials that balance beauty and practicality.
Experiment with embellishments, but avoid overloading your pinwheel. Too much decoration can weigh it down and prevent smooth rotation. Subtle glitter or small accents usually work best.
Test your pinwheel’s spin after assembly. If it doesn’t move freely, check the alignment of the folds and the tightness of the brad. Minor adjustments can make a big difference in performance.
Finally, involve others in your crafting process. Making a pinwheel for the 4th of July can be a shared activity, strengthening family bonds and creating lasting memories. Sharing this joyful craft multiplies the fun and adds to the holiday spirit.
FAQ
Q1: How long does it take to make a pinwheel using this pattern?
A: Depending on your skill level, it usually takes 20–40 minutes to complete a pinwheel for the 4th of July using the pattern by Goldenlucycrafts.
Q2: Can children make this DIY pinwheel?
A: Yes! With supervision and assistance for cutting and securing the center, children can enjoy making their own DIY pinwheel safely.
Q3: What materials are best for outdoor pinwheels?
A: Sturdy cardstock, weather-resistant sticks, and durable brads ensure your pinwheel can withstand outdoor conditions while maintaining its vibrant colors.
Q4: Can I use this pattern for other holidays?
A: Absolutely! While it’s perfect for the 4th of July, you can adapt the colors and embellishments for birthdays, Easter, or other festive occasions.
Q5: How do I make my pinwheel spin better?
A: Ensure folds are symmetrical and the brad is tight enough to hold but loose enough to allow free rotation. Testing before final display is recommended.
Q6: Can I make multiple pinwheels quickly?
A: Yes! Preparing materials in advance and following the pattern by Goldenlucycrafts step-by-step allows you to create several pinwheels efficiently.
Conclusion
Creating a pinwheel for the 4th of July – Pattern by Goldenlucycrafts is a delightful way to celebrate Independence Day. From gathering materials to completing the assembly, the process is simple, fun, and suitable for all ages. Using this DIY pinwheel pattern, you can add charm, color, and motion to your holiday decorations.
We covered essential materials, step-by-step instructions, creative ideas for display, and expert tips to ensure your pinwheel spins beautifully and looks fantastic. By following the pattern by Goldenlucycrafts, you guarantee a polished result that adds festive flair to any setting.
We’d love to hear your thoughts! Share your experiences, creative twists, or suggestions on making your pinwheels even more special. Your feedback helps inspire new ideas and enhances the joy of crafting for everyone.