
Crocheted house-shaped cookie for Christmas tree

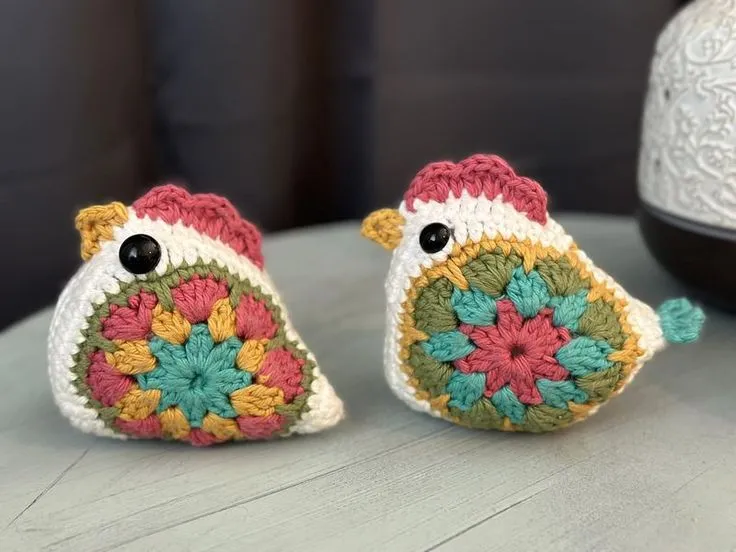
The Little Chicken Crochet Pattern is a delightful and beginner-friendly amigurumi project that captures the charm of a tiny farm animal in yarn form.
Perfect for Easter decorations, nursery toys, or as a cute keychain, this project is quick, satisfying, and highly customizable. Whether you are new to amigurumi or an experienced crocheter, making your own little chicken will bring joy and creativity to your crochet collection.
Creating your own Little Chicken Crochet Pattern allows you to explore shaping, color changes, and sewing techniques that are essential in amigurumi crafting.
You can experiment with different yarn textures, from cotton to acrylic, to achieve the perfect softness or firmness depending on the purpose—plush toy or decoration.
The finished result is a small, round, and fluffy chick that looks cute perched on any shelf or keyring. This is also a fun weekend project that doesn’t require much yarn or time, yet delivers an adorable result.
The charm of the Little Chicken Crochet Pattern lies in its simplicity. You can complete one in just a few hours, making it a great project to crochet in batches. Many crocheters enjoy creating sets of chicks in different pastel colors for springtime or Easter baskets. With its soft body, tiny wings, and bright orange beak, it’s impossible not to smile at this tiny handmade creature. Now, let’s explore how you can bring your own little chicken to life.
To make your Little Chicken Crochet Pattern, you will need a few basic materials. Start with worsted weight yarn or cotton yarn in colors such as yellow, white, or cream for the body. You will also need orange or red yarn for the beak and comb, and a small amount of black yarn or safety eyes for the face. Using the right yarn type ensures your chicken holds its shape while staying soft to the touch.
Next, grab your crochet hook, typically between sizes 2.5 mm and 3.5 mm, depending on your yarn thickness. A smaller hook will make tighter stitches, which is ideal for amigurumi to prevent stuffing from showing through. You will also need fiberfill stuffing to give your chick its cute, round form. Don’t forget a yarn needle for sewing parts together and weaving in the ends neatly.
A stitch marker is also very helpful to keep track of your rounds since amigurumi patterns are usually worked in continuous spirals. Scissors are, of course, essential for trimming yarn. Having all your materials prepared before starting ensures a smooth and enjoyable crocheting experience. With your supplies ready, it’s time to begin creating the body of your adorable chicken.
The main part of the Little Chicken Crochet Pattern starts with forming the body. Begin with a magic ring, the foundation of most amigurumi creations. Crochet six single crochets into the ring and pull tight to close. This creates a clean and secure base for your chicken. Continue to increase evenly in each round until you have a small sphere that fits comfortably in your palm.
As you crochet, make sure your stitches are even and tight. Uneven tension can cause your chicken to look lopsided. Once you’ve reached the widest part, work several rounds without increasing to build the body’s height. This gives your chick its characteristic round and plump shape. You can also slightly vary the number of rounds to make your chicken taller or shorter.
When you’re ready to close the body, begin decreasing evenly to narrow the top. Before completely closing, fill the body with fiberfill stuffing, gently shaping it with your fingers to make it smooth and firm. Then finish decreasing until the hole is closed. Secure your yarn, cut it, and weave in the end neatly. Your base chicken body is now complete and ready for the fun part—adding features.
Details bring your Little Chicken Crochet Pattern to life. Start with the wings: make two small ovals using the same yarn color as the body. You can crochet these flat or slightly stuffed, depending on your preference. Attach them symmetrically on each side of the chicken’s body using a yarn needle.
Next, create the beak with orange yarn. Chain two or three stitches, then single crochet along the chain to form a small triangle. Sew it securely to the center of the face area. A tiny red comb on top of the head adds a charming touch. This can be made with a few short chains joined with slip stitches to mimic the soft, bumpy texture of a real chicken’s comb.
For the eyes, you can use 6 mm safety eyes or simply embroider small black circles using yarn. The expression can completely change the personality of your little chicken—wide eyes make it cute and innocent, while smaller eyes give a sleepy or calm look. Take your time with placement; a well-positioned face gives character and charm to your project.
The Little Chicken Crochet Pattern is highly adaptable, allowing for endless creativity. You can experiment with different yarn colors to make a whole family of chicks—pastel pinks, blues, or even multicolored ones for fun variations. Adding small accessories such as a bow, scarf, or even a tiny crochet egg enhances the personality of your chicken.
If you’re making these as Easter gifts, consider attaching a small loop at the top so they can hang as decorations. For kids, you can stuff the chicken a bit softer and embroider the eyes for safety. Another creative idea is to turn them into keychains or bag charms by inserting a metal ring on top.
Finally, make sure to check for loose threads and secure all parts before gifting or displaying your work. Lightly roll the finished chick in your hands to smooth its shape. This not only improves the overall look but also helps evenly distribute the stuffing. Once complete, your adorable little chicken is ready to brighten up any space or bring a smile to someone’s face.
1. Is the Little Chicken Crochet Pattern suitable for beginners?
Yes! This pattern is great for beginners because it uses only basic stitches like single crochet, increase, and decrease. It’s small and quick to make, providing a fun learning experience.
2. What type of yarn works best for this pattern?
Cotton or acrylic yarns in weight category 3 or 4 work best. Cotton gives a neat look, while acrylic makes it softer and fluffier.
3. How long does it take to complete one chicken?
Depending on your skill level, it can take anywhere between one to three hours. It’s a perfect weekend or evening project.
4. Can I wash my crochet chicken?
Yes, if you’ve used washable yarn. Hand wash gently and let it air dry to maintain its shape and color.
5. Can I scale the pattern up or down?
Absolutely! Use thicker yarn and a larger hook for a bigger chicken, or thinner yarn and a smaller hook for mini versions.
6. Can I use felt pieces instead of crocheted parts for the face?
Yes, felt is a great alternative for beginners who prefer gluing or sewing small details rather than crocheting them.
The Little Chicken Crochet Pattern is a heartwarming and easy project that combines simplicity with creativity. Whether you’re making it as a toy, keychain, or decoration, this adorable amigurumi design captures the playful spirit of crochet crafting. With just a few materials and a little time, you can create something that brings smiles and warmth wherever it goes.
If you enjoyed this pattern, try experimenting with colors and accessories to make your chickens truly unique. Don’t forget to share your finished creations and leave your honest opinion and suggestions about this project. Your feedback helps improve future patterns and inspires more creative crochet ideas!


