
Crocheted house-shaped cookie for Christmas tree

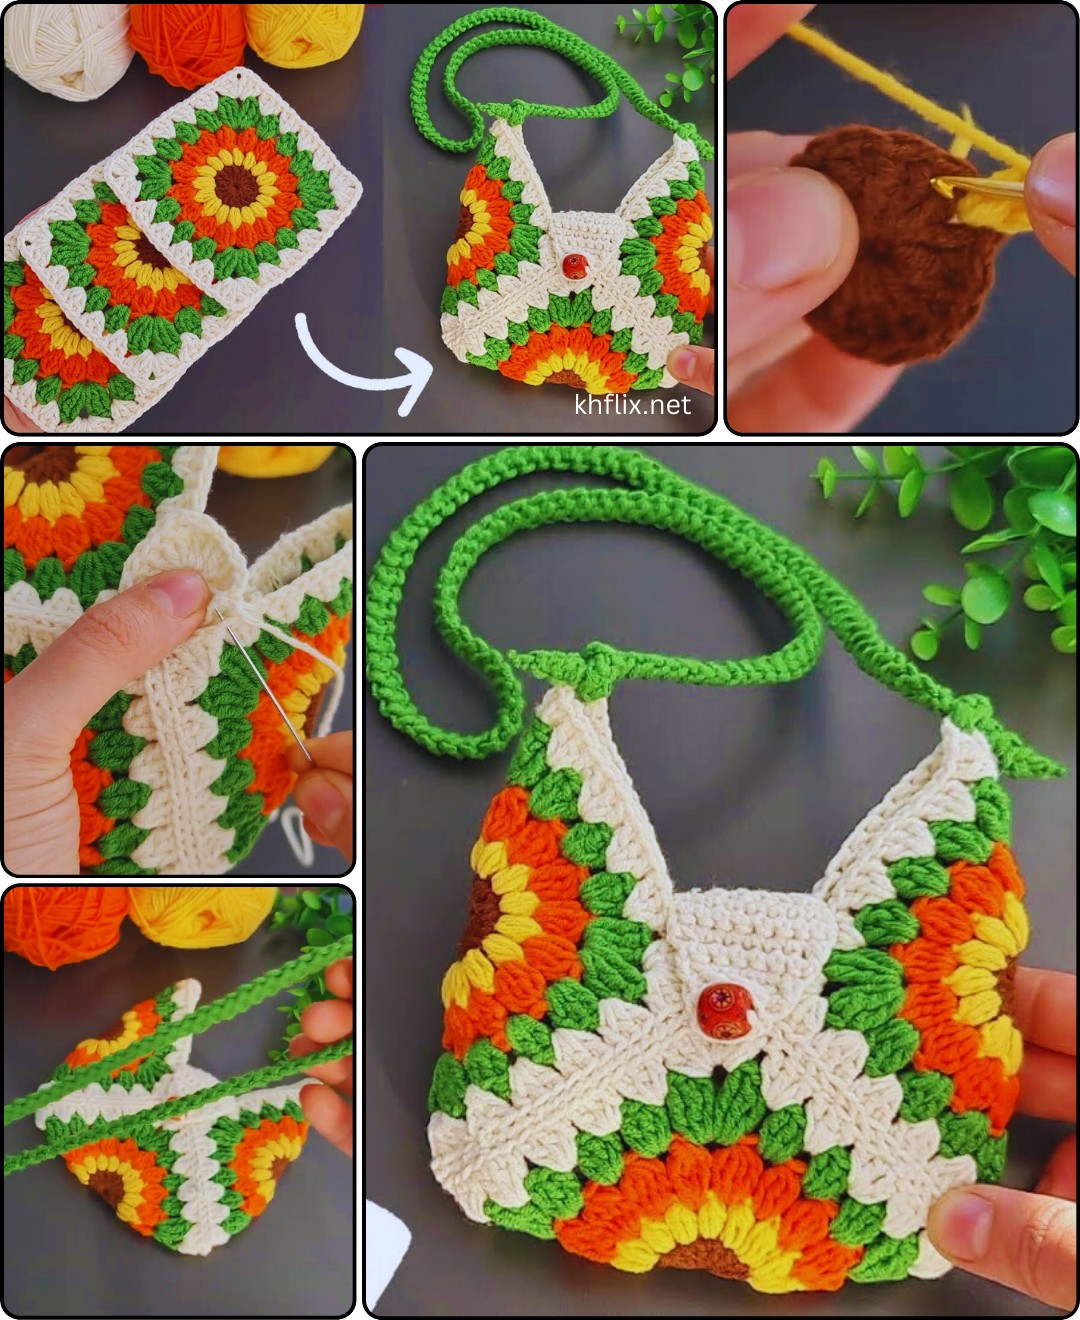
Learning how to make a crochet mini bag purse keychain is not only fun but also a creative way to express your crafting skills.
These small yet stylish accessories are perfect for personal use, gifts, or even to sell. Whether you are a beginner or an experienced crocheter, this step-by-step tutorial will guide you through the process of creating your very own mini bag that doubles as a cute keychain.
Crochet mini bags are highly versatile. They can be designed in various shapes, colors, and patterns depending on your preference.
Using quality yarn and a sturdy hook ensures that your DIY crochet bag is durable and long-lasting. Additionally, attaching a keychain ring makes it functional and convenient for carrying small essentials such as coins, lipstick, or keys.
Many people underestimate the charm of a small accessory, but a well-made crochet mini bag purse keychain can be an eye-catching addition to any outfit. Beyond being a practical item, it allows crafters to experiment with textures, stitches, and embellishments. Following a structured crochet tutorial helps achieve a professional-looking finish while keeping the process enjoyable and stress-free.
Before starting your crochet mini bag purse keychain, selecting the right materials is essential. The quality of your yarn, hook, and accessories directly affects the final outcome. For beginners, cotton yarn is recommended because it is easy to work with and provides a firm structure to the mini bag. Acrylic yarns also work well and offer a wide range of colors.
Your crochet hook size should match the yarn weight. Typically, a 3.5mm to 4.5mm hook is ideal for creating a small yet tight stitch structure for a mini bag. Tight stitches ensure that the bag holds its shape and securely contains small items. Remember, loose stitches might look pretty but reduce the bag’s durability.
Another important material is a keychain ring. Choosing a sturdy metal ring ensures that your purse keychain is functional and long-lasting. Additionally, decorative elements such as buttons, beads, or charms can enhance the aesthetic appeal of your crochet mini bag, making it unique and personalized.
Planning your color scheme is also critical. Many crafters prefer contrasting colors for the bag body and strap, while others enjoy monochromatic designs. Experimenting with different shades can result in a visually striking mini bag that stands out when attached to keys, backpacks, or handbags.
A stitch marker is another useful tool, especially if you are following a circular crochet tutorial for the mini bag. It helps you keep track of rounds and ensures consistent stitch counts. This small step can make a big difference in the quality of your final product.
Finally, don’t forget to have a yarn needle for finishing touches. Weaving in loose ends neatly enhances the professional appearance of your DIY crochet bag and prevents the yarn from unraveling. Proper preparation with the right materials sets a solid foundation for your project.
Starting your crochet mini bag purse keychain can be exciting, and following a step-by-step method ensures success. Begin with a simple foundation chain that matches the width you want for your bag. Most mini bags require a chain of 15 to 20 stitches. This forms the base of the bag and determines its size.
Next, work single crochet (sc) stitches across the chain. Single crochet is perfect for small projects because it creates a tight, durable fabric. Repeat rows until the bag reaches your desired height. The compact stitches are ideal for holding coins or other small items securely.
After completing the body, it’s time to create the flap. The flap can be as simple or decorative as you like. Many crafters use a combination of single and half-double crochet stitches to achieve a smooth yet visually appealing finish. You can also experiment with scalloped edges or picot stitches for added charm.
Adding the strap is the next step. For a purse keychain, a short strap is sufficient. Chain a length that allows easy attachment to a keyring. Secure the strap firmly to the bag body using slip stitches or by sewing it with a yarn needle. A strong strap ensures the mini bag can handle regular use without tearing.
Embellishments are optional but highly recommended. Small buttons, tiny bows, or beads can personalize your DIY crochet bag. Attach these carefully with a yarn needle to prevent loosening over time. Personalized decorations make your mini bag unique and can even reflect seasonal or holiday themes.
Finally, attach the keychain ring to the strap. Make sure it is securely fastened, as this is the part that will experience the most movement. Once everything is in place, weave in any remaining yarn ends, and your crochet mini bag purse keychain is ready for use or gifting.
When learning how to make a crochet mini bag purse keychain, beginners might feel overwhelmed, but several tips can make the process smoother. First, start with a small, simple pattern before attempting intricate designs. Smaller projects are easier to manage and boost confidence.
Keeping your tension consistent is critical. Uneven tension can make your mini bag look uneven or cause gaps in the fabric. Practicing basic stitches on scrap yarn helps maintain uniform tension, which is especially important for tight mini bag designs.
Use stitch markers to track rounds and rows. This small step prevents mistakes, especially when following circular crochet tutorials. Markers save time and reduce frustration, ensuring that your mini bag maintains its intended shape.
Don’t rush the finishing touches. Weaving in ends and securing embellishments properly is as important as the crocheting itself. A neatly finished mini bag looks professional and lasts longer. Patience in these steps pays off significantly.
Experiment with color changes gradually. Beginners may feel intimidated by multiple colors, but starting with simple two-tone designs can be fun and educational. Color changes add depth and style to your crochet mini bag without making the project overly complicated.
Lastly, watch tutorials or read through step-by-step instructions carefully before starting. Visual aids and written guides complement each other and help prevent mistakes, making the learning process enjoyable.
Once you master the basics of your crochet mini bag purse keychain, you can explore creative ideas to make each bag unique. For example, adding small pockets or compartments inside the mini bag increases functionality and style.
Customizing with different yarn textures, such as fluffy or metallic yarn, adds a trendy touch. These materials can transform a simple bag into a statement accessory. However, ensure that the chosen yarn is strong enough to support a keychain attachment.
Experimenting with patterns like stripes, chevrons, or polka dots enhances visual appeal. These simple design tweaks elevate your DIY crochet bag from a basic accessory to a fashionable piece that draws attention.
You can also personalize mini bags with initials or small crochet motifs. Adding a tiny heart, star, or flower creates a meaningful and decorative element. Such customizations make excellent gifts or party favors.
The strap can also be modified to suit different purposes. Longer straps allow the mini bag to be worn as a small crossbody, while shorter ones are perfect as keychains or zipper pulls for backpacks. Flexibility in design increases the versatility of your mini bag.
Lastly, consider seasonal themes. Crocheting mini bags in colors and motifs matching holidays or seasons adds a playful and festive element. These themed bags can be great for gift-giving or selling in markets.
Q1: How long does it take to make a crochet mini bag purse keychain?
A: Depending on your experience level and the complexity of the design, it can take anywhere from 1 to 3 hours. Beginners may take longer, while experienced crocheters may finish faster.
Q2: Can I use any type of yarn for mini bags?
A: While you can technically use any yarn, cotton or acrylic yarns are recommended for durability and structure. Avoid very loose or fuzzy yarns for better results.
Q3: Do I need advanced crochet skills to make a mini bag?
A: No, this project is beginner-friendly. Basic stitches like single crochet, slip stitch, and chain stitch are sufficient to create a functional mini bag.
Q4: How can I attach a keychain ring securely?
A: Use a short strap or chain stitched into the bag, and reinforce it by sewing multiple times with a yarn needle. This ensures the keychain ring stays attached.
Q5: Can I wash a crochet mini bag?
A: Yes, hand-washing in cold water with mild detergent is recommended. Avoid wringing or twisting to maintain the shape. Air dry flat.
Q6: How do I prevent my mini bag from losing shape?
A: Using tight, consistent stitches and sturdy yarn helps maintain shape. Adding a small lining inside the bag also provides extra support.
Creating a crochet mini bag purse keychain is a rewarding and enjoyable project. This guide showed how to select materials, follow a step-by-step crochet tutorial, incorporate tips for beginners, and explore creative customizations. By practicing these techniques, you can make a durable, stylish, and functional mini bag that reflects your personality and creativity.
We encourage you to share your thoughts, leave a sincere opinion, and suggest ideas for future projects. Your feedback helps inspire more creative crochet tutorials and encourages others to start their crafting journey.


