
Crocheted house-shaped cookie for Christmas tree

How to crochet the Suzette stitch is one of the most common searches among beginner crocheters who want a textured and elegant pattern that looks complex but is surprisingly simple to make.
The Suzette stitch is a beautiful combination of single and double crochet stitches worked alternately into the same stitch, creating a dense yet soft fabric with a delightful texture.
Whether you’re a crochet beginner or an experienced maker, mastering this stitch can elevate your projects to a new level of sophistication.
This easy Suzette stitch tutorial will walk you through every step, from understanding the basics of the stitch pattern to learning how to use it in practical projects such as scarves, blankets, dishcloths, and even garments.
By the end of this article, you’ll not only know how to crochet the Suzette stitch but also how to adapt it creatively for different crochet projects. The best part? It’s completely beginner-friendly and requires only the most basic stitches.
The Suzette stitch is also one of the most versatile crochet stitches because it adds both beauty and structure to your work. It’s dense enough for warm items like blankets but soft and flexible enough for delicate accessories. If you’ve ever wanted a stitch that looks intricate but takes minimal effort to learn, this guide on how to crochet the Suzette stitch will quickly become your favorite resource.
The Suzette stitch is a crochet pattern made by alternating single crochet (sc) and double crochet (dc) stitches into the same stitch, followed by skipping a stitch, then repeating the process. The simplicity of this sequence creates a textured pattern that resembles woven fabric but remains soft and flexible. The subtle ridges add depth to the surface, making it an excellent choice for items that need both texture and durability.
One of the best features of the Suzette stitch pattern is that it works beautifully with almost any yarn weight. Whether you use a fine cotton yarn for lightweight summer projects or a chunky wool yarn for cozy blankets, the Suzette stitch maintains its visual charm and structure. Its natural balance of firmness and stretch makes it suitable for a wide variety of creative applications.
Another great advantage of this stitch is its symmetrical look on both sides. Unlike many crochet stitches that have a clear front and back, the Suzette stitch looks nearly identical on both, making it perfect for reversible projects such as scarves and afghans. This two-sided symmetry saves you the trouble of worrying which side faces out.
Beginners often find the Suzette stitch easy to memorize since it follows a predictable rhythm. Once you learn the simple “single crochet + double crochet, skip one” pattern, your hands quickly develop muscle memory, allowing you to work smoothly and efficiently. With just a little practice, you can create evenly spaced, textured rows that look professionally made.
Finally, the Suzette stitch offers great versatility when combined with color changes. Alternating colors every few rows enhances the pattern’s woven appearance and creates beautiful visual effects. If you’re experimenting with colorwork or want to add personality to your projects, the Suzette stitch is a perfect foundation to start from.
To follow this Suzette stitch tutorial, you’ll only need a few basic crochet tools. These are standard materials that most crocheters already have in their kit, but it’s always helpful to review them before starting your project.
First, you’ll need yarn of your choice. The Suzette stitch works well with nearly any fiber, but medium-weight yarns (like worsted weight) are best for practicing. Cotton yarn produces clean stitch definition, which helps you clearly see your stitches as you work. If you prefer a softer result, acrylic or blended yarns also work beautifully.
Next, select a crochet hook that matches your yarn’s recommended size. For worsted-weight yarn, a 5mm (H-8) hook is ideal. Using a slightly larger hook will create a looser texture, while a smaller hook will make the stitch tighter and denser. Experiment to find your preferred look and feel.
You’ll also need a pair of scissors for trimming your yarn and a yarn needle (also called a tapestry needle) for weaving in the ends. These small tools make finishing your project neat and professional. A stitch marker can also be useful if you’re new to crochet and want to keep track of your rows or the first stitch of each row.
Before beginning, it’s a good idea to practice tension control. Maintaining consistent tension ensures that your Suzette stitch pattern looks even across your work. If your stitches are too tight, the fabric may become stiff; if they’re too loose, the texture will lose definition.
Lastly, make sure you have good lighting and a comfortable workspace. Crocheting the Suzette stitch requires attention to detail, especially when inserting your hook into the correct stitches. A well-lit area helps you see your stitches clearly and avoid common beginner mistakes.
Now that you have your materials ready, let’s dive into the step-by-step process of how to crochet the Suzette stitch. This section will explain each part clearly so you can follow along easily, even if you’re just starting out.
This technique is the foundation of countless crochet projects. Once you’re comfortable with this rhythm, you can modify it by changing yarn weights, colors, or even alternating row patterns for a unique twist.
Even though the Suzette stitch is beginner-friendly, there are a few tips that can help you master it faster and achieve professional results. These small adjustments make a big difference in the final look of your work.
One useful trick is to always insert your hook into the correct stitch. When working the next row, ensure that your single and double crochets go into the single crochet stitch from the previous row, not the double crochet. This maintains the signature texture of the Suzette pattern.
Another helpful tip is to maintain consistent stitch tension. Uneven tension can distort the clean texture of the Suzette stitch. If your rows start to curl or pucker, try adjusting your hook size or relaxing your grip slightly.
Blocking your finished project can also improve its overall look. Wet blocking or steam blocking helps the Suzette stitch pattern lay flat and enhances its woven appearance. This step is especially useful for larger projects like blankets or shawls.
If you enjoy experimenting, try color striping with the Suzette stitch. Changing yarn colors every few rows creates stunning striped effects. The dense stitch pattern helps the colors blend beautifully without visible gaps.
You can also play with yarn texture. Using variegated or self-striping yarns adds visual interest without changing colors manually. The Suzette stitch’s texture naturally enhances the beauty of color transitions.
Finally, don’t be afraid to practice swatches before starting a big project. Working a small sample allows you to perfect your technique, measure gauge, and experiment with hook sizes until you find the look you love most.
Once you’ve learned how to crochet the Suzette stitch, a world of creative possibilities opens up. This stitch’s soft texture and balanced structure make it perfect for many projects, from home decor to fashion accessories.
One of the most popular uses is the Suzette stitch blanket. Because the pattern is dense and cozy, it creates a warm, comforting fabric ideal for throws and baby blankets. You can use a single color for a minimalist style or alternate colors for a playful design.
Another favorite is the Suzette stitch scarf. Its reversible nature ensures your scarf looks beautiful on both sides, and the texture adds elegant detail without needing complicated patterns. Using soft yarn like merino wool or cotton blend makes it extra comfortable.
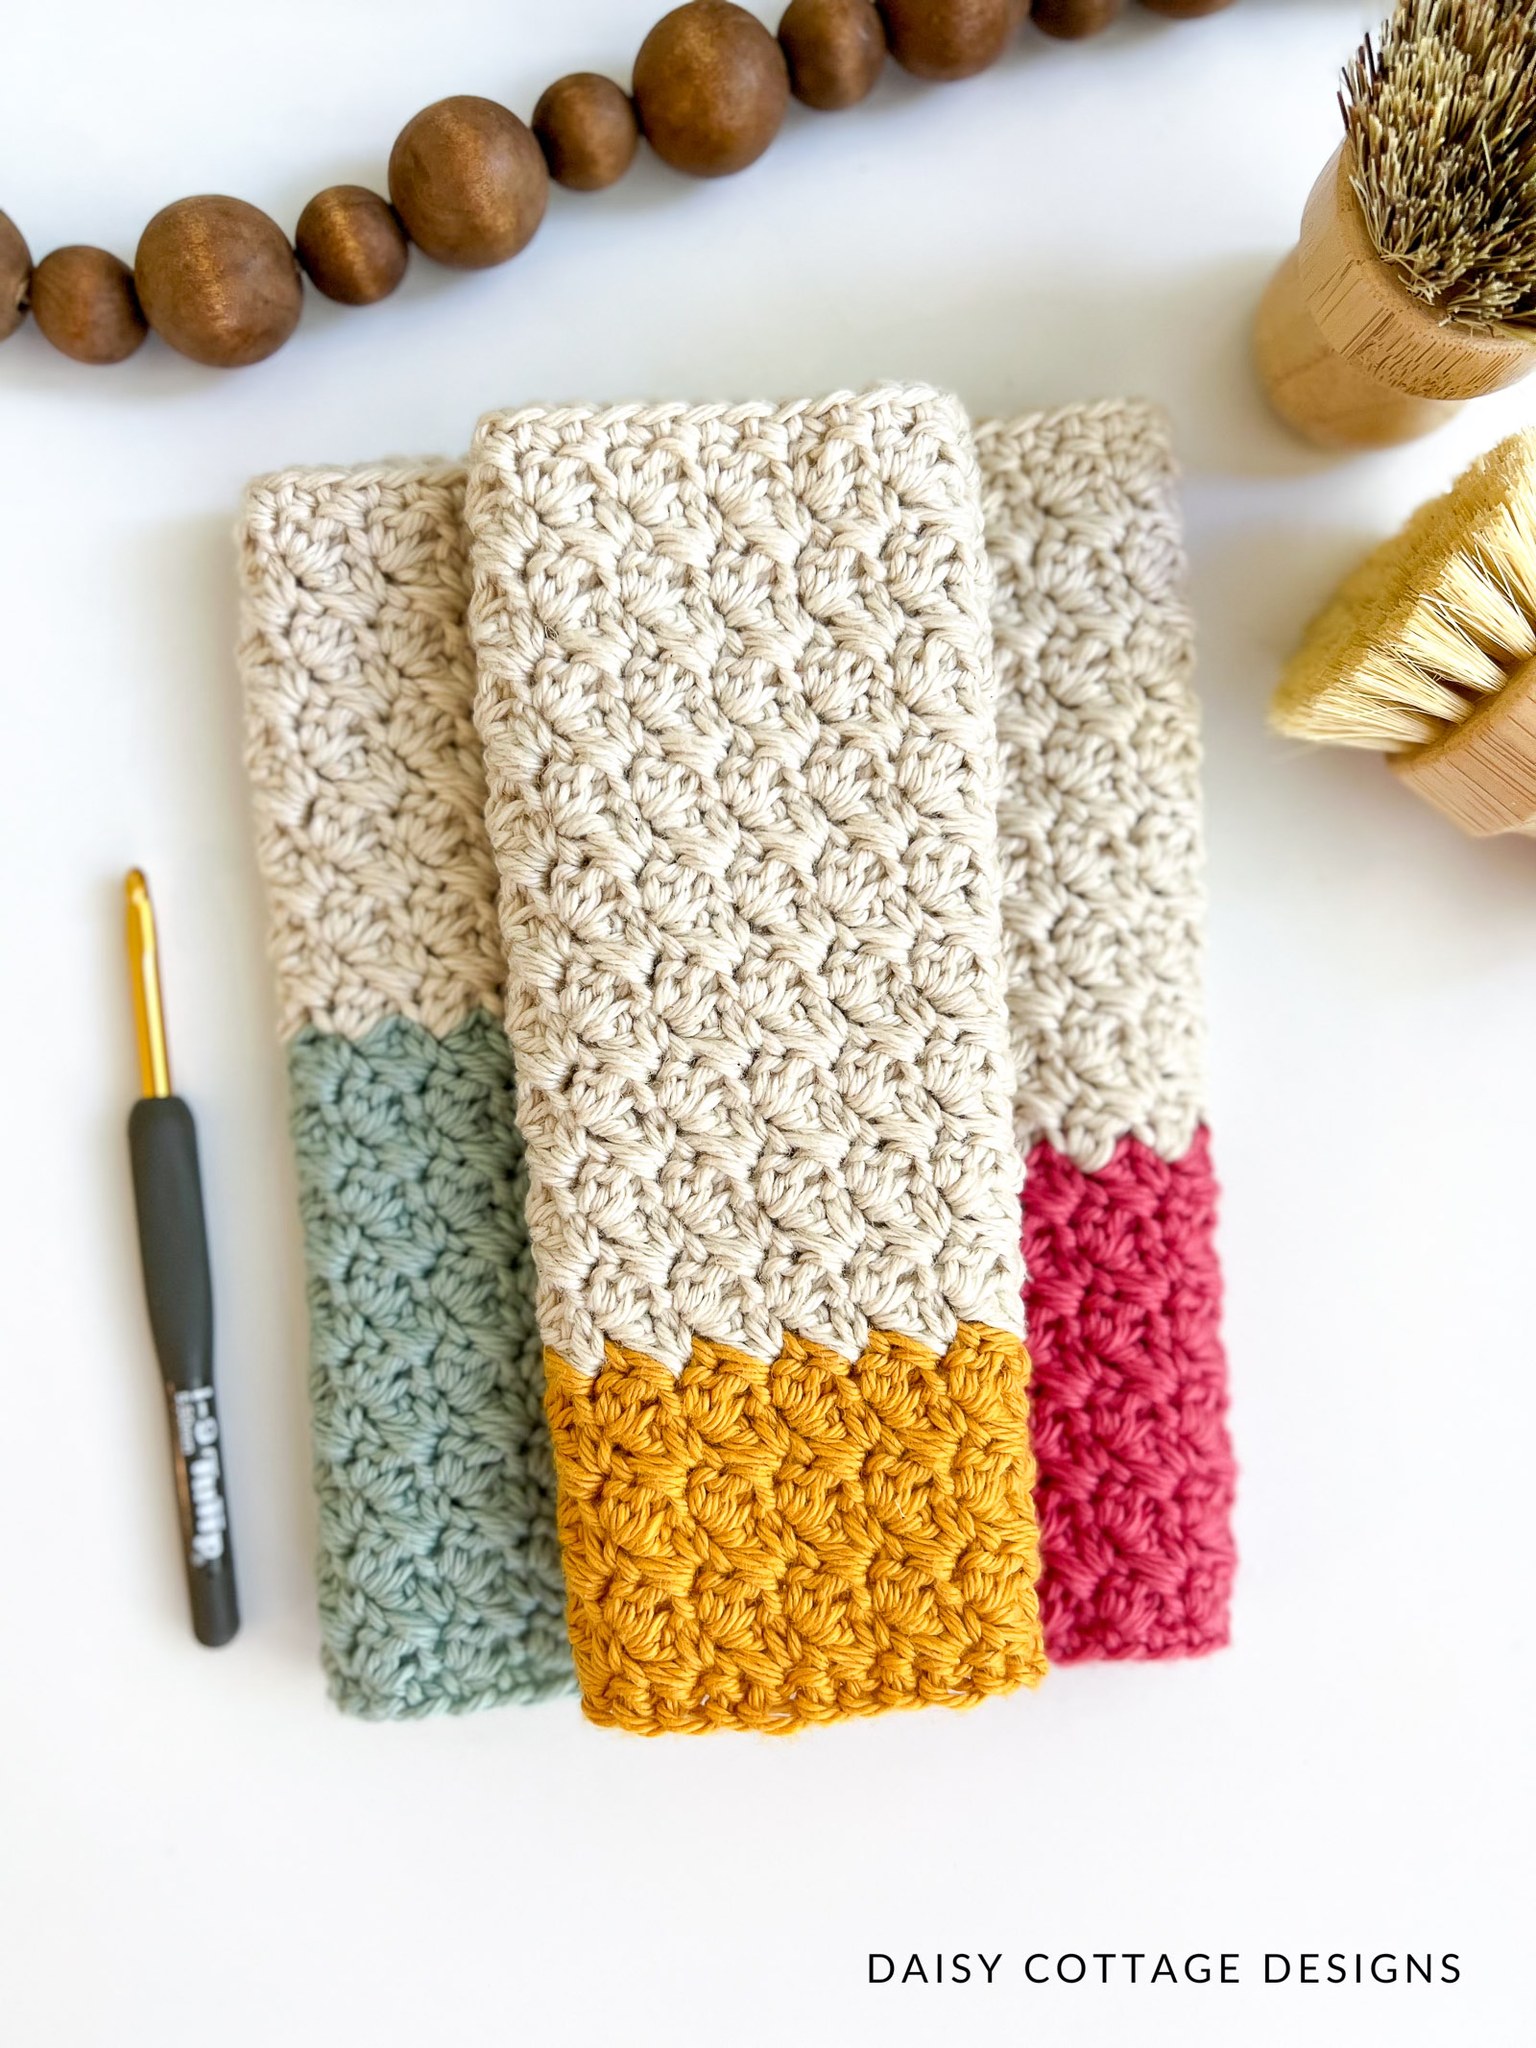
The Suzette stitch also works wonderfully for washcloths and dishcloths. The dense texture provides gentle exfoliation and excellent absorbency. Cotton yarn is best for these projects since it’s durable and easy to wash.
If you’re feeling adventurous, try using the Suzette stitch in bags or purses. Its firmness adds stability, helping your bag hold its shape. Combining it with sturdy handles or a lining gives your creation a professional finish.
You can even apply the Suzette stitch to wearables such as sweaters or cardigans. When worked in lighter yarns, the pattern becomes soft and flexible enough for garments, adding a touch of handmade charm to your wardrobe.
Finally, don’t overlook home decor items. Cushion covers, placemats, and even rugs can all benefit from the Suzette stitch’s texture. The stitch brings a handcrafted aesthetic that adds warmth and personality to your living space.
1. Is the Suzette stitch good for beginners?
Yes, absolutely! The Suzette stitch only uses single and double crochets, making it perfect for beginners who know the basics but want to create something more visually interesting.
2. What type of yarn is best for the Suzette stitch?
Medium-weight yarns like cotton or acrylic work best because they show off the texture clearly. Cotton is especially recommended for washcloths and dishcloths.
3. Can I use the Suzette stitch for blankets?
Definitely! The Suzette stitch creates a warm, cozy fabric perfect for blankets. It’s dense enough to provide comfort but still soft and flexible.
4. Why does my Suzette stitch look uneven?
Uneven tension or skipping the wrong stitch can cause this. Make sure you always work into the single crochet from the previous row, not the double crochet.
5. Can I crochet the Suzette stitch in the round?
Yes! The Suzette stitch works beautifully in the round for projects like coasters, baskets, or even bags. Just adjust your starting chain accordingly.
Learning how to crochet the Suzette stitch opens up endless creative opportunities for crafters of all levels. Its simple yet elegant texture makes it one of the most rewarding stitches to master. From cozy blankets and stylish scarves to functional dishcloths and bags, the Suzette stitch adds beauty, texture, and charm to every project.
We’ve explored what the Suzette stitch is, the materials you need, step-by-step instructions, expert tips, and creative ideas for using it. Now it’s your turn to pick up your hook and yarn and start experimenting.
What do you think of this Suzette stitch tutorial? Leave your honest opinion and share your suggestions — your feedback helps improve future crochet guides for everyone!


