
Crocheted house-shaped cookie for Christmas tree

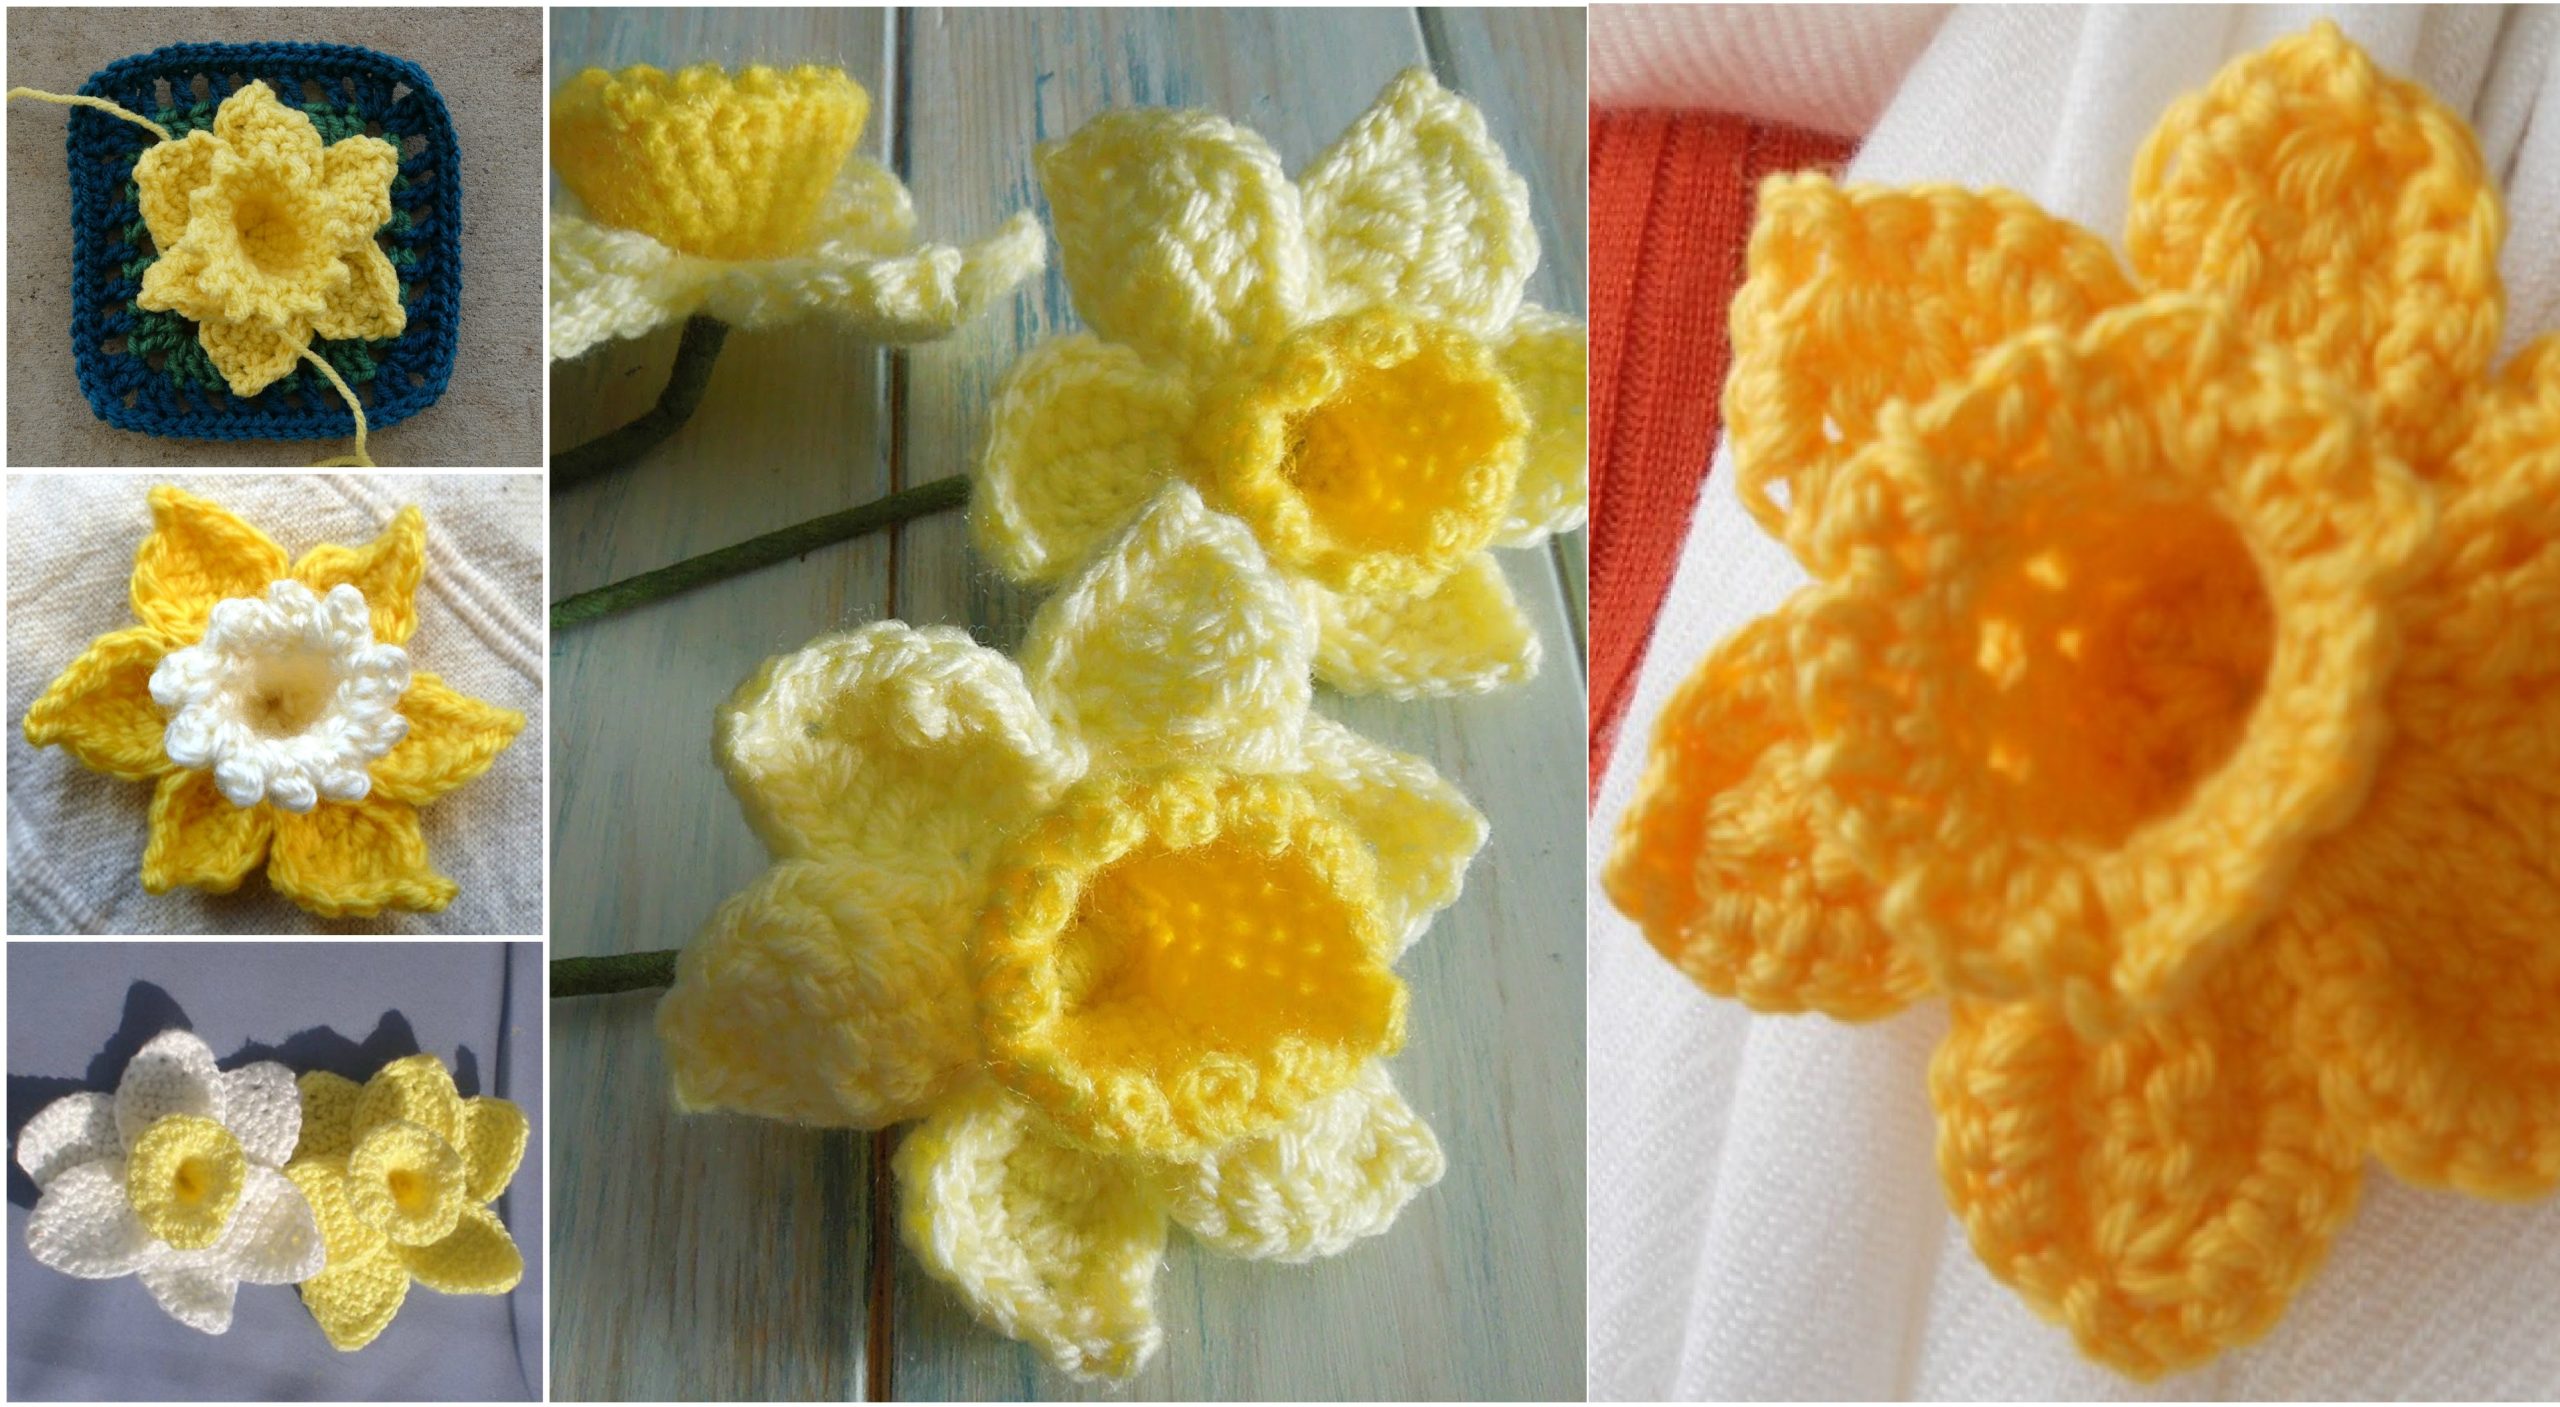
Learning how to crochet a daffodil is a joyful way to bring the beauty of spring into your home. This project allows you to transform simple yarn into a stunning crochet flower that can brighten any space.
Whether you want to create floral arrangements, embellish clothing, or design seasonal decorations, mastering the crochet daffodil gives you endless creative opportunities.
Each petal, stitch, and texture reflects the unique charm of the real daffodil, making it one of the most beloved flowers to replicate through crochet.
A crochet daffodil is a small project that can yield big results. As a handmade decoration, it adds color and character to home décor, gift wrapping, and personal accessories.
Many crafters enjoy this type of easy crochet project because it combines simplicity with artistry. Unlike large-scale crochet patterns, flowers are quick to make and require minimal materials, making them perfect for those short on time but full of creativity. Even with basic crochet skills, you can produce a lifelike daffodil that looks as elegant as nature itself.
For beginners, working on a beginner crochet pattern like this daffodil is an excellent way to practice fundamental techniques such as chain stitches, slip stitches, and double crochet. As you progress, you’ll gain confidence and rhythm, discovering how different stitch combinations bring your daffodil pattern to life. With the right yarn, color, and finishing touches, your crochet flower will stand out beautifully, whether used as an ornament, brooch, or part of a larger bouquet.
Before starting your crochet daffodil, gather all the necessary tools and materials to ensure a smooth process. You’ll need lightweight yarn, a suitable crochet hook (usually between 2.5mm and 3.5mm for fine details), scissors, and a yarn needle. Choose high-quality yarn with a soft texture to make your crochet flower look elegant and lifelike. Cotton yarn is ideal for structure, while acrylic yarn provides flexibility and shine.
Color choice plays a vital role in capturing the essence of a daffodil. Classic yellow with an orange or darker yellow trumpet center creates the traditional look, but you can experiment with white, cream, or pastel shades for a more personalized touch. The combination of bright tones makes the handmade decoration pop beautifully in any setting.
If you are new to crocheting, familiarize yourself with the beginner crochet pattern you plan to follow before starting. Reading through the entire pattern helps you anticipate steps and understand abbreviations, such as ch (chain), sc (single crochet), dc (double crochet), and sl st (slip stitch). This preparation avoids confusion once you begin stitching your easy crochet project.
It’s also helpful to create a small swatch to test your yarn tension and hook size. This ensures your crochet daffodil petals maintain their intended shape and firmness. Proper tension keeps the flower from curling or becoming too loose. A well-balanced texture gives your final daffodil pattern a professional finish.
Make sure your workspace is well-lit and organized. Crocheting small elements like flower petals requires good visibility and precision. Keep your tools within easy reach, and consider using stitch markers to track your rounds. Comfort is also essential—choose a relaxed seating position to enjoy the meditative rhythm of your crochet flower creation.
Lastly, remember that patience is part of the process. A handmade decoration crafted with care and attention always stands out. Enjoy each step as your yarn transforms into a stunning, lifelike crochet daffodil that radiates warmth and charm.
The petals are the most recognizable and delicate part of the crochet daffodil. Typically, the flower features six petals arranged around a central trumpet. Begin by making a foundation chain and working your stitches into it to form elongated petal shapes. Each petal is built using basic crochet stitches, making this an easy crochet project suitable for all skill levels.
Start each petal with a small loop or magic ring, which forms the base. Then work upward with a combination of double crochets and half-double crochets to shape the petal’s curves. The use of simple stitches ensures the beginner crochet pattern remains accessible while still creating a visually appealing texture. Repeating this process for all six petals brings symmetry and balance to your crochet flower.
Once you’ve made all the petals, join them together at the base with slip stitches or by sewing them carefully with a yarn needle. Consistent joining keeps the petals evenly spaced, forming the classic daffodil shape. This step showcases the beauty of handmade craftsmanship, turning yarn into an elegant handmade decoration.
For added realism, you can lightly shape the petals by blocking them. Pin each petal on a soft surface, spray it with water, and allow it to dry. Blocking helps define the structure and makes your crochet daffodil look more natural and refined. The extra effort enhances the authenticity of your finished flower.
Experimenting with petal size and color variations can create unique results. Try using lighter or darker shades of yellow for depth, or add a hint of orange to the tips for a gradient effect. Such subtle details elevate your daffodil pattern, giving your crochet flower a personalized artistic flair.
Finally, set your completed petals aside while preparing to crochet the central trumpet—the most distinctive part of the crochet daffodil. With the petals done, you’ve already created the foundation for a stunning handmade decoration full of texture and charm.
The trumpet-shaped center, also known as the corona, gives the crochet daffodil its signature look. This part of the daffodil pattern adds depth and dimension, creating the flower’s iconic silhouette. Begin by forming a small circular base using chain stitches joined with a slip stitch to create a ring.
From this foundation, work in rounds using single and double crochet stitches. Gradually increase stitches as you go to form a flared, trumpet-like shape. The combination of stitch increases and careful tension control helps achieve the gentle outward curve characteristic of real daffodils. This portion is a fun and rewarding part of any easy crochet project, as you watch the flower’s personality come to life.
Once the trumpet is shaped, add texture by alternating stitch heights. You can create subtle ridges or frills by using front post or back post stitches. This small detail makes your crochet flower look dynamic and realistic, capturing the essence of nature’s elegance.
After finishing the trumpet, attach it securely to the center of the petals. Use a yarn needle or crochet directly through both layers to connect them. Ensuring a tight, even join helps maintain the flower’s structure, keeping it sturdy and well-balanced. Proper joining is especially important if you plan to use the handmade decoration frequently, such as in bouquets or wall art.
To add more charm, consider incorporating a contrasting color for the trumpet’s edge, such as a deeper orange or soft pink. This touch of color enhances the visual impact of your crochet daffodil, giving it a realistic and vibrant appearance. Color blending can elevate even a beginner crochet pattern to look professional.
Once completed, fluff out the petals gently and adjust the trumpet’s shape by hand. This final shaping step ensures your crochet flower stands beautifully and naturally, making it perfect for any decorative purpose or as part of a larger floral arrangement.
With all parts complete, it’s time to assemble and enjoy your crochet daffodil. Begin by checking that each piece—petals, trumpet, and stem (if included)—is well-shaped and securely fastened. Use a small amount of yarn or a matching thread to stitch them together firmly. This assembly process transforms your separate elements into a cohesive, elegant handmade decoration.
For those who wish to add a stem, use green yarn to crochet a simple tube or cover a wire for support. This step gives your crochet flower a lifelike finish and makes it easier to display in a vase or bouquet. Stems can also be flexible, allowing you to position your daffodil creatively within arrangements.
Once assembled, your crochet daffodil can be used in countless ways. Attach it to hair accessories, hats, or scarves for a touch of springtime flair. Use multiple flowers to create a bright garland, wreath, or even a unique table centerpiece. The possibilities for using this easy crochet project are endless.
Your daffodil pattern can also serve as a foundation for experimenting with other flowers. By altering petal shapes, sizes, and stitch combinations, you can expand your floral crochet collection. Practicing with daffodils helps refine your technique, making more advanced crochet flower projects easier and more enjoyable.
For gifting purposes, consider attaching a pin or magnet to the back of your finished flower. This turns your handmade decoration into a thoughtful present suitable for birthdays, Mother’s Day, or any celebration. Personalized touches like these make your creations even more meaningful.
Finally, take pride in your work. Each crochet daffodil reflects patience, creativity, and craftsmanship. Whether displayed at home or gifted to someone special, this small but stunning crochet flower radiates warmth and handmade charm.
Q1: Is the crochet daffodil suitable for beginners?
A1: Yes! It’s a wonderful beginner crochet pattern that helps you practice basic stitches while creating a beautiful result.
Q2: What yarn works best for daffodil patterns?
A2: Lightweight cotton or acrylic yarn works best. Cotton holds its shape well, while acrylic adds flexibility and shine.
Q3: Can I make a larger daffodil?
A3: Absolutely. Use thicker yarn and a larger hook size to increase the overall flower size without changing the daffodil pattern.
Q4: How can I make my crochet flower look more realistic?
A4: Block your petals, use gradient colors, and slightly shape the trumpet after assembling your crochet daffodil.
Q5: Can I use the crochet daffodil for wearable accessories?
A5: Yes! Attach a pin or clip to the back to create brooches, hair accessories, or hat embellishments.
Q6: How long does it take to make one crochet daffodil?
A6: On average, an easy crochet project like this takes between 30 minutes to 1 hour, depending on your skill level.
Making a crochet daffodil is a joyful, rewarding process that brings creativity and color into your life. By following a clear daffodil pattern, choosing the right materials, and mastering basic stitches, you can create a stunning crochet flower that looks delicate yet durable. Whether you’re a beginner or an experienced crafter, this easy crochet project offers both relaxation and satisfaction.
Use your finished daffodils as handmade decorations, thoughtful gifts, or charming additions to your crochet collection. Every stitch tells a story of care and craftsmanship.
If this guide inspired you, share your honest thoughts, tips, and ideas for future tutorials. Your feedback helps keep the crochet community blooming beautifully. 🌼


