
Crocheted house-shaped cookie for Christmas tree

Cute Cat Hair Clip – Crochet Pattern is an adorable and fun project perfect for adding a handmade touch to your hair accessories collection. This crochet pattern allows you to craft tiny, charming cat motifs that can be attached to clips, headbands, or hair ties.
Whether you are making it for yourself, as a gift for a friend, or even to sell, this cute crochet project is quick, enjoyable, and highly customizable. Handmade hair accessories like these not only bring personality to your outfits but also allow you to practice and improve your crochet skills.
Creating a cute cat hair clip is suitable for crocheters of all skill levels. The pattern uses basic crochet stitches such as single crochet, half double crochet, and slip stitches, making it accessible even for beginners.
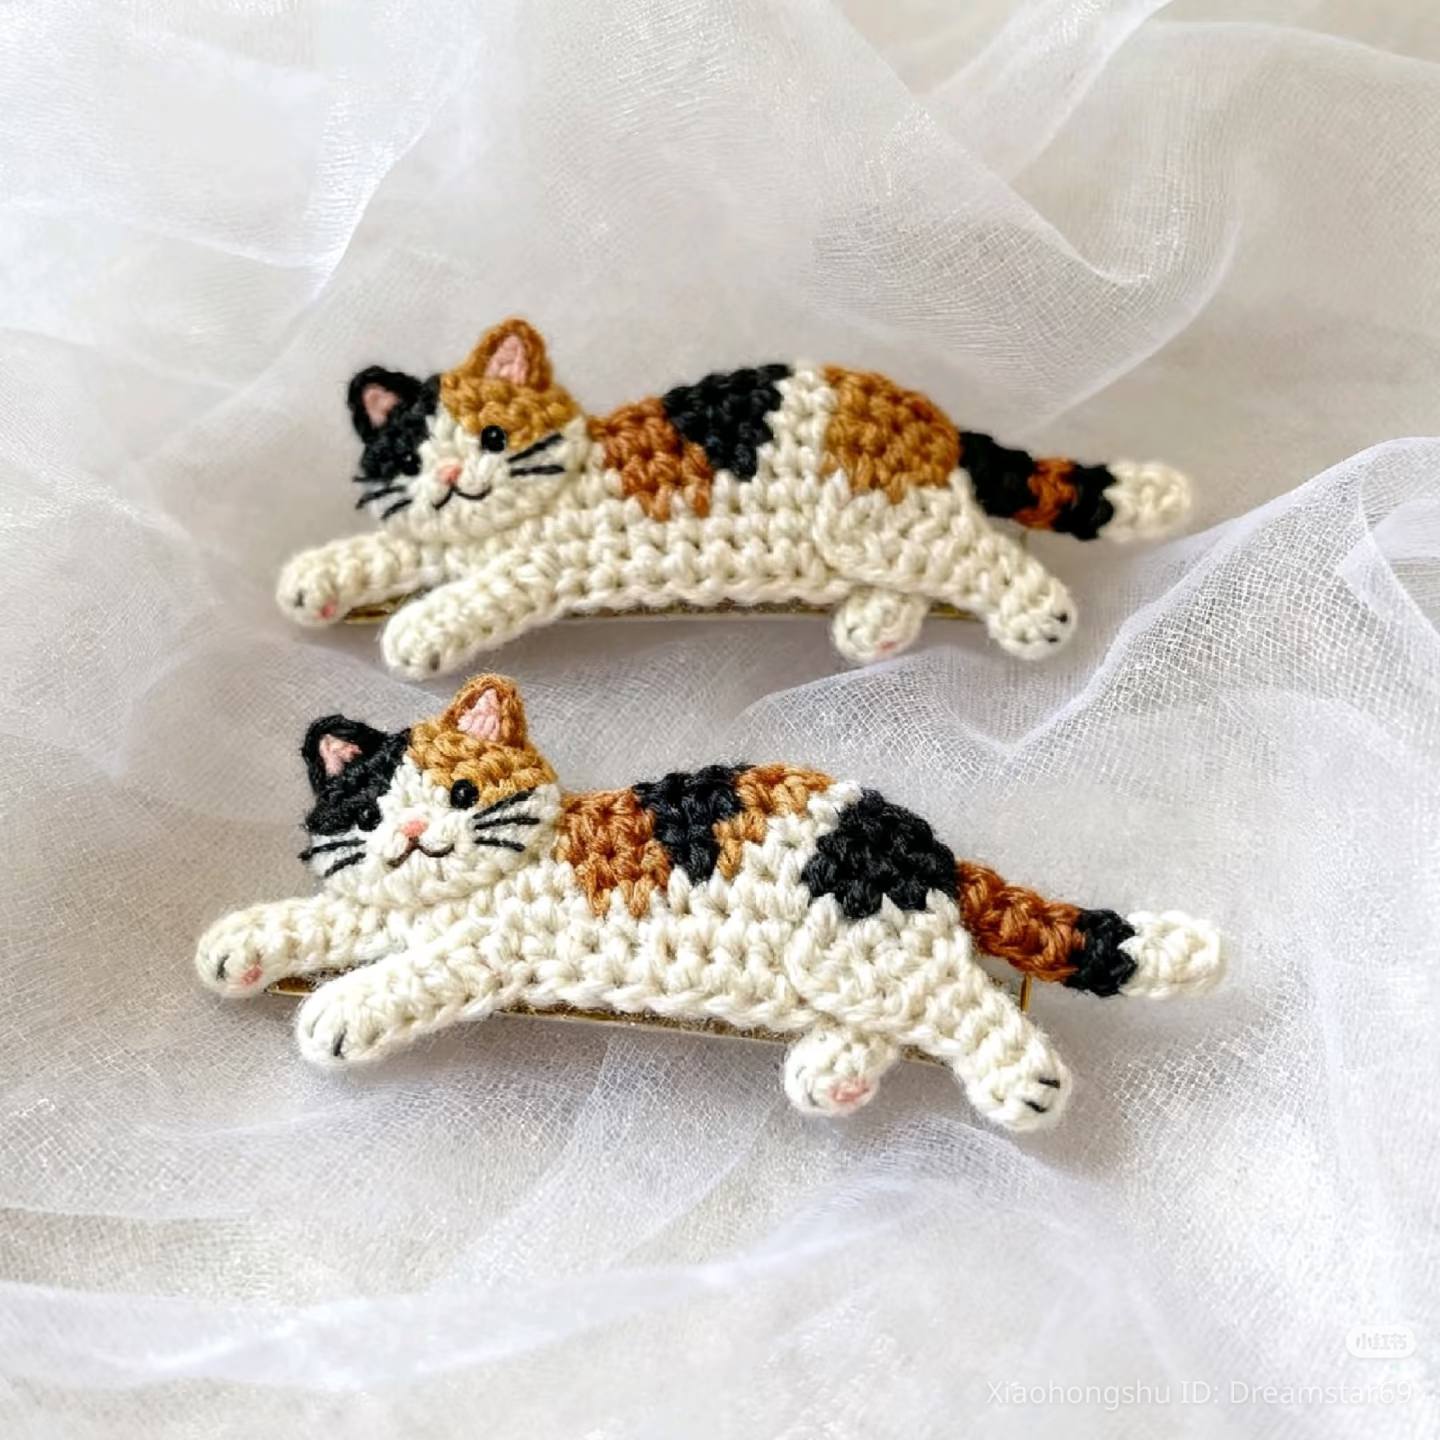
Despite its simplicity, the finished product is impressive, with a three-dimensional cat face, ears, and expressive features. You can choose colors, add tiny embroidery details for eyes and whiskers, or even experiment with different sizes. Each clip can be a unique creation reflecting your personal style.
Another advantage of making a Cute Cat Hair Clip – Crochet Pattern is that it’s compact and uses small amounts of yarn, making it perfect for leftover scraps. This eco-friendly approach allows you to reduce waste while creating something practical and delightful. Additionally, handmade hair accessories are thoughtful gifts for birthdays, holidays, or special occasions. In this article, we’ll cover everything from materials and step-by-step instructions to creative variations and expert tips for making the cutest crochet cat clips.
Before starting your Cute Cat Hair Clip – Crochet Pattern, gather the following materials. These are basic and easy to find at any craft store.
Start with worsted weight or cotton yarn. You can choose neutral shades like gray, white, or black for classic cats or vibrant colors for a playful touch. Consider using soft yarn that’s gentle to touch, especially if the clips are for children.
Next, select the appropriate crochet hook. A 2.5 mm to 3.5 mm hook works well for small amigurumi pieces like these cat faces. Using a slightly smaller hook than recommended helps keep stitches tight and prevents stuffing from showing through.
You’ll need a yarn needle to weave in ends and attach small parts. Scissors and stitch markers are also helpful to track rounds or mark stitch positions.
Optional materials include small safety eyes, embroidery thread for whiskers, or tiny beads to decorate the cat face. For assembling the clip, you’ll need alligator clips or hairpins and a small amount of hot glue or yarn stitching to secure the pieces.
Finally, prepare a comfortable workspace with good lighting. Organizing your materials in advance makes the project more enjoyable and ensures smooth progress when working on your cute cat hair clips.
Follow this step-by-step guide to create your Cute Cat Hair Clip – Crochet Pattern. The pattern is simple but produces a detailed miniature cat face.
Step 1: Begin with a magic ring and make 6 single crochets inside. Pull the ring tight to form the center.
Step 2: Round 2 – Increase in each stitch to get 12 stitches. Round 3 – 1 single crochet, increase around (18 stitches). This forms the base of the cat face.
Step 3: Crochet 1 single crochet in each stitch for two rounds to build thickness. Then, decrease gradually with single crochet two together around until you get a slightly rounded shape.
Step 4: For the ears, make two small triangles separately using single crochets, half double crochets, and slip stitches. Attach them to the top of the cat face securely with yarn needle stitching.
Step 5: Add facial details. Use embroidery thread to stitch eyes, nose, and whiskers. You can also attach small safety eyes for a realistic effect.
Step 6: Assemble your hair clip. Use hot glue or stitch the cat face onto an alligator clip or hairpin. Make sure it is firmly attached for durability. Your cute cat hair clip is now ready to use or gift.
Once you’ve made your first Cute Cat Hair Clip – Crochet Pattern, there are countless ways to customize it.
Try different colors and patterns. You can make calico, striped, or even rainbow cats to match different outfits or themes.
Experiment with facial expressions. Happy, sleepy, or surprised expressions make each clip unique and fun.
Add accessories like tiny bows, flowers, or ribbons to give your cat character and style.
Play with sizes. Smaller faces are cute for delicate clips, while slightly larger ones can be bold statement pieces.
Use sparkly yarn or metallic embroidery thread to add a festive or whimsical touch. Perfect for holidays or special occasions.
Consider creating matching sets for siblings, friends, or even themed gifts for parties. Sets can include multiple cats with different colors or expressions.
To ensure your Cute Cat Hair Clip – Crochet Pattern looks professional and lasts, follow these expert tips.
Keep tight and even stitches so the cat face maintains its shape and does not flatten.
Use a small hook for amigurumi parts to prevent stuffing from showing through the stitches.
Securely attach the ears and clip. Reinforce with stitching and glue if needed to prevent detachment.
Use high-quality yarn to avoid pilling or fraying, especially for pieces that will be handled frequently.
When embroidering facial details, keep stitches neat and proportional. Small eyes and whiskers look cute but need careful placement.
Experiment and practice. The more you make, the more confident you’ll become in shaping the cat face and adding unique personal touches.
Q1: Is this pattern suitable for beginners?
A: Yes! The Cute Cat Hair Clip – Crochet Pattern uses basic stitches and simple shapes, making it ideal for beginners.
Q2: Can I use different yarn types?
A: Yes. Cotton or acrylic yarn works best. Cotton is soft and durable, while acrylic allows for more color variety.
Q3: How do I attach the cat to a hair clip?
A: Use hot glue or stitch securely with yarn. Make sure it’s firmly attached to avoid slipping.
Q4: Can I make multiple cats in different sizes?
A: Absolutely. Adjust the number of rounds or stitches to make smaller or larger cat faces.
Q5: Are these clips safe for children?
A: Yes, if you securely attach small parts and avoid beads or embellishments that could be a choking hazard for young children.
Q6: How long does it take to make one clip?
A: Typically 1–2 hours depending on your skill level and embellishments added.
The Cute Cat Hair Clip – Crochet Pattern is a charming and versatile project perfect for handmade gifts, personal use, or even small-scale selling. From gathering materials to stitching and assembling, this guide provides everything you need to make a delightful miniature cat clip. With endless customization options, you can create unique accessories that reflect your personal style or the recipient’s personality.
Now that you’ve learned how to make your own cute cat hair clips, start experimenting with colors, expressions, and embellishments. Share your honest opinions and suggestions — your feedback can inspire other crocheters to try this adorable project!


