
Crocheted house-shaped cookie for Christmas tree

The Crochet Pencil Scarf – Pattern is a fun, creative, and practical project that combines whimsy with fashion. Designed to look like a giant pencil, this scarf is perfect for school enthusiasts, teachers, students, or anyone who loves unique and playful accessories.
Using simple crochet stitches, this pattern transforms soft yarn into a statement piece that is both functional and visually striking.
Whether you’re a beginner or an experienced crocheter, the Crochet Pencil Scarf – Pattern offers an enjoyable project that can be customized with your favorite colors.
Creating a Crochet Pencil Scarf – Pattern is more than just making a scarf—it’s about adding personality and creativity to your wardrobe.
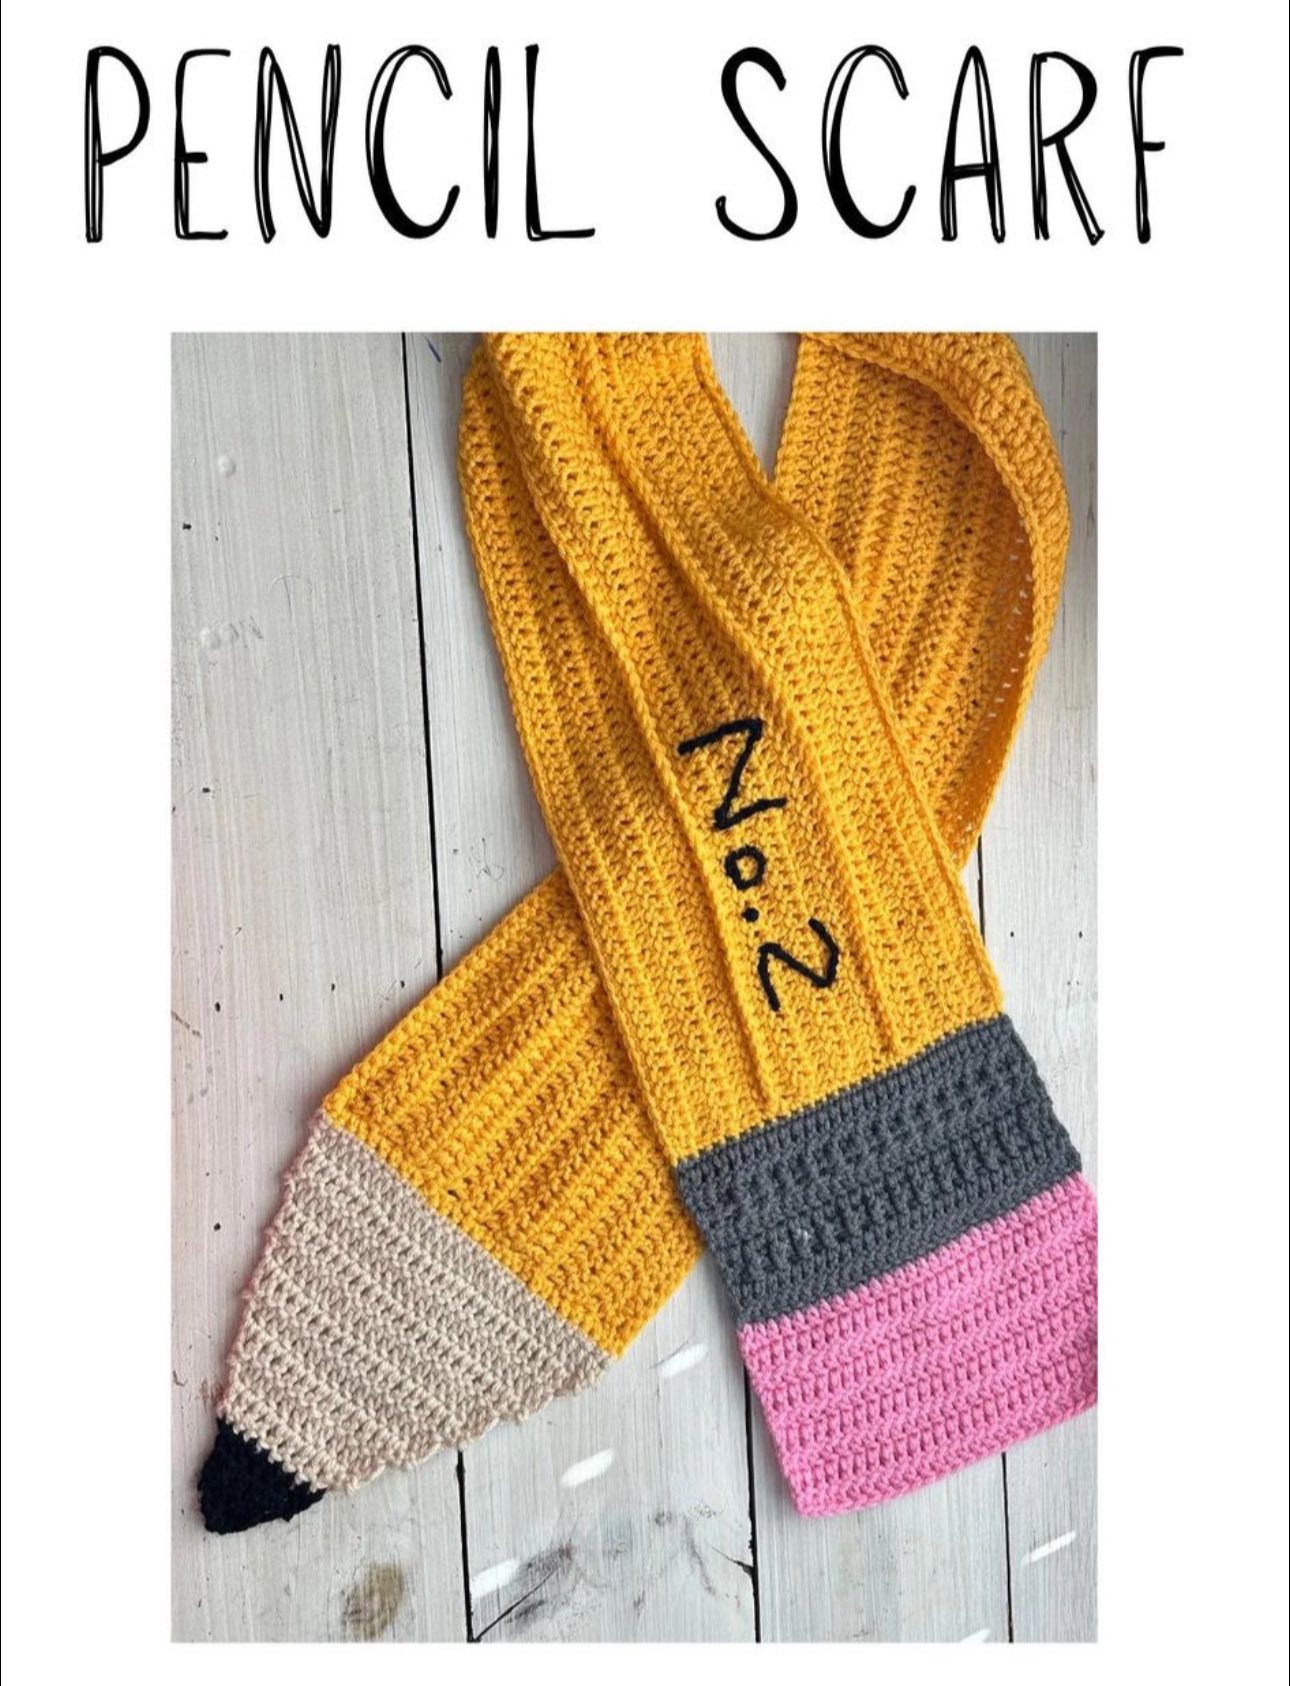
The pencil design, complete with a sharpened tip and eraser, allows for endless possibilities in color choice and detailing. Each section of the pencil can be made in different hues, adding depth and dimension to the scarf. This pattern not only keeps you warm but also makes a playful statement wherever you go.
The Crochet Pencil Scarf – Pattern is also ideal as a handmade gift. Teachers, students, or crafty friends will appreciate the thought and effort behind a unique item like this. In this guide, we’ll cover all aspects of creating your pencil scarf, including choosing yarn, reading crochet patterns, assembling the scarf, adding finishing touches, and customizing it to your personal taste.
Selecting the right yarn is key to a successful Crochet Pencil Scarf – Pattern. Soft, durable yarns like acrylic or cotton blends work best because they hold shape well and are comfortable against the skin. Choose yarn in four main colors to mimic a pencil: yellow for the body, light brown for the wooden tip, pink for the eraser, and gray for the metal ferrule.
You’ll need a crochet hook suitable for your chosen yarn weight, a tapestry needle for weaving in ends, and stitch markers if desired. Pre-washing the yarn is recommended for projects that will be frequently worn, ensuring no shrinkage or color bleeding occurs.
When selecting yarn, consider textures as well. Smooth, worsted-weight yarn provides clean lines for the pencil’s segments, while slightly fuzzy yarn can add a cozy, playful texture to the scarf. You can also experiment with variegated yarns to give a marbled or watercolor effect to the pencil body, adding depth and interest to your Crochet Pencil Scarf – Pattern.
Finally, ensure that you have enough yarn for each color segment, especially the main yellow body, as it will be the longest part of the scarf. Planning your yarn usage carefully helps prevent running out mid-project and maintains consistency in stitch tension.
The Crochet Pencil Scarf – Pattern primarily uses basic crochet stitches, making it accessible to beginners while still offering a visually appealing result. Common stitches include chain (ch), single crochet (sc), half double crochet (hdc), and slip stitch (sl st). These simple techniques create a neat and uniform texture suitable for the pencil design.
For the pencil tip, you may use increases and decreases to create a tapered effect, giving it a realistic triangular shape. The eraser section is typically crocheted in rounds or rows depending on your preferred method. Working in color blocks helps distinguish each part of the pencil, creating a visually striking accessory.
It’s important to maintain consistent tension throughout your work. Uneven tension can make the scarf lopsided or cause certain sections to appear too tight or loose. Using stitch markers and counting stitches regularly ensures accuracy and helps create clean lines in your Crochet Pencil Scarf – Pattern.
Adding texture stitches, like front post or back post single crochets, is optional but can enhance the pencil’s look by simulating the ridges found on real pencils. These subtle touches make your scarf more unique and playful.
Lastly, familiarize yourself with color changing techniques. Clean transitions between yarn colors are crucial for a realistic pencil appearance, especially when moving from the yellow body to the tip or ferrule sections. Practicing these techniques beforehand ensures a polished final scarf.
To assemble your Crochet Pencil Scarf – Pattern, start by creating the main yellow section, which forms the pencil’s body. Work in rows until the desired length is achieved, ensuring uniform stitch tension. Measure periodically to maintain consistency, especially if the scarf will be worn by someone specific.
Next, crochet the sharpened tip using brown and light beige yarn. Incorporate increases to form the triangular shape, tapering the tip as desired. Attach this section securely to one end of the yellow body using a tapestry needle and whipstitch method, ensuring no gaps remain.
The eraser section is made separately with pink yarn and a gray ferrule to simulate the metal band. Crochet in rounds or rows, depending on the design, and attach it firmly to the opposite end of the yellow body. Check alignment and proportions carefully—an evenly assembled scarf looks professional and polished.
Weaving in all loose ends with a tapestry needle ensures a clean, finished look. Press or gently block the scarf if needed to shape the sections correctly, maintaining a uniform width and straight edges. This final step makes the Crochet Pencil Scarf – Pattern both functional and visually appealing.
Optional embellishments include adding tiny embroidered letters or lines to mimic brand names on pencils. You can also crochet small accessory pockets or loops along the scarf for a playful, interactive design.
The Crochet Pencil Scarf – Pattern offers plenty of room for creativity and customization. You can adjust the scarf length for adults or children, change color schemes to represent colored pencils, or even create a set of multiple pencil scarves for fun, vibrant variety.
Experiment with textures by using yarns with different finishes, like metallic or glitter-infused strands, to give your pencil scarf a unique sparkle. You can also try adding fringes or tassels at the ends for a playful look.
Personalization is another great option. Use embroidered initials, favorite colors, or small appliqués to make each scarf unique. Combining solid and variegated yarns allows for a modern twist while maintaining the whimsical charm of the pencil design.
Crochet techniques like bobble stitches, puff stitches, or front post designs can add dimension, simulating the grooves of a real pencil. Even subtle variations in stitch patterns along the pencil’s body can create an eye-catching, textured appearance.
Finally, consider using eco-friendly or recycled yarns. This adds a sustainable touch to your Crochet Pencil Scarf – Pattern, making it not only stylish but environmentally conscious.
1. Is the Crochet Pencil Scarf Pattern suitable for beginners?
Yes, the pattern uses basic crochet stitches like single crochet, half double crochet, and slip stitch, making it accessible to beginners with some practice.
2. What yarn works best for this scarf?
Medium-weight cotton or acrylic yarn works best for structure and comfort. Use yellow, brown, pink, and gray for the pencil’s body, tip, eraser, and ferrule.
3. How long should the scarf be?
The standard length is about 60 inches, but you can adjust based on personal preference or intended wearer.
4. Can I make a colored pencil version?
Absolutely! Simply change the yellow body section to your favorite color, like red, blue, or green, for a playful variation.
5. How do I attach the pencil tip and eraser securely?
Use a tapestry needle and whipstitch the sections to the scarf body, ensuring tight, even stitches and no gaps.
6. Can I wash the crochet pencil scarf?
Yes, hand wash in cold water and lay flat to dry to maintain the scarf’s shape and color.
7. Can I make this as a gift?
Definitely! This whimsical, handmade scarf makes a perfect gift for teachers, students, or crochet enthusiasts.
The Crochet Pencil Scarf – Pattern is a fun, practical, and visually appealing project that combines creativity and function. Its unique pencil design allows for endless customization with colors, textures, and embellishments, making it a perfect handmade accessory for yourself or as a gift.
Following this guide, you can create a professional-looking scarf with clean lines, secure attachments, and a polished finish. Whether you stick to classic yellow or explore playful color variations, the Crochet Pencil Scarf – Pattern is a delightful way to showcase your crochet skills.
We encourage you to try this pattern, share your results, and leave your honest opinions and suggestions. Your feedback helps inspire others to explore creative crochet projects and keeps the art of handmade accessories alive and thriving.


