
Crocheted house-shaped cookie for Christmas tree

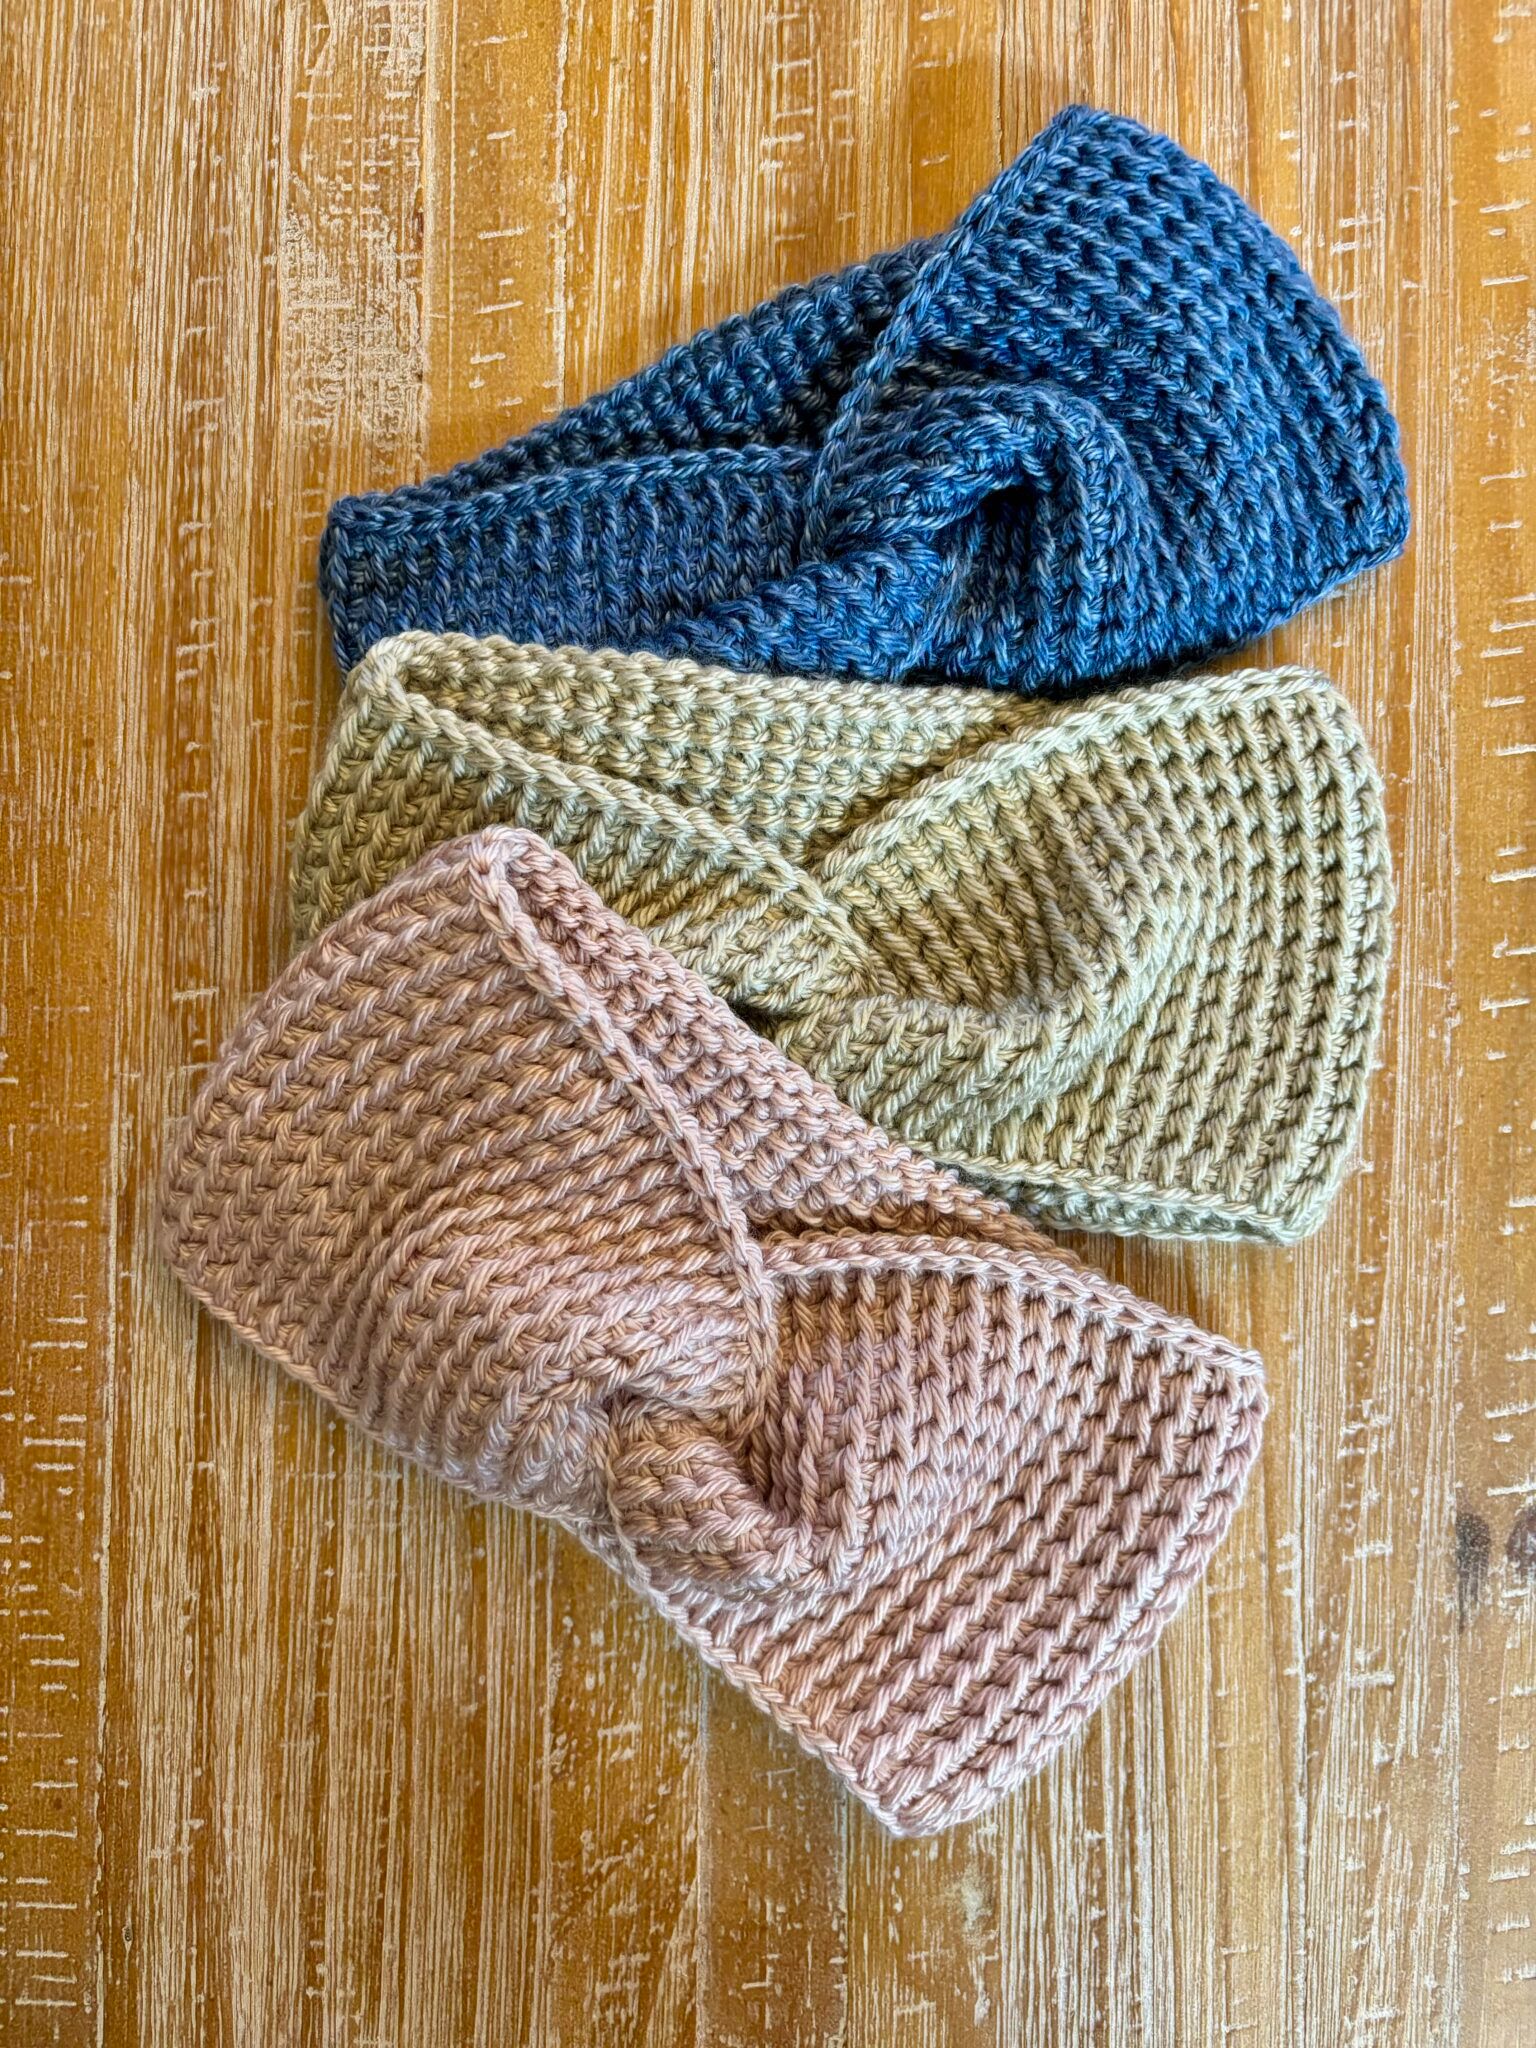
If you are looking to create a stylish and versatile accessory, the crochet headband – free pattern is the perfect project to start with. Crochet headbands are not only practical but also a fun way to express your creativity.
Whether you are a beginner or an experienced crocheter, this guide will take you step by step through the process, making it easy to craft your own handmade accessories.
By following this free pattern, you can make headbands that suit any occasion, from casual everyday wear to festive celebrations.
Creating a crochet headband allows you to explore different yarn textures, colors, and stitching techniques. You can customize your headband to match your wardrobe or create unique gifts for friends and family.
Many crafters find that working on DIY headbands is not only rewarding but also relaxing, providing a sense of accomplishment as each stitch comes together. Using this free pattern, you can ensure that your project is efficient, enjoyable, and yields beautiful results every time.
The beauty of a crochet headband lies in its simplicity and versatility. Unlike other accessories that may require complicated tools or techniques, this free pattern is designed to be accessible for all skill levels. With just a few basic crochet stitches and some patience, you can create an accessory that looks professional and feels personal. Whether you are making a classic style or experimenting with intricate designs, this guide will help you achieve the perfect handmade headband.
Before starting your crochet headband – free pattern, it’s important to gather all the necessary materials. This ensures that your crafting session is smooth and enjoyable. You will need a medium-weight yarn, preferably soft and comfortable for wearing on the head. A crochet hook appropriate for the yarn size, a yarn needle for finishing, and scissors are also essential. Optional embellishments, such as buttons, beads, or flowers, can add a personal touch to your DIY headband.
When choosing your yarn, consider the season and purpose of your headband. Cotton yarns are breathable and perfect for warmer weather, while wool or acrylic blends provide extra warmth during colder months. Picking complementary colors or experimenting with patterns can make your handmade accessory truly unique. The right combination of materials and colors can elevate a simple crochet headband into a statement piece.
Using high-quality materials not only improves the appearance of your headband but also enhances its durability. A well-crafted crochet headband should maintain its shape and softness even after repeated wear and washing. Following this free pattern, you can ensure that your accessory is both beautiful and long-lasting, providing a wearable piece of art.
Once your materials are ready, it’s time to familiarize yourself with the basic stitches used in this crochet headband – free pattern. Common stitches include chain stitches, single crochet, and double crochet. Practicing these stitches before starting your project will make the process smoother and more enjoyable. Remember, the key to a successful DIY headband is patience and consistency.
Starting your crochet headband begins with a foundation chain. Measure your head circumference to ensure a comfortable fit, and adjust the chain length accordingly. The beauty of this free pattern is that it can be adapted for different sizes and styles. By following the steps carefully, you will create a headband that fits perfectly and looks polished.
Next, work the chosen stitch across the foundation chain. This could be a simple single crochet or a more intricate pattern depending on your preference. The texture of your handmade accessory will depend on the stitches you select. Experimenting with stitch patterns can add depth and personality to your crochet headband.
Once the desired length is achieved, join the ends of the headband with a slip stitch or sew them together using a yarn needle. This step ensures that your DIY headband is secure and wearable. Make sure the seam is neat to maintain a professional appearance.
Adding embellishments is optional but can enhance the style of your crochet headband – free pattern. Small flowers, buttons, or beads can be attached using a yarn needle. These decorations allow you to personalize your accessory and make it unique.
Finishing touches include weaving in any loose ends and ensuring that the headband is smooth and comfortable. This final step in the free pattern ensures that your headband is ready to wear or gift. Taking care during finishing improves the overall quality of your handmade accessory.
Once your crochet headband is complete, it’s time to enjoy your creation. Wearing a handmade headband provides a sense of pride and accomplishment. Whether for casual wear, a special occasion, or as a thoughtful gift, your DIY headband will be cherished.
To create the best crochet headband – free pattern, consider these practical tips. First, always check your gauge to ensure a consistent size. This prevents the headband from being too tight or too loose. Using a stitch marker can help maintain uniformity throughout your project.
Experiment with different stitch patterns and textures to make your handmade accessory stand out. Combining simple and complex stitches can create visual interest and a unique style. Don’t be afraid to mix colors or use variegated yarns for a playful look.
Keeping your tension even is essential for a polished finish. Uneven stitches can cause the headband to warp or become misshapen. Practicing on a small swatch before starting the free pattern can help maintain consistent tension.
When adding embellishments, ensure they are securely attached. Loose buttons or beads can pose a safety hazard or damage the headband. A well-secured decoration enhances both style and durability.
Regularly checking your progress helps prevent mistakes. If you notice an error, it’s easier to correct it immediately rather than unraveling a large portion later. This tip is especially useful for beginners following a DIY headband pattern for the first time.
Finally, don’t rush the process. Crafting a crochet headband should be enjoyable and relaxing. Taking your time allows for careful attention to detail, resulting in a high-quality handmade accessory that you’ll be proud of.
While creating a crochet headband – free pattern, some mistakes can be avoided with careful attention. One common error is misjudging the headband size. Always measure your head accurately and consider stretchability.
Skipping or adding extra stitches can alter the shape of your headband. Counting stitches carefully ensures that your DIY headband turns out as intended. Using stitch markers can be extremely helpful in this regard.
Choosing the wrong yarn or hook size can affect both comfort and appearance. Following the recommended materials in this free pattern guarantees better results.
Not finishing your ends properly can result in fraying or unraveling. Make sure to weave in ends neatly to maintain the quality of your handmade accessory.
Overcomplicating the design before mastering the basics can lead to frustration. Start simple and gradually incorporate more advanced stitches or embellishments as your skills improve.
Neglecting care instructions can reduce the longevity of your headband. Wash according to the yarn type and handle your crochet headband gently to ensure durability.
Q1: Can beginners make this crochet headband?
A1: Absolutely! This free pattern is designed for all skill levels. By following the step-by-step instructions and practicing basic stitches, beginners can successfully create a stylish DIY headband.
Q2: What type of yarn is best for headbands?
A2: Soft cotton or acrylic yarns work well for handmade accessories. Choose yarn that is comfortable to wear and easy to crochet.
Q3: How long does it take to make a crochet headband?
A3: Depending on your skill level, it can take anywhere from 1 to 3 hours. Beginners may take a little longer, while experienced crocheters can finish faster.
Q4: Can I customize the size of the headband?
A4: Yes! This free pattern is flexible. Measure your head and adjust the foundation chain accordingly to ensure a perfect fit.
Q5: How do I add decorations to my headband?
A5: You can attach flowers, beads, or buttons using a yarn needle. Make sure the embellishments are secure for safety and durability.
Q6: Can I wash my crochet headband?
A6: Yes. Follow the yarn manufacturer’s care instructions. Most cotton or acrylic yarns are machine washable on a gentle cycle.
Creating a crochet headband – free pattern is a rewarding and enjoyable experience. By following this guide, you can craft a DIY headband that is stylish, comfortable, and personalized. From selecting the right materials to finishing touches and embellishments, every step contributes to a high-quality handmade accessory.
Whether you are a beginner or an experienced crocheter, this free pattern offers the perfect opportunity to practice your skills and create something beautiful.
We encourage you to share your thoughts, leave feedback, and suggest ideas for future projects. Your input helps us continue providing valuable and inspiring crochet guides. Enjoy your crafting journey and wear your creation with pride!


