
Crocheted house-shaped cookie for Christmas tree

Amazing Crochet Square – Pattern is the perfect project for anyone who loves creativity and color in their crochet work. This crochet pattern combines beauty and simplicity, offering an enjoyable way to explore shapes, textures, and color combinations.
Whether you are a beginner or an experienced crafter, making an amazing crochet square is a fun and relaxing activity that can be turned into blankets, bags, pillow covers, or any other DIY crochet project you imagine. What makes this project truly special is that it’s versatile and allows you to experiment freely without limits.
Each crochet square can be made in your favorite colors and stitches, creating a patchwork of textures that showcase your personality. You can make one simple square or combine many of them to form larger and more intricate designs.
Because the free crochet tutorial is easy to follow, even beginners can achieve beautiful results without stress. All you need are a few materials, patience, and your imagination. Once you’ve mastered the basic pattern, you’ll find yourself making countless variations to match your own creative vision.
Working on an amazing crochet square not only helps you improve your technique but also brings a sense of peace and satisfaction. Crochet is known to be a mindful activity that encourages focus and relaxation. As you repeat the stitches, you’ll notice how your hands begin to move naturally, forming beautiful geometric designs with every loop and pull. Each square you create tells a story, reflecting the time, care, and creativity you’ve invested in your craft. Whether for personal use or as a handmade gift, these crochet squares are sure to bring joy and warmth wherever they go.
To start your amazing crochet square, gather all the materials that will help you achieve professional and beautiful results. You’ll need yarn, a crochet hook, scissors, and a yarn needle for finishing touches. Choosing the right yarn is essential because it determines the texture and appearance of your final piece. Cotton yarn is great for summer projects, as it creates a clean and defined stitch pattern, while acrylic yarn is soft, warm, and ideal for cozy blankets and winter accessories.
Your hook size should match the thickness of your yarn. Typically, a 3.5 mm to 5 mm hook works well for most DIY crochet projects, but always check the yarn label for guidance. Using a slightly smaller hook can help you achieve tighter stitches, which make your crochet pattern look neater and more defined. Scissors are needed for cutting yarn cleanly, and a yarn needle is perfect for weaving in loose ends to give your square a polished finish.
Color selection is one of the most enjoyable parts of this crochet project. You can go with soft, pastel tones for a calm and elegant look or bright, vibrant shades for a cheerful and playful design. Combining contrasting colors can make your amazing crochet square stand out even more. Experiment with different combinations until you find a palette that inspires you.
Besides the basic tools, you may want to keep a stitch marker handy, especially if you’re a beginner. This small accessory helps track your progress and ensures you don’t lose your place in the pattern. A notebook can also be useful for jotting down ideas or color combinations for future projects. With all your materials ready, you’ll be set to start creating beautiful and unique crochet squares that reflect your artistic vision.
Remember that using high-quality materials ensures not only a better appearance but also longer-lasting results. Investing in durable yarn and good tools will make your crocheting experience smoother and more enjoyable. Taking the time to prepare your workspace and materials before starting can make all the difference in your final DIY crochet creation.
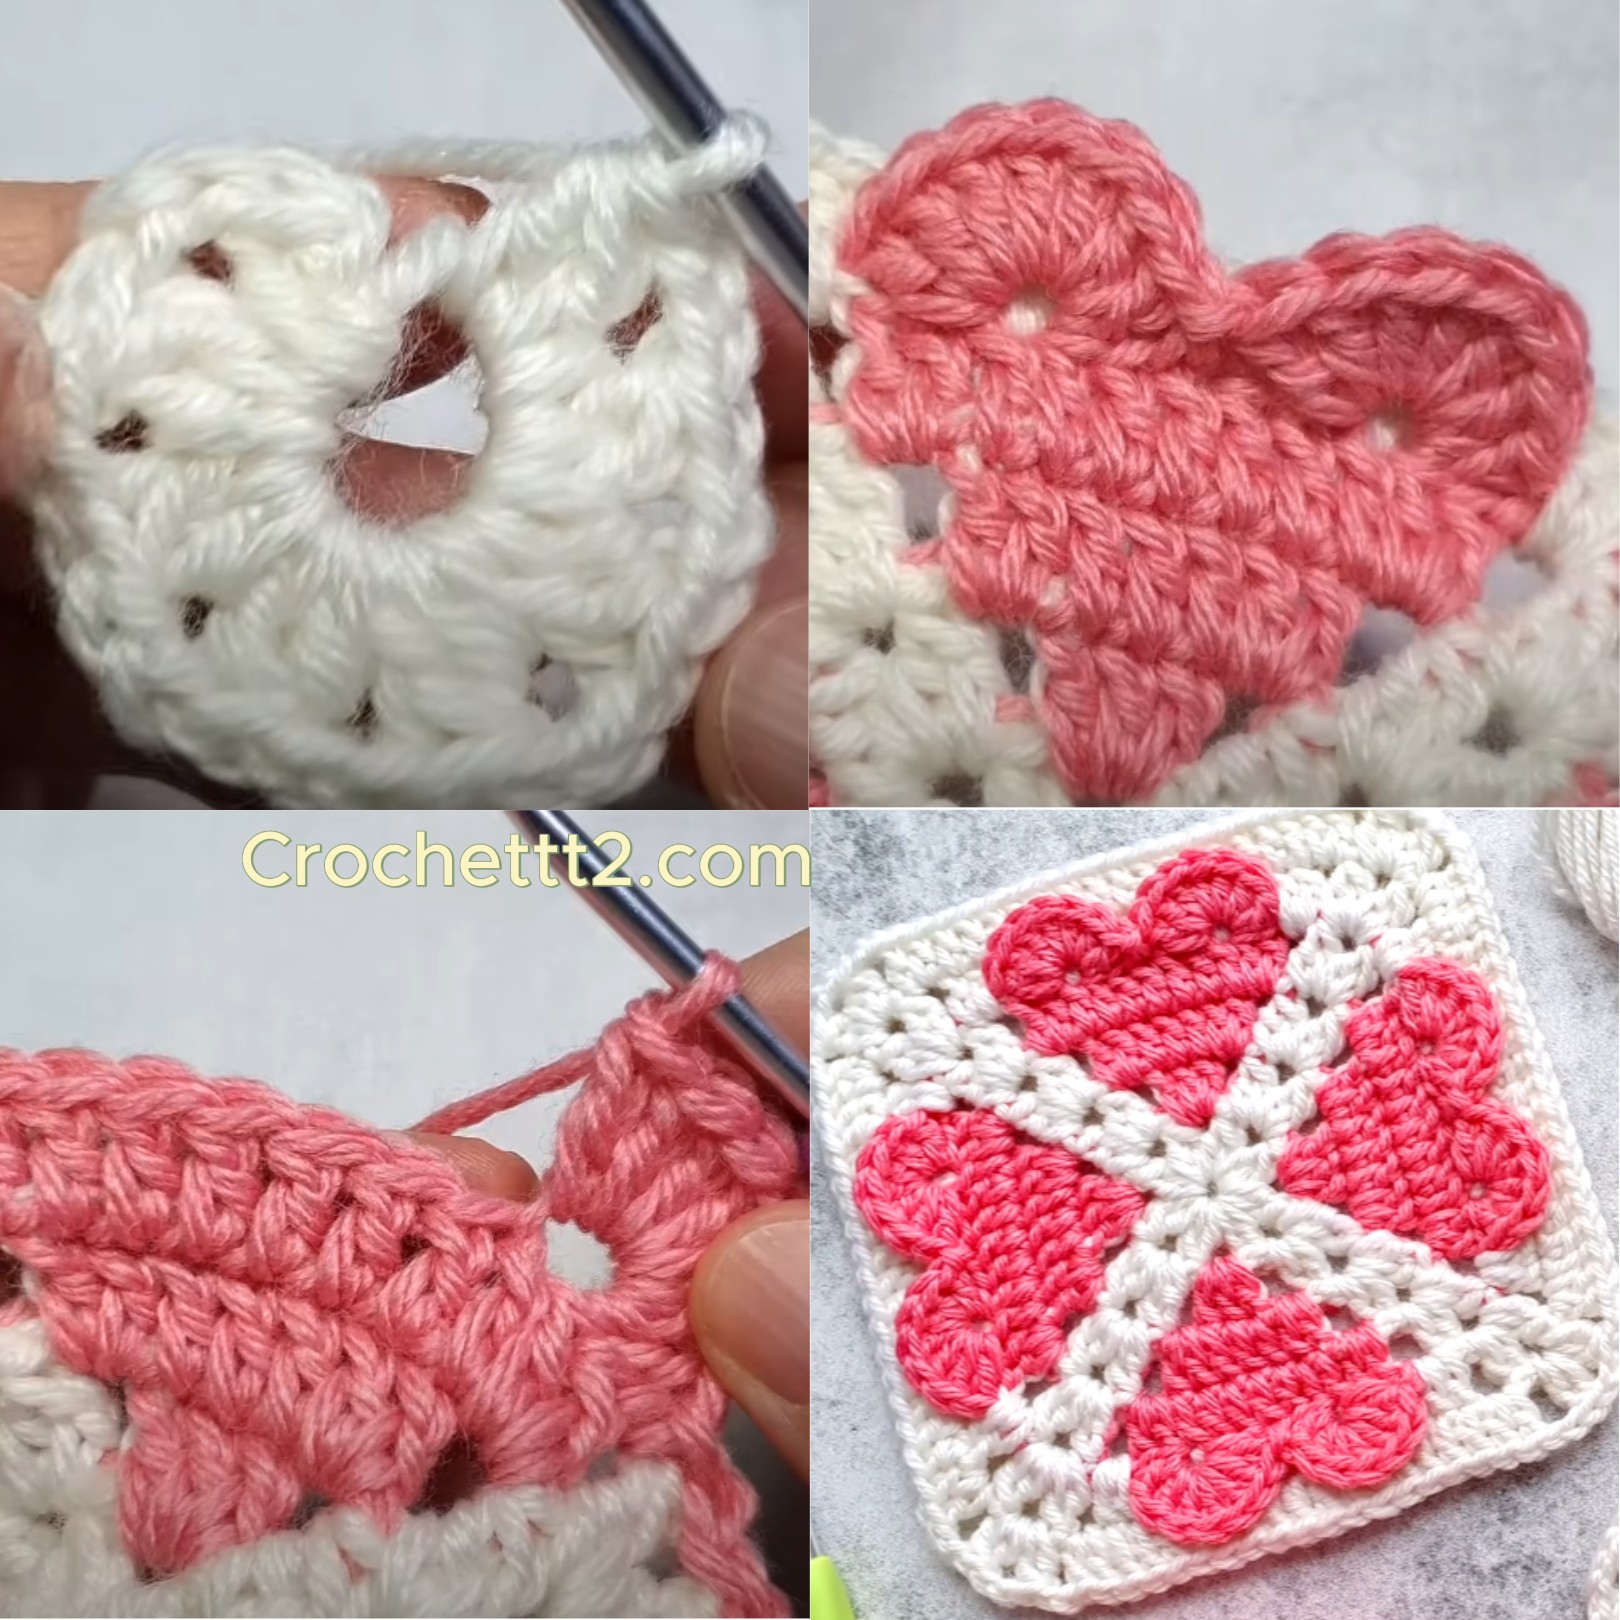
Start your amazing crochet square by making a slipknot and chaining four stitches. Join them with a slip stitch to form a ring. This small ring will serve as the base of your square. Into this ring, you will crochet clusters of stitches — most commonly double crochets — separated by chains to form corners. Following the free crochet tutorial, you’ll see how easily the shape begins to form as you repeat this sequence around the ring.
Once the foundation is set, you can begin building your square outward. Each new round adds layers, creating a beautifully symmetrical design. The key to achieving clean edges and perfect corners is maintaining consistent tension in your stitches. If your stitches are too tight, your square may curl, while too loose stitches may make it floppy. Finding that balance is what makes your crochet pattern look professional.
As you progress through the rounds, you can change yarn colors to add more visual interest. Many crocheters love switching hues every two or three rounds, which creates stunning contrast and highlights the structure of the amazing crochet square. Don’t be afraid to experiment — sometimes unexpected color combinations can lead to the most beautiful results.
Continue building your square until it reaches your desired size. Some people stop after a few rounds to make smaller motifs, while others create larger squares for blankets or cushion covers. When you’re happy with the size, finish the last round with a slip stitch and fasten off your yarn securely. Weave in the ends with your yarn needle for a neat finish.
You can block your square to give it a perfectly flat and defined shape. Simply dampen it lightly, pin it to a flat surface, and let it dry. This step enhances the overall appearance of your DIY crochet project, making the edges crisp and the pattern more visible.
When you’ve completed your first square, you’ll likely want to make more — and that’s the beauty of this project. Each amazing crochet square can be connected with others to form endless possibilities: blankets, table runners, shawls, and more.
One of the best things about the amazing crochet square is its versatility. Once you learn the basic pattern, you can modify it to create hundreds of unique designs. Changing yarn weights, colors, and stitches gives each square a new personality. You might start with a simple crochet pattern, but by adding different stitches like shells, bobbles, or puff stitches, your square can take on an entirely new look.
Another creative idea is to mix textures by combining yarns of different thicknesses or materials. Try pairing soft cotton with metallic threads for a touch of sparkle. Using gradient yarns can also produce beautiful color transitions that make your DIY crochet project look more sophisticated.
You can create themed squares — such as floral, geometric, or vintage-inspired patterns — to suit your decor or season. For example, warm reds and oranges work perfectly for fall-themed projects, while blues and whites bring a refreshing, coastal feel. Each amazing crochet square can tell its own story through color and design.
Experimenting with size is another great way to add variety. Small squares are perfect for detailed projects like bags or coasters, while larger ones can be joined to make blankets or wall hangings. Adding a delicate border or lace edge can elevate your square from simple to stunning.
If you love mixing crafts, consider sewing your finished squares onto tote bags, denim jackets, or pillow covers for a trendy and personalized look. Combining crochet with fabric can turn your free crochet tutorial into a beautiful mixed-media masterpiece.
The possibilities are endless when it comes to the amazing crochet square. Every variation you create reflects your creativity and personal style, making each project a unique expression of art and skill.
Even seasoned crafters make mistakes, but most issues with crochet patterns are easy to fix once identified. One common problem is uneven tension, which can cause your amazing crochet square to look lopsided or misshapen. The best solution is practice — work slowly and focus on keeping your yarn tension steady throughout the project.
Skipping stitches or adding extra ones can also distort the shape of your square. Counting carefully and using stitch markers at each corner helps you stay on track. It’s also a good idea to check your work after every few rounds to ensure that your corners remain sharp and your sides even.
Another mistake is using the wrong hook size. If your square looks stiff and tight, your hook is too small; if it looks too loose and floppy, it’s too large. Finding the perfect balance between hook and yarn thickness is essential for achieving beautiful results.
Changing colors without securing yarn ends properly can cause unraveling later. Always weave in your ends neatly using a yarn needle, and make sure to tie them firmly but not tightly to avoid distorting the stitches.
Inconsistent stitch height is another issue to watch for, especially when mixing stitch types. Practice maintaining uniform loops and pulling your yarn evenly to create a professional finish. Blocking your finished square can correct small irregularities and make your DIY crochet project look polished and neat.
Lastly, don’t rush the process. Crochet is about enjoyment, relaxation, and creativity. Taking your time to follow the free crochet tutorial carefully will always lead to a more beautiful and satisfying result.
Q1: Is this crochet square suitable for beginners?
Yes! The amazing crochet square is simple enough for beginners, yet flexible enough for experienced crafters to customize.
Q2: What yarn works best for crochet squares?
Cotton or acrylic yarn is recommended for clarity, durability, and easy handling.
Q3: How long does it take to make one square?
Depending on your speed, one DIY crochet square usually takes between 30 minutes and an hour.
Q4: Can I use multiple colors in one square?
Absolutely! Mixing colors enhances the beauty and creativity of your crochet project.
Q5: How do I connect multiple squares together?
You can join them using slip stitches, whip stitch, or crochet join-as-you-go techniques.
Q6: Can I sell items made from this pattern?
Yes, as long as the crochet pattern allows it. Always credit the original designer if required.
The Amazing Crochet Square – Pattern is a timeless and versatile project that offers endless possibilities for creativity. From colorful blankets to elegant home décor, this DIY crochet pattern allows crafters to combine artistry, skill, and imagination. With simple stitches and vibrant colors, anyone can create stunning squares that reflect personal style and creativity.
We hope this free crochet tutorial inspires you to start your own collection of squares and explore the joy of handmade creation. Try new color combinations, textures, and designs — and most importantly, enjoy the process.
Don’t forget to share your results, leave a sincere opinion, and suggest new ideas or patterns you’d love to see next. Every stitch tells a story, and your creativity makes each one uniquely amazing!


