
Crocheted house-shaped cookie for Christmas tree

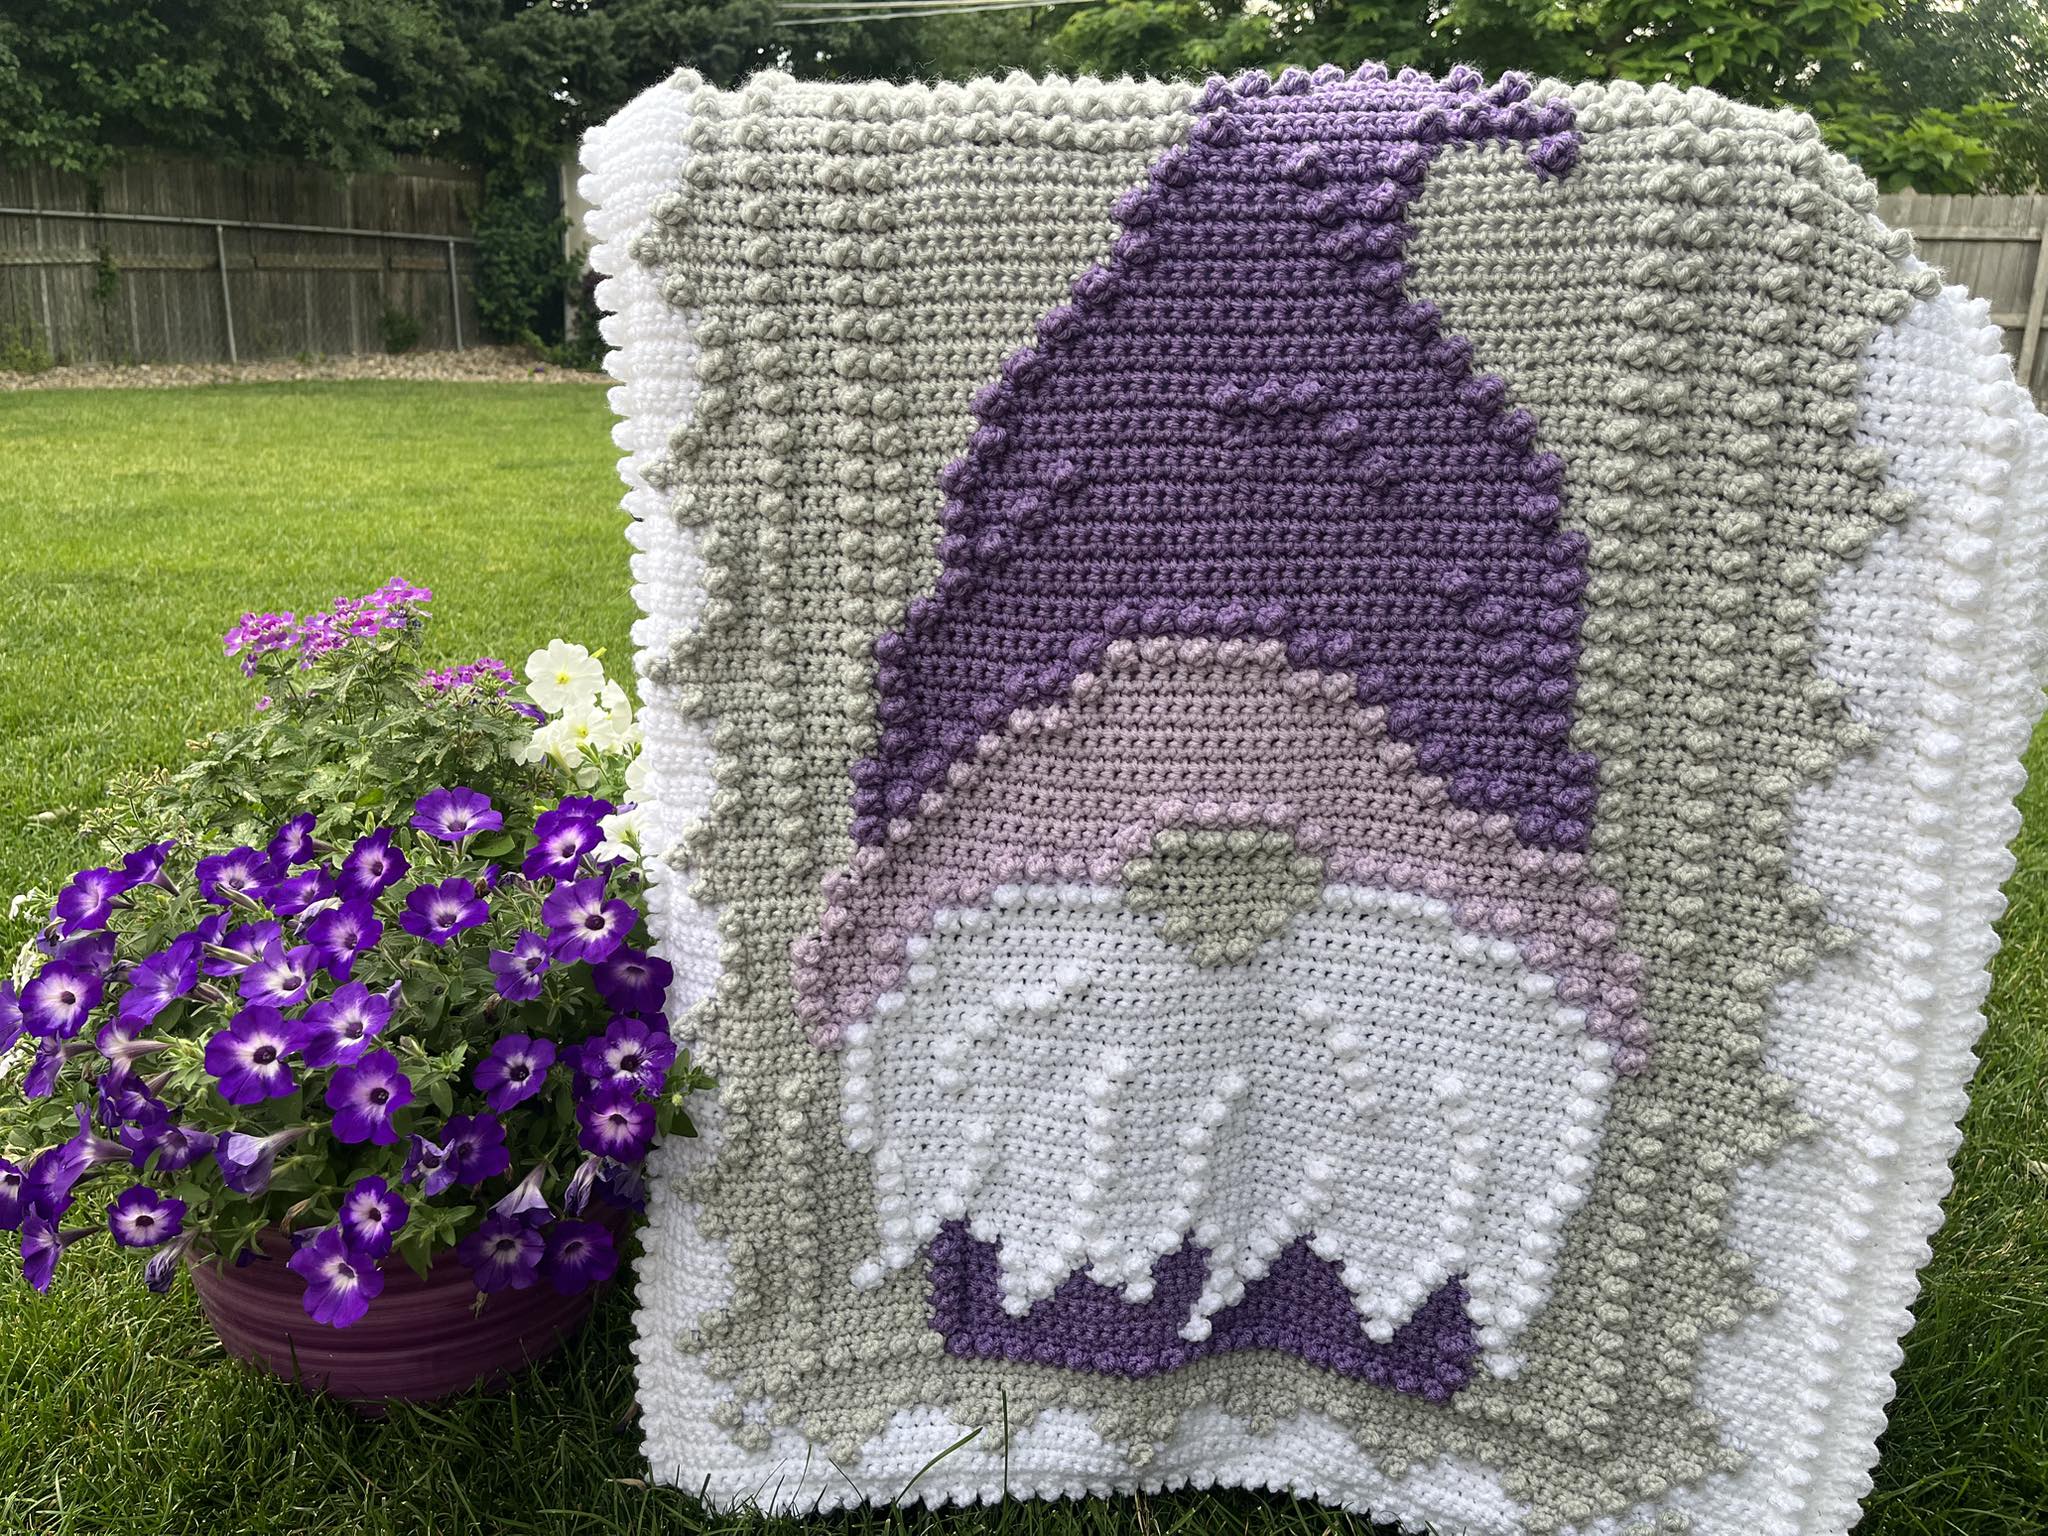
If you are looking to create a cozy, whimsical, and heartwarming project, the Gnome Blanket – Crochet Pattern is the perfect guide.
This pattern allows you to transform simple yarn into a charming blanket featuring adorable gnome motifs that can brighten any space.
Whether you are an experienced crocheter or a beginner looking for a fun project, this tutorial will guide you step by step to craft a beautiful and functional blanket that’s both playful and practical.
Crocheting a blanket with gnome designs is a unique way to express your creativity. The Gnome Blanket – Crochet Pattern combines basic and intermediate crochet techniques to create textured motifs, vibrant colors, and detailed stitching.
These gnome motifs add personality to your blanket, making it a perfect gift for children, family members, or even as a decorative piece for your living room.
The appeal of a Gnome Blanket – Crochet Pattern lies in its versatility. You can customize the size, colors, and number of gnomes to suit your style or the intended recipient. Plus, crocheting a blanket is a relaxing and rewarding hobby that enhances hand-eye coordination, patience, and concentration. This guide will ensure you complete your blanket successfully, even if it’s your first time working with motifs and decorative designs.
The first step in creating your Gnome Blanket – Crochet Pattern is selecting the right yarn and materials. Yarn choice impacts the blanket’s texture, warmth, and durability. Soft acrylic yarns or cotton blends are ideal for comfort and easy care. Wool or wool-blends provide extra warmth, perfect for winter blankets.
Color selection is especially important for a gnome-themed blanket. Choose bright, cheerful colors for the gnomes’ hats, coats, and boots. Reds, blues, greens, and earthy tones bring your gnome motifs to life. For the background of the blanket, neutral or complementary shades work well to highlight the colorful gnome figures. Planning your color palette carefully ensures a visually balanced and appealing Gnome Blanket – Crochet Pattern.
Other materials you’ll need include a crochet hook suitable for your yarn weight, stitch markers, scissors, and a yarn needle for weaving in ends. Having all tools ready before you start makes the crocheting process smoother and more enjoyable.
Consider the size of your blanket when selecting yarn. For a baby blanket, you might need less yarn than for a full-sized throw. Planning in advance ensures you have enough material to complete your project and maintain color consistency throughout the blanket.
Finally, prepare your workspace. A comfortable area with good lighting will make it easier to follow your Gnome Blanket – Crochet Pattern and focus on the details of each motif.
The centerpiece of the Gnome Blanket – Crochet Pattern is the gnome motifs themselves. Each gnome is created individually and later assembled into the blanket. Begin by crocheting the basic shapes: hat, body, and boots. Using simple stitches such as single crochet, half double crochet, and double crochet, you can form each section accurately.
Start with the hat. Typically, gnome hats are triangular or conical and can include small decorative stitches to add texture. Bright colors work best here to make each gnome stand out. After the hat, create the gnome’s body, ensuring that it’s proportionate and balanced. You can add details like a beard or a coat using contrasting yarn colors and stitching techniques.
The boots or feet of the gnome complete the motif. Small details, like contrasting soles or tiny stitches for toes, make the gnome more lively and realistic. Take your time with these details to maintain consistency across all motifs in your Gnome Blanket – Crochet Pattern.
Once the individual motifs are complete, arrange them according to your blanket layout. You can position them in rows, a random scattered design, or even create a playful scene with gnomes interacting. Laying out your motifs before assembly ensures the final blanket looks cohesive and charming.
Finally, connect the motifs using a join-as-you-go method, slip stitches, or sewing with a yarn needle. Ensure that seams are secure but flexible, so the blanket remains soft and comfortable while maintaining the decorative gnome patterns.
After creating the gnome motifs, it’s time to assemble the Gnome Blanket – Crochet Pattern. Start by attaching the motifs to the background squares or rows of your blanket. You can crochet additional rows or panels to fill spaces and create a cohesive design.
Seam finishing is essential for durability and aesthetics. Use a whip stitch or slip stitch to join sections, ensuring that the seams lie flat and don’t create bulk. Press lightly with an iron if necessary to flatten edges and improve appearance.
Bordering your blanket adds a polished and professional touch. A simple scalloped edge, granny square border, or even a ruffled trim complements the whimsical gnome theme beautifully. Borders not only enhance visual appeal but also provide extra strength to the blanket edges, ensuring it holds up to use and washing.
Pay attention to weaving in all yarn ends neatly. Loose ends can unravel over time and affect the durability of your Gnome Blanket – Crochet Pattern. Using a yarn needle, secure each end through multiple stitches for added stability.
Once assembled, gently block the blanket if needed. Blocking helps even out stitches, ensures motifs lie flat, and improves overall appearance. This step enhances the finish of your blanket and makes the gnome designs stand out.
Finally, step back and admire your completed blanket! Your Gnome Blanket – Crochet Pattern now combines creativity, skill, and warmth into a delightful project that is perfect for gifting or displaying at home.
The beauty of the Gnome Blanket – Crochet Pattern lies in its customization possibilities. You can adjust the number, size, and color of gnomes to suit personal preference or seasonal themes. For instance, using autumnal colors can make the blanket suitable for fall décor, while bright primary colors work well for children’s rooms.
Adding extra embellishments is another way to personalize your blanket. Consider embroidered stars, hearts, or other whimsical elements around the gnomes. You can also include textured stitches in the background for additional visual interest.
Layering yarn types or experimenting with textures can create a unique look. For example, combining soft acrylic with fluffy or boucle yarns gives your blanket an interesting tactile quality. This technique also emphasizes the gnome motifs, making them pop against the background.
Adjusting the blanket size is simple with this pattern. You can create a baby blanket, a throw for a couch, or a full-sized bedspread by adding or reducing rows and motifs. Planning your layout in advance ensures a balanced and cohesive final piece.
Finally, think about functionality. Ensure the blanket is soft and cozy, especially if it’s intended for children or frequent use. A customized Gnome Blanket – Crochet Pattern is not only visually appealing but also practical and comfortable.
Q1: Is this pattern suitable for beginners?
Yes, beginners can follow this pattern with patience. Basic stitches are used, and detailed instructions help guide you through the gnome motifs.
Q2: What yarn types are recommended?
Soft acrylics, cotton blends, or wool work best. Choose yarns that are easy to handle and comfortable for a blanket.
Q3: Can I change the size of the blanket?
Absolutely. Add or remove motifs and rows to create the desired size for a baby blanket, throw, or bedspread.
Q4: How do I join the gnome motifs?
You can use slip stitches, whip stitch, or join-as-you-go methods. Secure seams ensure durability without sacrificing softness.
Q5: Can I add extra embellishments?
Yes! Embroidery, applique, or textured stitches can be added for additional decorative touches.
Q6: Is this blanket washable?
Yes, most acrylic and cotton yarns are machine washable. Use gentle cycles and low heat to maintain shape and color.
The Gnome Blanket – Crochet Pattern is a whimsical, cozy, and rewarding project that combines creativity, skill, and functionality. From selecting yarn and colors to creating adorable gnome motifs and assembling the blanket, each step is an opportunity to showcase your crafting abilities.
We hope this guide inspires you to create your own Gnome Blanket – Crochet Pattern. Don’t forget to leave a sincere opinion and suggestions in the comments, as your feedback encourages others and helps improve future tutorials.
With creativity, patience, and attention to detail, you can make a charming blanket that brings joy and warmth to your home or to someone special.


