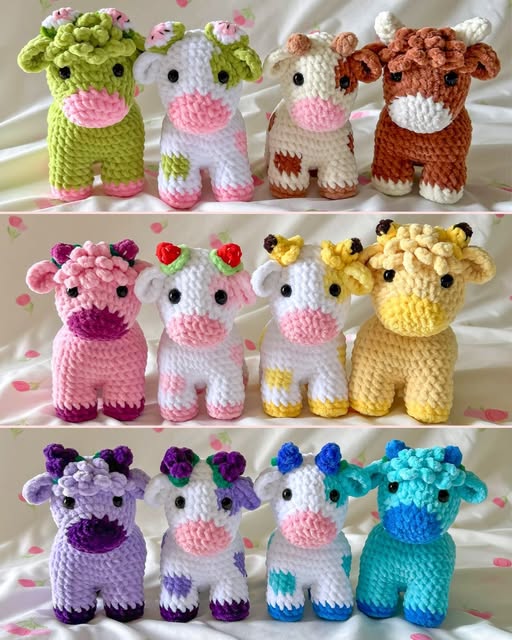
Amigurumi Cute Cow - Pattern

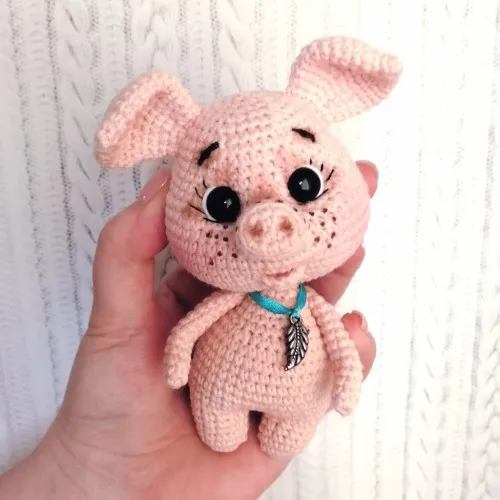
The Cute Pig Amigurumi – Tutorial is a delightful guide for creating an adorable pig plushie using crochet techniques. Amigurumi, the Japanese art of crocheting small, stuffed animals or characters, has become extremely popular among crafters worldwide.
This project combines creativity, patience, and attention to detail, resulting in a charming handmade toy perfect for gifts, home décor, or personal collections.
The Cute Pig Amigurumi is especially appealing due to its cute proportions, soft textures, and approachable construction, making it suitable for beginners and advanced crocheters alike.
Starting your Cute Pig Amigurumi – Tutorial journey allows you to develop essential crochet skills, such as working in rounds, increasing and decreasing stitches, and sewing pieces together seamlessly.
Each part of the pig, from the body to the ears and tiny snout, contributes to the overall adorable appearance. Following a detailed tutorial ensures your pig comes together proportionally and looks polished.
Making a Cute Pig Amigurumi also provides a fun and relaxing crafting experience. Crocheting small pieces is often meditative, allowing you to enjoy the creative process while producing a tangible, cute outcome. In this tutorial, we will cover all the steps, from materials and stitches to assembly, finishing touches, and customization ideas for your Cute Pig Amigurumi.
Before starting the Cute Pig Amigurumi – Tutorial, gather all necessary materials to ensure a smooth crafting process. You will need:
Choosing soft, durable yarn ensures your Cute Pig Amigurumi will be cuddly and long-lasting. Cotton or acrylic blends work well for beginners due to ease of handling. You may also add blush or embroidery for extra cuteness after assembly.
Optional accessories such as tiny bows, scarves, or miniature outfits can enhance the personality of your amigurumi, making each pig unique. Preparing all materials before beginning helps avoid interruptions and keeps your crafting session enjoyable.
To successfully complete the Cute Pig Amigurumi – Tutorial, familiarity with basic crochet stitches is essential. The main techniques include:
Working in continuous rounds is standard for amigurumi, preventing visible seams and maintaining smooth shapes. Using stitch markers helps track the beginning of each round, ensuring consistent shaping throughout the Cute Pig Amigurumi.
If you are a beginner, practice each stitch on a small swatch before starting the pig. Mastery of tension and stitch consistency will greatly improve the final appearance and durability of your amigurumi.
The body is the foundation of your Cute Pig Amigurumi – Tutorial. Begin with a magic ring and crochet in continuous rounds, gradually increasing to form a spherical or oval shape depending on your preference. Use increases and decreases strategically to shape the body’s top and bottom, ensuring a smooth, symmetrical appearance.
Stuff the body with polyester filling as you progress, adding just enough to make the pig soft and plush without overstuffing, which can distort stitches. Carefully check the symmetry of the body to maintain balance, making future assembly of limbs and head easier.
Pay attention to the stitch count for each round, as consistency is key to achieving an evenly shaped body. The finished body should be firm enough to hold shape but soft enough to give the pig its cuddly quality.
Once the body is complete, set it aside while you work on the head, ears, legs, and snout. Keeping the body separate ensures easier handling and smoother assembly of all pieces.
The head of your Cute Pig Amigurumi – Tutorial is crocheted similarly to the body but slightly smaller. Begin with a magic ring and work in rounds, gradually increasing to achieve the desired head size. Attach safety eyes or embroider them with black yarn before closing the head to avoid difficulty later.
The snout is made separately, typically in a lighter pink shade. Crochet a small circle, stuff lightly, and embroider nostrils with dark pink or black yarn. Sew the snout securely onto the head, centering it for a cute and proportionate look.
Crocheted ears are usually small triangles or semi-circles attached symmetrically to the sides of the head. Adjust the placement to ensure the pig looks balanced and expressive.
Optional blush or embroidered mouth adds extra charm, completing the pig’s signature cute appearance. Small details like this enhance the personality of your Cute Pig Amigurumi and make it more endearing.
The legs and arms of your Cute Pig Amigurumi – Tutorial are small tubes crocheted in rounds. Stuff lightly and shape them to match the body proportions. Attach them symmetrically to maintain balance, ensuring the pig can sit or stand properly if desired.
The tail is often a small spiral or curly piece crocheted separately. Lightly stuff and sew it to the back of the body, adding a playful, whimsical touch. Tail length and curl can be customized according to preference.
Assembly of limbs and tail should be done carefully with a yarn needle, stitching securely to prevent loose parts. Double-check placement before final stitching to maintain symmetry and overall cuteness.
Once all components are crocheted, assemble the Cute Pig Amigurumi by sewing the head, ears, limbs, snout, and tail onto the body. Use small, tight stitches for durability and consistency.
After assembly, adjust stuffing as needed, ensuring a smooth, plump appearance. Weave in all loose ends to create a polished, professional finish.
Optional decorations like tiny bows, hats, or embroidered accessories can be added to personalize your pig. These finishing touches elevate your Cute Pig Amigurumi – Tutorial from a simple toy to a memorable gift or collectible.
1. Is this amigurumi suitable for beginners?
Yes, with basic crochet skills and attention to detail, beginners can successfully create the Cute Pig Amigurumi.
2. What yarn type is best?
Soft cotton or acrylic yarn works well. Choose a weight that matches your crochet hook and desired finished size.
3. Can I make the pig larger or smaller?
Yes, adjusting yarn weight, hook size, and rounds can change the final size while keeping proportions consistent.
4. How should I wash the finished amigurumi?
Hand wash in cold water gently, and air dry. Avoid harsh scrubbing to maintain shape and softness.
5. Can I customize the pig?
Absolutely! Change colors, add accessories, or embroider details to make it unique.
6. Are safety eyes necessary?
They are optional. You can use embroidery instead for child-safe toys.
7. Can I sell my finished amigurumi?
Yes, handmade amigurumi can be sold, provided you are not using copyrighted characters.
The Cute Pig Amigurumi – Tutorial offers a fun and rewarding crochet project that combines creativity with craft skills. Its adorable design and customizable features make it perfect for gifts, collections, or décor. Following this tutorial ensures a polished and charming final product, with every detail contributing to the pig’s personality.
We hope this guide inspires you to create your own Cute Pig Amigurumi. Share your experience, leave suggestions, and let your creativity shine in every stitch. Handmade amigurumi not only brings joy to the creator but also to anyone lucky enough to receive one!