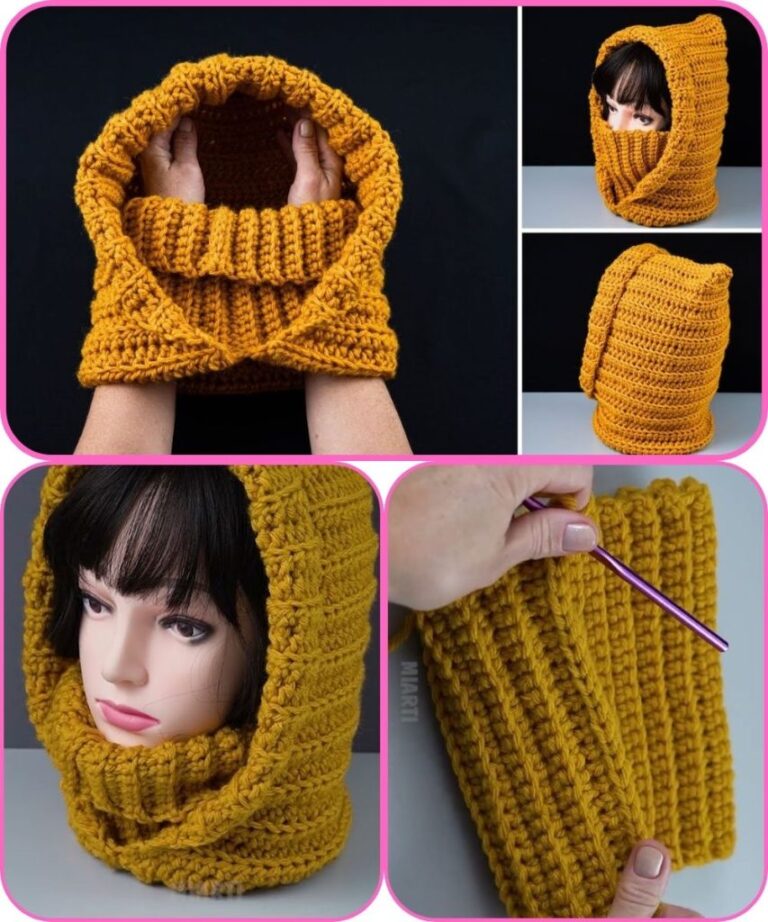
Simple Crochet Balaclava - Free Pattern

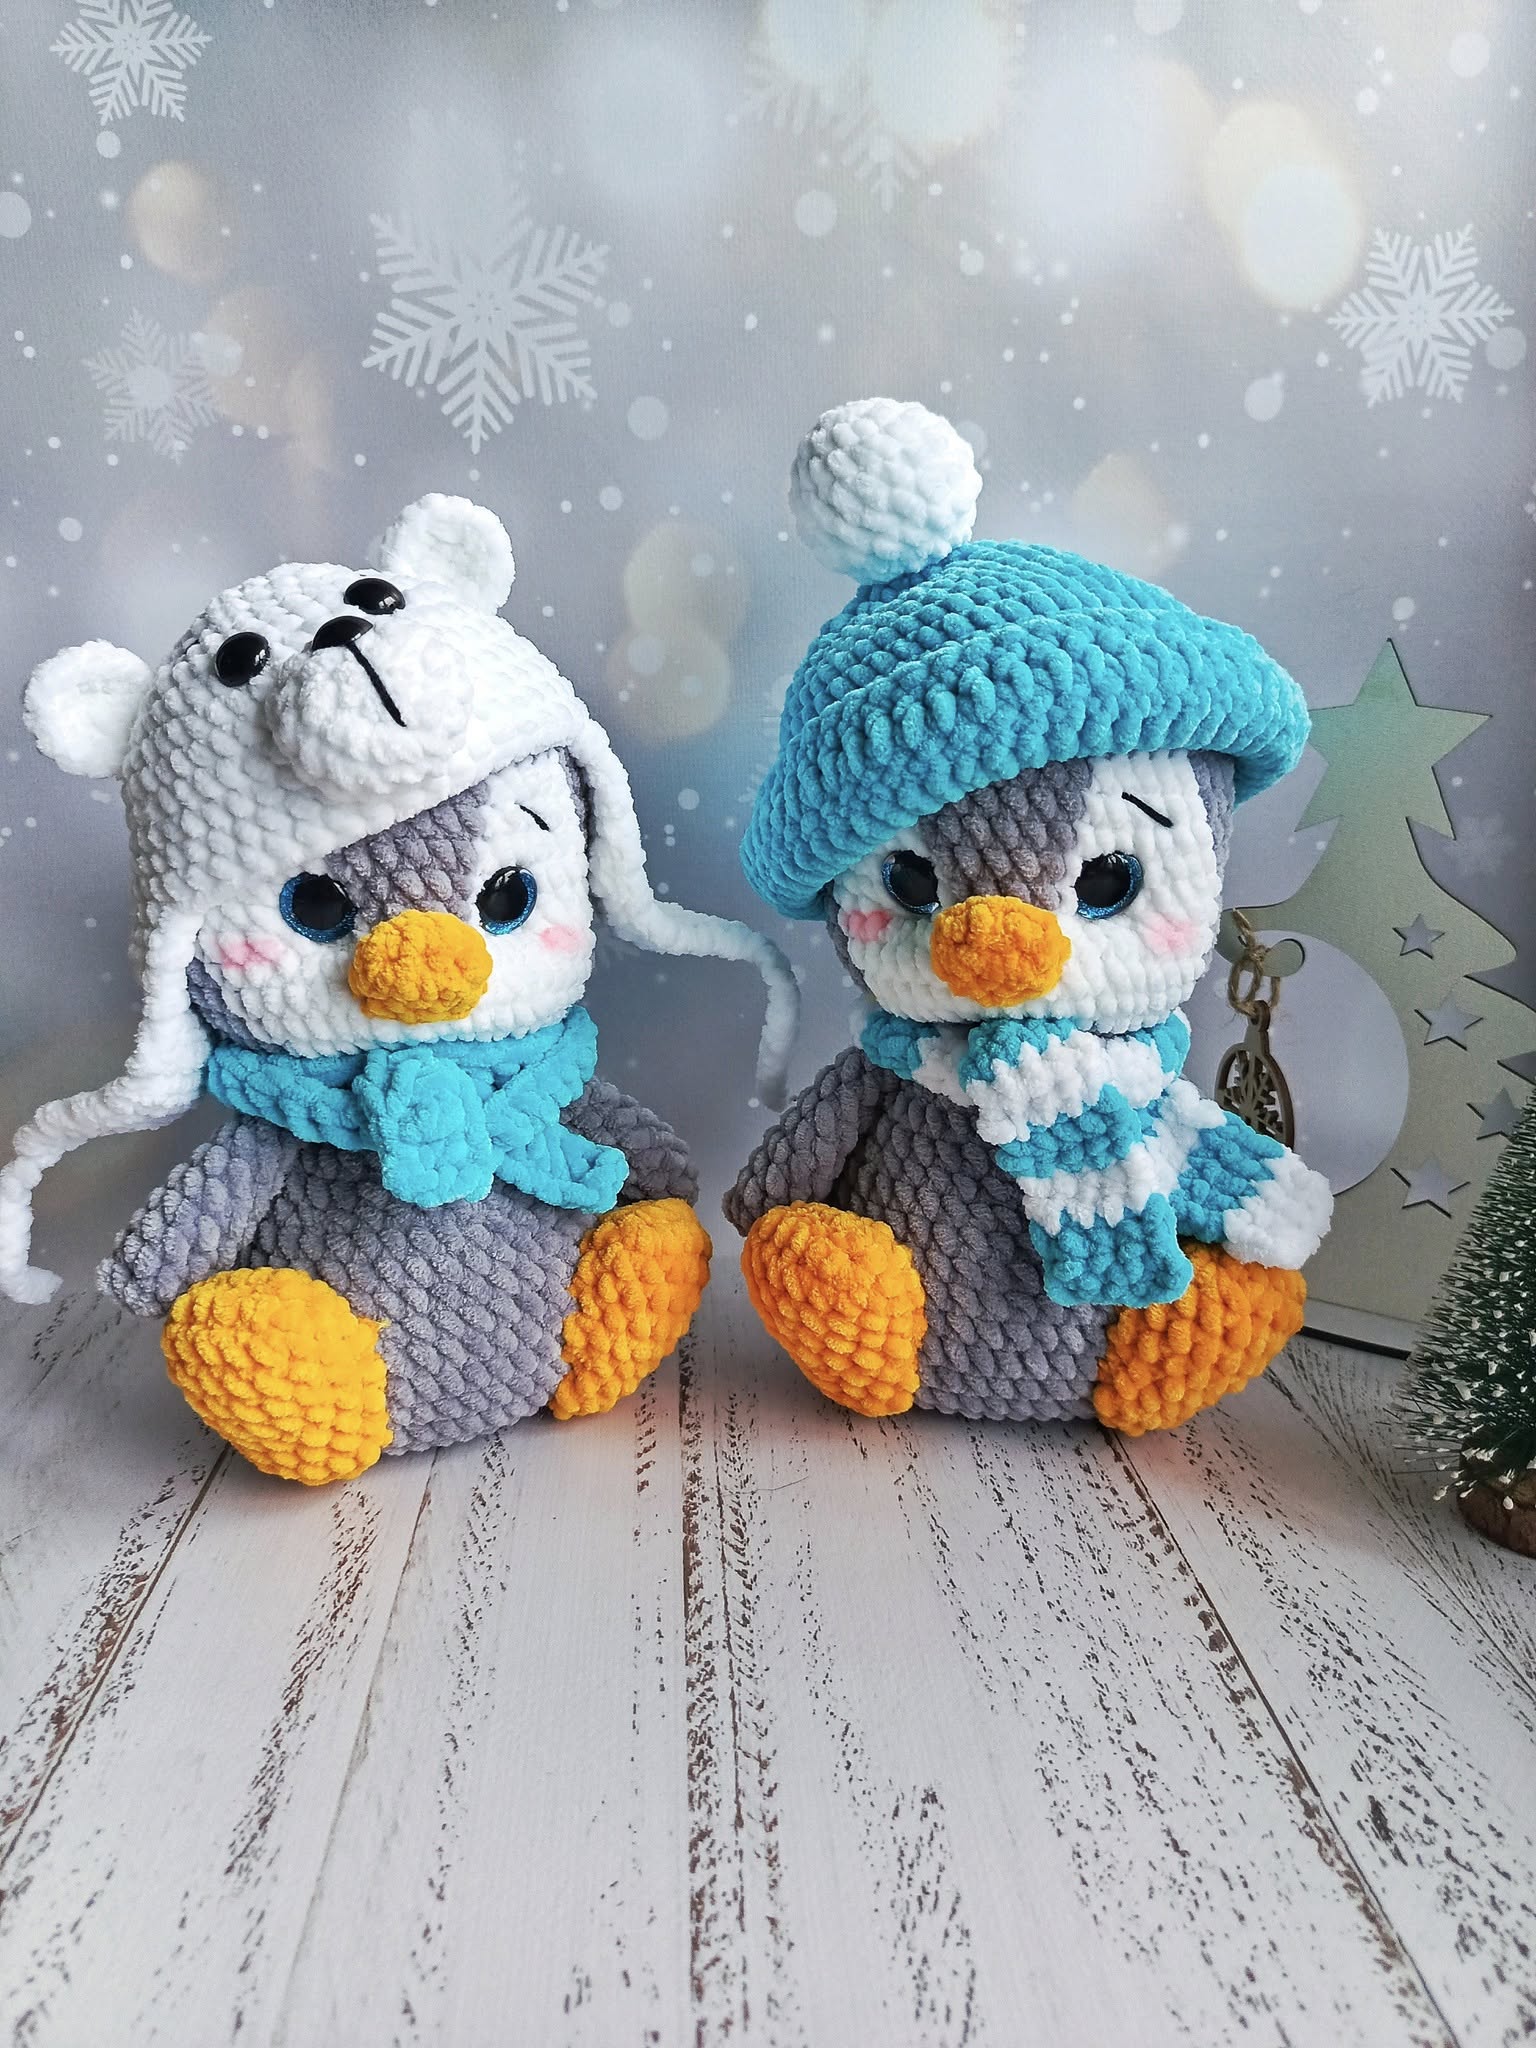
Crochet Patterns Penguin Amigurumi is one of the most beloved handmade projects among crochet enthusiasts around the world. This delightful craft combines the relaxing art of crochet with the charm of amigurumi, the Japanese technique of creating small, stuffed yarn creatures.
Whether you are a beginner or a seasoned crocheter, making a cute penguin amigurumi can bring immense satisfaction and spark your creativity. The combination of soft yarn, simple stitches, and adorable design makes this pattern a perfect way to express your artistic side.
Creating your own Crochet Patterns Penguin Amigurumi is not just a fun hobby—it’s also a meaningful way to make personalized gifts or decorations.
These cuddly penguins can serve as lovely nursery decor, heartfelt gifts for friends, or even unique items for small handmade businesses.
The process of crocheting each piece and assembling your penguin gives you a sense of accomplishment and mindfulness, making it an excellent project for relaxation and creative expression.
In this guide, we’ll explore the best tips, materials, and techniques for making your Crochet Patterns Penguin Amigurumi look professional and adorable. You’ll learn about the right yarns to use, the best hooks, color combinations, and some expert tips for stuffing and sewing the parts neatly. Whether you’re following a written pattern or designing your own, these insights will help you achieve an irresistibly cute penguin amigurumi that will impress everyone who sees it.
Selecting the proper materials is one of the most important steps when creating Crochet Patterns Penguin Amigurumi. The quality of your yarn, hook, and stuffing directly affects the appearance and durability of your finished penguin. For amigurumi projects, you’ll want materials that are soft yet sturdy enough to hold their shape over time.
When choosing yarn, opt for medium-weight cotton or acrylic yarns. Cotton provides a clean, structured finish, while acrylic is softer and more flexible. Many crocheters mix both types depending on the look they want. Using high-quality yarn ensures that your penguin amigurumi doesn’t fuzz or lose its shape after washing or long-term display.
Hook size is equally crucial for creating tight stitches that hold the stuffing inside without gaps. Most Crochet Patterns Penguin Amigurumi recommend smaller hooks than the yarn label suggests. This creates a firm, neat surface that enhances the toy’s look and prevents fiberfill from showing through the stitches.
Stuffing materials also play a big role in the final appearance. Polyester fiberfill is the most common choice—it’s lightweight, easy to shape, and gives your penguin a soft yet bouncy texture. For eco-friendly options, you can use cotton stuffing or even yarn scraps, though they may result in a firmer toy.
Don’t forget about safety eyes or embroidery thread for the facial details. If your amigurumi is for a child under three years old, avoid plastic eyes and use embroidered ones instead for safety. Lastly, a yarn needle and stitch marker are indispensable tools that will make your crocheting smoother and more precise.
With the right combination of yarn, hook, and accessories, your Crochet Patterns Penguin Amigurumi will turn out both adorable and durable, ready to bring joy for years to come.
Now that you’ve gathered your materials, it’s time to dive into the actual process of creating your Crochet Patterns Penguin Amigurumi. The secret to success lies in mastering a few essential techniques that form the foundation of every amigurumi project. Even if you are a beginner, you’ll find these methods simple and rewarding once you get the hang of them.
Start with the magic ring technique, which is essential for creating a seamless, closed center. This method prevents holes at the top of the penguin’s head or body, giving it a polished and professional finish. Tighten your ring firmly, but not so much that it’s difficult to insert your hook later.
Next, focus on maintaining even tension throughout your work. Consistent stitch tension ensures that your penguin’s shape remains symmetrical and the stuffing doesn’t show through. Take your time to count stitches carefully—accuracy is key when following amigurumi patterns, especially for shaping rounded forms like penguins.
Use the single crochet stitch (sc) as your main stitch, since it provides a dense and sturdy texture perfect for amigurumi. As you increase and decrease stitches to shape the body, wings, and head, mark each round with a stitch marker to avoid confusion. This will make assembly much easier in the end.
When finishing each part—the body, flippers, beak, and feet—stuff them gradually and evenly. Avoid overfilling, as this can distort the shape. Lightly press and mold each piece with your hands to achieve a soft and uniform look. Pay special attention to facial placement: the eyes and beak define the personality of your penguin.
Once all the parts are ready, sew them together using an invisible stitch technique. This creates a clean, professional seam. Take your time aligning each part before sewing—slight adjustments can dramatically change the expression and balance of your penguin amigurumi.
Finally, use a fine yarn brush or your fingers to smooth out the surface and remove loose fibers. Your Crochet Patterns Penguin Amigurumi is now complete—a small, handmade treasure filled with creativity and care.
One of the joys of working with Crochet Patterns Penguin Amigurumi is the endless opportunity for customization. Once you’ve mastered the basic pattern, you can experiment with different styles, colors, and accessories to create unique versions of your penguin. Each variation adds a touch of personality and charm to your handmade collection.
Try experimenting with color variations first. Traditional penguins feature black, white, and yellow tones, but who says you can’t use pastel blues, pinks, or even rainbow shades? Using gradient or variegated yarn can also give your penguin a magical, whimsical effect.
Adding seasonal accessories is another fun idea. For example, you can crochet a small scarf for a winter-themed penguin, a sun hat for a summer version, or a tiny heart for Valentine’s Day. These little details make your penguin even more expressive and suitable for gifting or decoration.
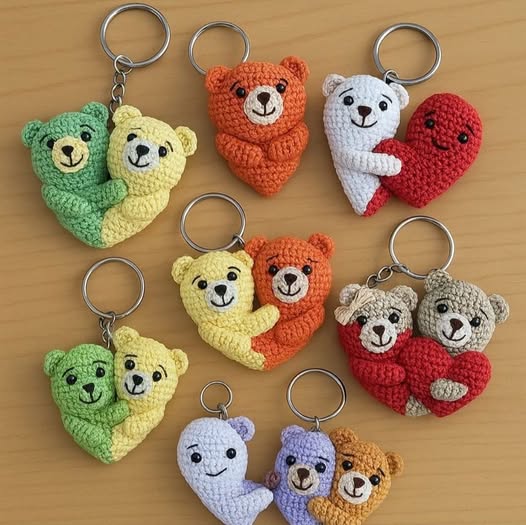
Size variation is another creative twist. By changing your hook and yarn thickness, you can create a whole family of penguins—from mini keychain-sized versions to large plush toys. This flexibility is part of what makes amigurumi such a beloved craft.
If you enjoy storytelling, you can create themed collections, such as “Penguin Adventures.” Each penguin can have its own name, outfit, and personality. This is particularly popular among crafters who sell their creations or share them on social media, as it gives each piece a personal touch.
For an eco-friendly twist, try using recycled or organic yarns. Not only does this make your Crochet Patterns Penguin Amigurumi sustainable, but it also appeals to buyers and friends who value environmentally friendly handmade items.
With endless combinations of colors, sizes, and themes, the creative potential of penguin amigurumi is limited only by your imagination.
After spending hours crafting your Crochet Patterns Penguin Amigurumi, you’ll want to keep it looking perfect for a long time. Proper care and thoughtful display are essential for maintaining the beauty and longevity of your handmade creation.
First, always handle your penguin with clean, dry hands. Even small amounts of oil or dirt can cling to yarn fibers over time. If your penguin gets dusty, use a lint roller or a soft brush to clean it gently without damaging the stitches.
In case your amigurumi needs a deeper clean, hand wash it in cold water using mild soap. Avoid soaking or wringing it out—gently squeeze excess water with a towel and let it air dry completely. Never use a dryer, as the heat can damage yarn fibers and alter the shape.
When displaying your penguin, avoid direct sunlight for long periods, as this can fade the colors. A shaded shelf or display cabinet is ideal. For those who collect multiple amigurumi, consider arranging them by theme or size for a cute, organized look.
If your penguin starts to lose shape over time, you can carefully restuff it through a hidden seam or touch up the seams with a yarn needle. Proper maintenance ensures your Crochet Patterns Penguin Amigurumi remains just as charming as the day you made it.
These small care habits help your handmade treasures last for years and make them beautiful keepsakes to pass on or showcase proudly.
1. What is the best yarn for making Penguin Amigurumi?
Medium-weight cotton or acrylic yarns are ideal because they offer structure, softness, and durability.
2. Can beginners make Crochet Patterns Penguin Amigurumi?
Yes! Many patterns are beginner-friendly, especially those using only basic stitches like single crochet and slip stitch.
3. How long does it take to make a penguin amigurumi?
Depending on your skill level, it can take between 3 to 6 hours for a small penguin and up to 10 hours for a larger one.
4. What stuffing should I use for my penguin amigurumi?
Polyester fiberfill is the most common and provides a soft, even texture. Eco-friendly options include cotton or yarn scraps.
5. Can I wash my penguin amigurumi?
Yes, but always hand wash gently in cold water and air dry to maintain shape and color.
6. How do I make my penguin look more unique?
Experiment with colors, accessories, and facial expressions. Adding scarves, hats, or themed designs can make each penguin stand out.
Making your own Crochet Patterns Penguin Amigurumi is a deeply rewarding and enjoyable craft that allows you to express creativity while creating something adorable and lasting. From choosing materials to perfecting stitches and customizing designs, every step is a chance to learn and relax through art. Whether you’re crafting for yourself, a loved one, or to sell, these little penguins are guaranteed to bring smiles and warmth.
We hope this guide has inspired you to start your own penguin amigurumi project today. If you enjoyed this article or have tried making your own, please share your honest opinion and suggestions in the comments—we’d love to hear your experience and ideas for future crochet projects!


