
Crocheted house-shaped cookie for Christmas tree

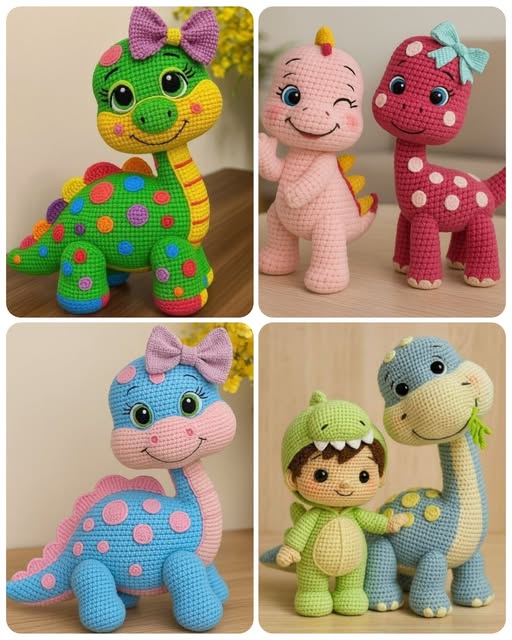
Creating a Branchiosaurus using free patterns is an exciting and enjoyable project for crafters of all skill levels. Whether you are a beginner in amigurumi or an experienced crocheter, making your own Branchiosaurus pattern allows you to combine creativity and skill to produce a charming, handcrafted toy.
This article will guide you through the essential steps, materials, and tips to make your own DIY Branchiosaurus using easily accessible free Branchiosaurus patterns, helping you achieve a professional-looking result while having fun.
The appeal of crafting a Branchiosaurus lies in its unique, prehistoric charm and the ability to customize your creation. Using a free Branchiosaurus pattern ensures consistency in your project, helping you replicate the design accurately while still allowing space for personal touches.
From selecting the right yarn and hook size to following the stitch instructions, each decision contributes to the overall look and quality of your amigurumi Branchiosaurus.
Many crafters enjoy working on a DIY Branchiosaurus because it combines relaxation with tangible results. Whether you plan to gift your creation, display it, or use it as a playful toy, following a structured Branchiosaurus pattern ensures a smooth crafting process. In this article, we will explore all aspects of making a Branchiosaurus using free patterns, including materials, step-by-step guidance, and helpful tips to make your project enjoyable and successful.
Selecting the right materials is key to making a beautiful Branchiosaurus. Yarn type, hook size, and stuffing all affect the final appearance and feel of your project. Soft cotton or acrylic yarn is ideal because it is easy to work with, durable, and comfortable to the touch. Choose colors that reflect the natural tones of a Branchiosaurus or get creative with playful shades to make a unique design.
Hook size is equally important when following a Branchiosaurus pattern. The recommended hook ensures that your stitches are tight enough to hold the stuffing without leaving gaps. Using a hook that is too large can result in loose stitches, while a hook that is too small can make the project difficult and dense. Checking the gauge specified in your pattern guarantees the final size matches the instructions.
Stuffing is essential for giving your DIY Branchiosaurus shape and firmness. Polyester fiberfill is commonly used because it is lightweight, soft, and easy to distribute evenly. Some crafters add small plastic pellets to the body to provide weight and stability. Proper stuffing ensures your Branchiosaurus maintains its form and remains huggable.
Additional materials, such as safety eyes or embroidery thread, can enhance the personality of your amigurumi Branchiosaurus. If the toy is intended for children, always prioritize safety. Other tools, including stitch markers, scissors, and a yarn needle, are essential for assembling the parts neatly and efficiently.
Attention to detail in material selection improves both the crafting experience and the final appearance of your Branchiosaurus. Using high-quality yarn and appropriate tools makes the project smoother, reduces frustration, and increases the overall satisfaction of completing the project.
Finally, always review the specific free Branchiosaurus pattern you plan to use, as it may have unique material recommendations. Having everything prepared before starting prevents interruptions and helps maintain focus throughout your crafting session.
A Branchiosaurus pattern is more than just a set of instructions; it is a roadmap to creating a charming and well-proportioned amigurumi Branchiosaurus. Patterns typically include a materials list, stitch abbreviations, step-by-step instructions, and sometimes diagrams to help you assemble each part accurately. Reviewing the pattern thoroughly before starting helps avoid mistakes and ensures smooth progress.
Familiarize yourself with common stitch abbreviations used in the Branchiosaurus pattern, such as sc (single crochet), inc (increase), and dec (decrease). Understanding these terms is essential for following the instructions correctly. Beginners may find it helpful to practice these stitches on a small swatch before starting the full project.
Most patterns divide the Branchiosaurus into separate parts, such as the body, limbs, tail, and head. Crocheting each piece individually allows for greater control over shape and size. Keeping track of stitch counts is crucial for maintaining symmetry in your DIY Branchiosaurus.
Following the instructions in the free Branchiosaurus pattern ensures your project progresses without major errors. Skipping steps or miscounting stitches can affect proportions and make assembly more difficult. For beginners, using stitch markers or row counters is a helpful way to stay on track.
Patterns that include diagrams or illustrations are valuable for visual learners. They show how pieces fit together and clarify written instructions that may seem confusing. Using these diagrams as reference points during assembly improves accuracy and reduces frustration.
By thoroughly understanding your Branchiosaurus pattern, you gain confidence and can focus on the enjoyable aspects of crafting. A clear grasp of the instructions allows for personalization without compromising the final appearance of your amigurumi Branchiosaurus.
Start with the body when making a Branchiosaurus, as it serves as the foundation for attaching other parts. Most patterns instruct you to work in rounds, gradually increasing stitches to create a rounded shape. Following the stitch count carefully ensures your body maintains proper proportions.
Next, crochet the head and limbs separately. These pieces usually involve simple stitches, with occasional increases or decreases to shape features accurately. Checking stitch counts frequently helps maintain symmetry and avoid mistakes in your DIY Branchiosaurus.
Proper stuffing is essential for giving your Branchiosaurus form. Fill the body, head, limbs, and tail gently, distributing fiberfill evenly to prevent lumps or distortions. Balanced stuffing ensures your amigurumi Branchiosaurus looks smooth and professional.
Assemble the pieces using a yarn needle and secure stitching, such as a whip stitch or mattress stitch. Position the head, limbs, and tail carefully before sewing to ensure alignment. Once sewn, your Branchiosaurus will take shape and look cohesive.
Adding facial features and shell or body patterns brings personality to your Branchiosaurus. Safety eyes or embroidery work well, and you can use contrasting yarn colors to add visual interest. These finishing touches make your project uniquely yours.
Finally, inspect your work for loose ends or uneven stitches. Weave in all yarn tails neatly and trim any excess. Attention to these details guarantees your DIY Branchiosaurus looks polished and ready to enjoy.
Personalizing your Branchiosaurus makes your creation truly special. Experiment with colors, textures, and patterns to match your style or the intended recipient. Playful, bright colors appeal to children, while natural or muted tones work well for decor.
Consider adding accessories like small scarves, hats, or embroidered designs to your amigurumi Branchiosaurus. These details make your project unique and show off your creativity. Holiday-themed or seasonal designs can also add a fun twist.
Different yarn textures create interesting effects. Fuzzy or textured yarns give a whimsical look, while smooth cotton creates a clean, precise appearance. Choosing the right yarn can significantly affect the overall feel of your DIY Branchiosaurus.
Adjust the size by changing hook and yarn thickness. Larger hooks and yarn produce a bigger toy, while smaller combinations yield a cute miniature. Size customization is perfect for making multiple Branchiosaurus toys in a collection.
Embroidery and applique techniques allow for additional personalization. Hearts, initials, or patterns on the body can make your Branchiosaurus one-of-a-kind, ideal for gifting or display.
Don’t hesitate to mix different patterns or invent new features. Combining elements from various Branchiosaurus patterns encourages creativity and results in a unique piece you can proudly display or gift.
Q1: Can beginners make a Branchiosaurus?
A1: Absolutely! Many Branchiosaurus patterns are beginner-friendly. Start with basic stitches and follow instructions carefully.
Q2: What yarn is best for a Branchiosaurus?
A2: Soft acrylic or cotton yarn is ideal. Use polyester fiberfill for stuffing. Safety eyes or embroidery thread can add facial features.
Q3: How long does it take to crochet a Branchiosaurus?
A3: It depends on size and experience. Small Branchiosaurus toys may take a few hours, while larger or detailed ones may take a couple of days.
Q4: Can I sell my crocheted Branchiosaurus?
A4: Yes! Handmade DIY Branchiosaurus toys are popular. Ensure you follow copyright rules if using a published pattern.
Q5: How can I personalize my Branchiosaurus?
A5: Use different yarn colors, add accessories, or embroider designs on the body. Adjust size with hook and yarn choices.
Q6: Is it safe to wash a Branchiosaurus?
A6: Most yarns can be hand-washed gently with cold water. Avoid wringing and check the yarn label for care instructions.
Creating a Branchiosaurus using free patterns is a fun and creative project that allows you to craft a unique, charming toy. By selecting the right materials, understanding the Branchiosaurus pattern, and personalizing your design, you can produce a professional-looking DIY Branchiosaurus. From crocheting individual parts to careful assembly and finishing touches, each step ensures a polished and delightful result.
We hope this guide inspires you to create your own amigurumi Branchiosaurus. Experiment with colors, textures, and patterns to make your toy uniquely yours. Share your experiences, suggestions, and honest feedback to help the crafting community grow and inspire others to explore the joy of crochet.


