
Crocheted house-shaped cookie for Christmas tree

The Beaded Fidget Turtle – Crochet Pattern is a delightful and calming project for crocheters of all skill levels. Creating a crochet fidget toy shaped like a tiny turtle allows crafters to enjoy the therapeutic benefits of amigurumi while producing a functional and adorable item.
These turtles are not only fun to make but also serve as a portable DIY crochet turtle that can help reduce stress, improve focus, and provide a sensory experience.
Whether you are a beginner or an experienced crocheter, this free crochet pattern gives you the freedom to customize your turtle with different yarn colors, beads, and stitch patterns, making each creation unique.
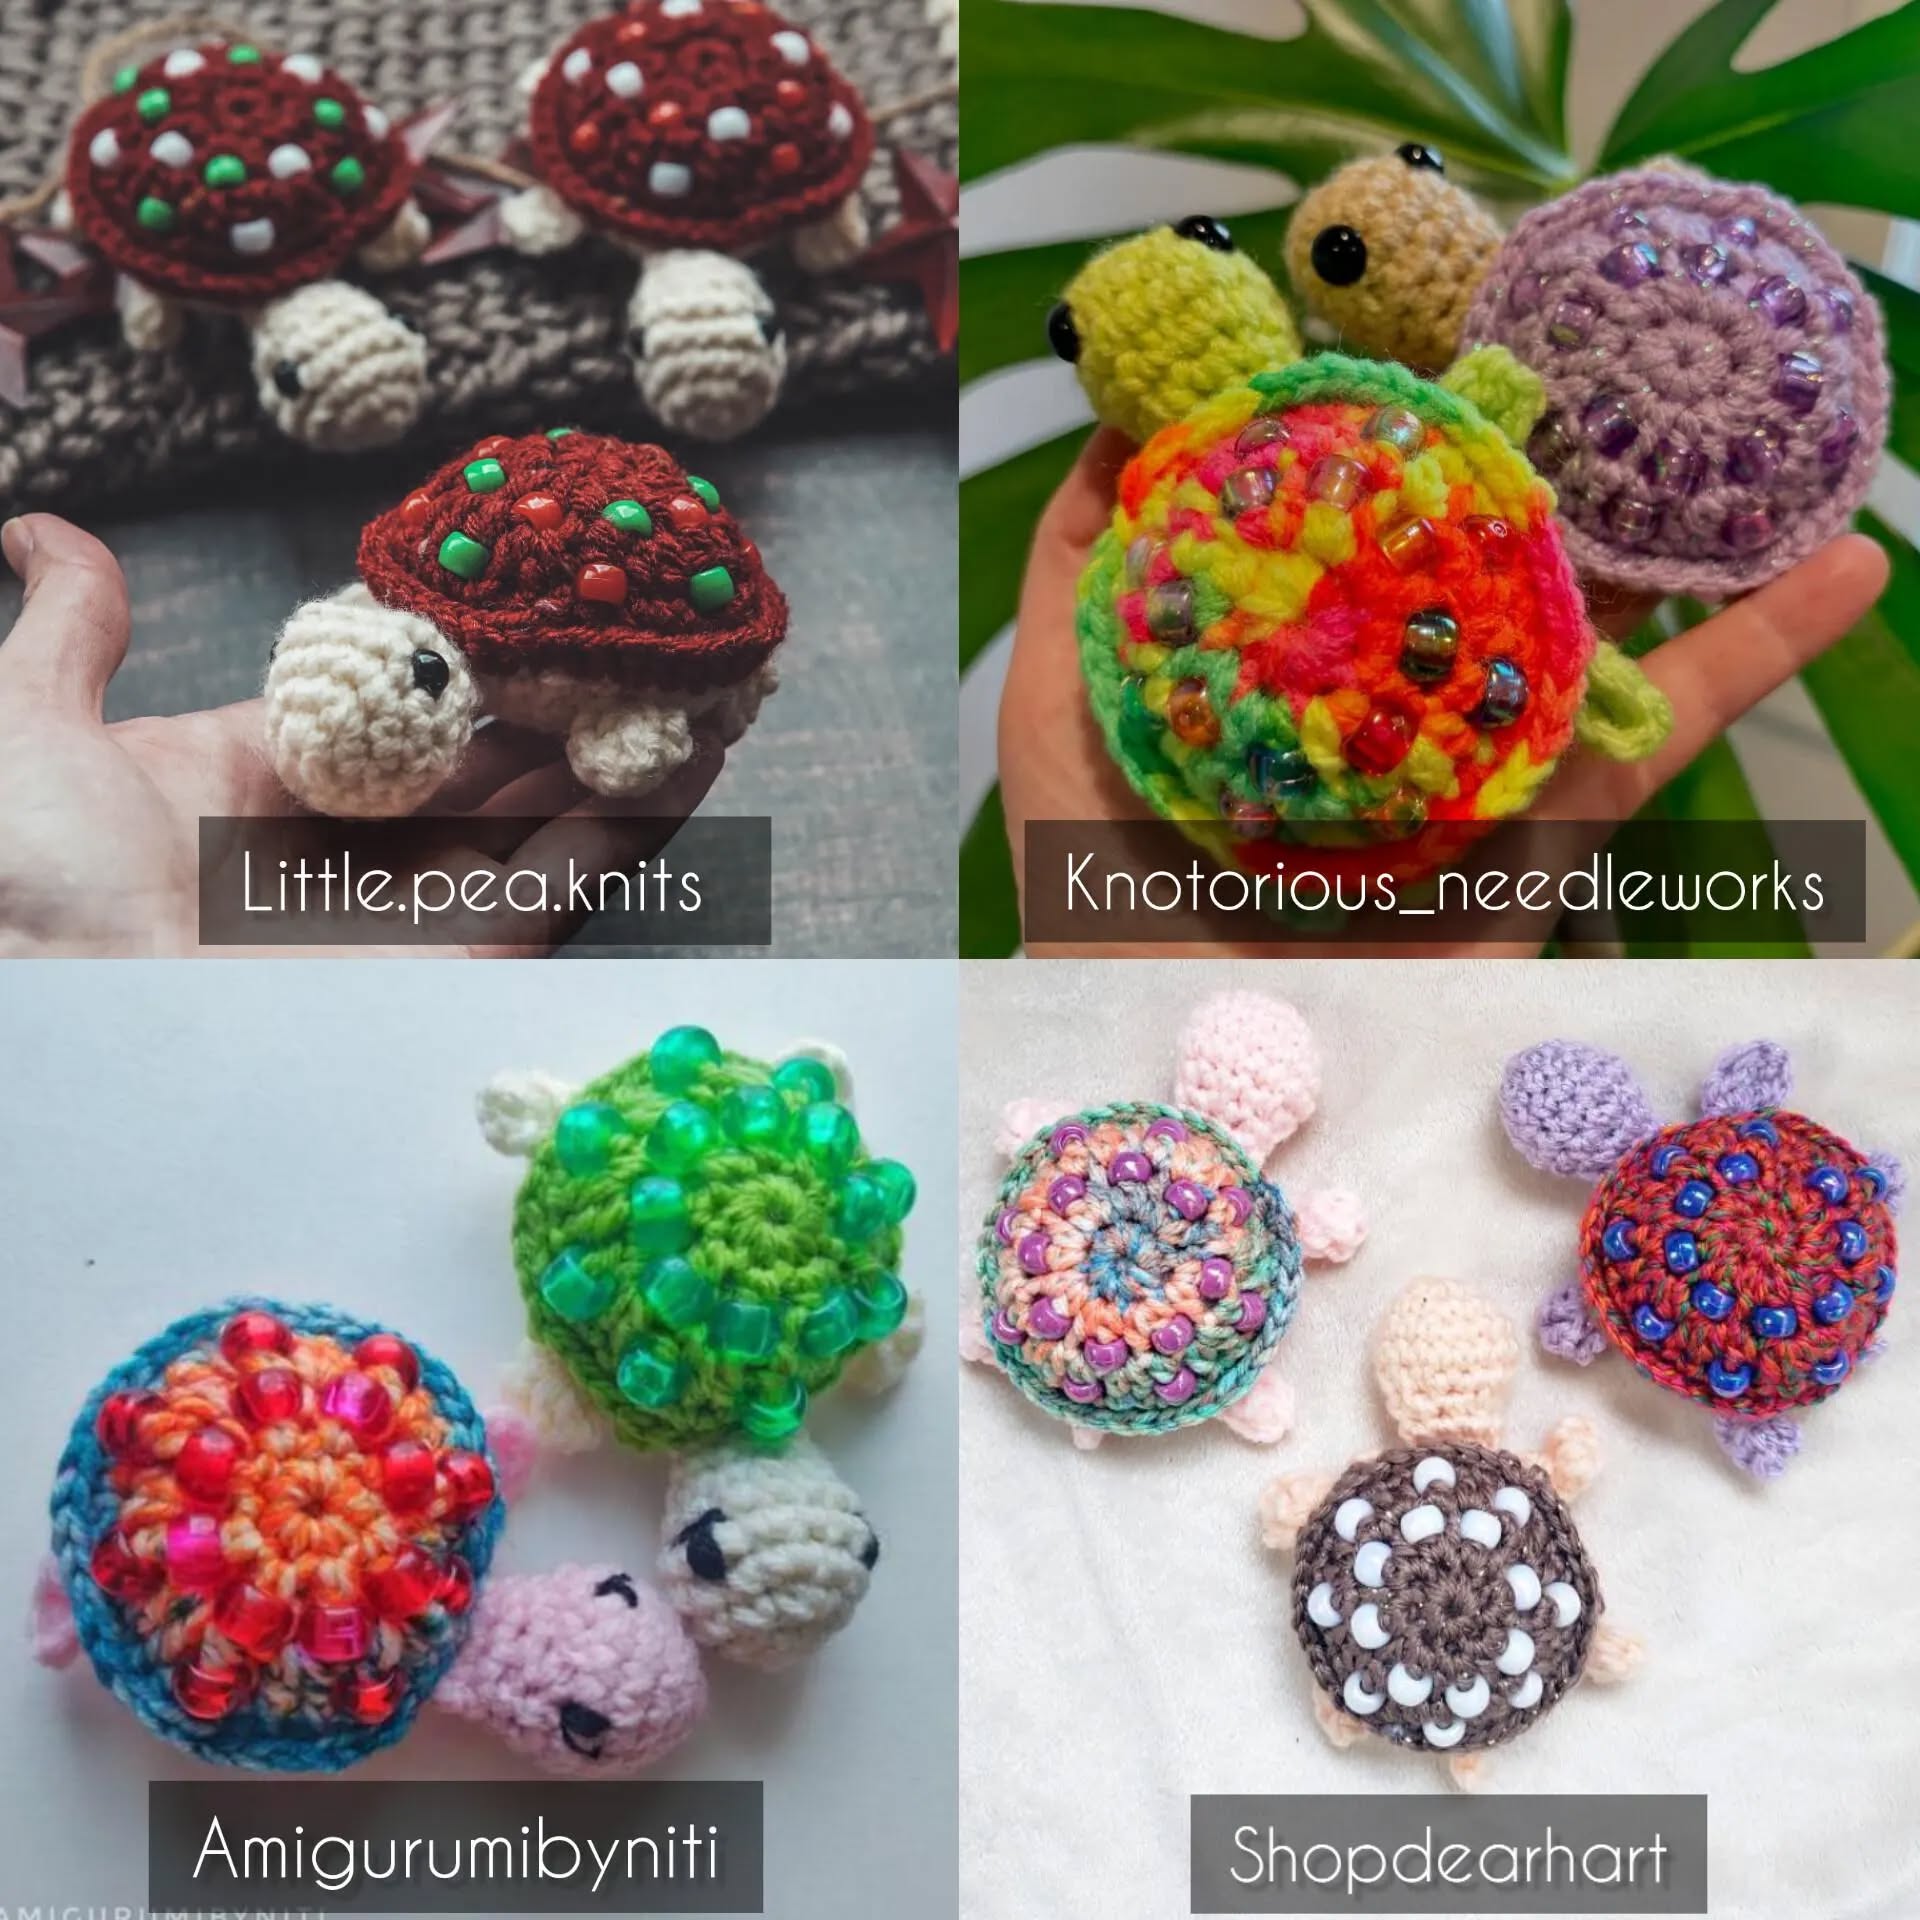
One of the main attractions of this beaded fidget turtle is its combination of soft yarn and textured beads. The beads provide tactile stimulation, while the crochet stitches give a soft, squeezable feel.
This makes it ideal for people of all ages who enjoy handmade fidget toys or need a calming tool during work, study, or leisure. The process of making the turtle itself is relaxing; repetitive stitches and careful bead placement create a mindful, meditative crafting experience that soothes both mind and hands.
Additionally, this project is compact and portable. Once completed, your DIY crochet turtle fits comfortably in your hand, bag, or pocket. You can carry it everywhere, using it as a stress-relief tool or as a cute gift for friends and family. The combination of bright, colorful beads and soft yarn makes it visually appealing, while its small size and lightweight design make it practical. Following this free crochet pattern allows you to explore new techniques, improve your precision, and create a unique, high-quality crochet fidget toy that will be loved for years.
Before starting, gather all necessary materials to create your beaded fidget turtle. The most important item is yarn. Choose a soft, durable yarn such as cotton or acrylic. Cotton is excellent for beginners because it offers clear stitch definition and is easy to manipulate. Acrylic is forgiving and flexible, making it perfect for small amigurumi projects. For your turtle, select two colors—one for the body and one for the shell—to make your beads and stitches stand out.
You will also need a crochet hook that matches your yarn, typically between 2 mm and 3.5 mm. A smaller hook helps create tight stitches, preventing stuffing or beads from slipping through. Polyester fiberfill is essential for stuffing the turtle’s body, giving it a soft yet firm shape suitable for fidgeting. Choose lightweight beads for the shell, like glass, wood, or plastic. The beads add texture and a pleasant sensory element, enhancing the tactile experience of your handmade fidget toy.
Other tools include a yarn needle for sewing pieces together, stitch markers to keep track of rounds, and scissors. Optional items include safety eyes, embroidery thread for facial features, and small pins for temporarily holding parts in place. If this DIY crochet turtle is intended for children, embroidered eyes are safer than plastic ones. Having all your materials prepared ensures a smooth crafting experience and allows you to focus on creating a high-quality free crochet pattern project.
Start your beaded fidget turtle by creating the head and body using a magic ring. This technique allows for a seamless start, ensuring a neat finish. Crochet in single rounds, gradually increasing stitches to form a smooth, rounded body. Once the base is established, you can begin incorporating beads. Thread beads onto your yarn beforehand, sliding each bead into place before completing a stitch. This method ensures your beads remain securely in the shell pattern, adding a beautiful texture and visual appeal.
After forming the main body, continue working in rounds until the turtle reaches your desired size—around 3 to 4 inches in diameter is ideal for a fidget toy. Stuff the body lightly with fiberfill, making sure not to overstuff, so it remains squeezable. The stuffing process is crucial for achieving the perfect texture, balancing firmness with softness. Then, close the opening carefully using decreasing stitches, maintaining the turtle’s rounded shape.
Next, crochet the limbs, head, and tail separately. Small ovals or tubes form the flippers, which you attach securely to the sides of the turtle. The head is slightly larger than the limbs, giving your DIY crochet turtle its charming appearance. After attaching all parts, add facial details such as embroidered eyes, a small mouth, or even tiny nostrils. Optionally, use contrasting yarn around the shell to accentuate the beads and give your handmade fidget toy a professional, polished look.
One of the most enjoyable aspects of making a beaded fidget turtle is the ability to customize it. Color choices dramatically change the turtle’s personality. For example, shades of green and blue can create an ocean-inspired look, while bright, multicolored beads give a playful, vibrant design. Changing the type or size of beads also affects the tactile experience; larger beads provide a more pronounced sensory effect, while smaller beads create subtle texture.
You can also personalize the turtle by adding small embroidery details or appliques, such as tiny hearts, stars, or initials. For a child-friendly option, substitute beads with soft yarn bumps or felt shapes for safety. Consider adding a small keyring or loop so the turtle can be used as a portable fidget toy or bag charm. By experimenting with stitch patterns, yarn types, and bead arrangements, every DIY crochet turtle can be made entirely unique, reflecting your creativity and personal style.
Customizations are not limited to appearance. You can also modify the turtle’s size by adjusting the yarn thickness and crochet hook. Larger turtles make fun desk toys, while smaller ones fit perfectly in your pocket or handbag. Each variation maintains the calming, tactile experience of the crochet fidget toy, making it versatile and highly adaptable for different needs or preferences.
When making a beaded fidget turtle, consistency is key. One common mistake is using uneven tension, which can cause the beads to sit irregularly or the body to become lopsided. Practice maintaining a steady stitch tension throughout, and consider using stitch markers to keep track of rounds. Another frequent issue is misplacing limbs or the head. Pinning each part before sewing ensures proper alignment and a professional look.
Be careful not to overstuff or understuff your turtle. Overstuffing results in a rigid, uncomfortable toy, while understuffing may make it floppy or collapse. Also, when adding beads, thread enough onto your yarn before beginning to avoid running out mid-project. Beads should be lightweight, smooth, and securely fastened to prevent them from loosening during use.
Finally, avoid rushing. Take your time with each step, especially when adding beads or attaching parts. Careful attention to detail ensures that your handmade fidget toy is visually appealing, functional, and durable. Small imperfections are natural, but patience and precision produce a polished free crochet pattern project that you can proudly display or gift.
Q1: Is this pattern suitable for beginners?
Yes! The beaded fidget turtle pattern is beginner-friendly, with simple single stitches and clear bead placement instructions.
Q2: What type of beads works best?
Lightweight, smooth beads such as plastic, wood, or glass are ideal. Avoid sharp or heavy beads for safety and ease of use.
Q3: How long does it take to complete one turtle?
Depending on experience, a DIY crochet turtle takes 2–4 hours to finish, making it a quick and rewarding project.
Q4: Can I wash the turtle?
Hand wash gently in cold water. Avoid machine washing to prevent beads from loosening or yarn from stretching.
Q5: Is it safe for children?
For younger children, replace beads with yarn bumps or felt shapes to prevent choking hazards. Always secure all parts tightly.
Q6: Can I sell these turtles?
Yes, many crafters sell handmade fidget toys online or at craft fairs. Ensure you respect the original pattern licensing if required.
The Beaded Fidget Turtle – Crochet Pattern combines creativity, mindfulness, and practicality in a small, portable project. This crochet fidget toy is not only adorable but also provides a calming sensory experience. By following this free crochet pattern, you can create unique, high-quality turtles customized with colors, beads, and embroidery.
Making these turtles is relaxing and rewarding, offering both visual appeal and tactile satisfaction. Each handmade piece is a reflection of your patience, skill, and creativity. Perfect as gifts or personal fidget tools, these turtles bring joy to crafters and recipients alike. Share your honest opinion and suggestions to inspire others to explore the world of DIY crochet turtles.
When working with this crochet pattern, you will discover how the turtle’s structure blends with the beads to form a balanced design. Each step of the process teaches patience and precision while leaving room for creativity in choosing colors and bead styles.
Before diving into the instructions, it’s important to understand the essential tools, stitches, and materials needed. Once you prepare your yarn, hook, and beads, you’ll be ready to start shaping your turtle and turning your imagination into a tangible piece of handmade art.


