
Crocheted house-shaped cookie for Christmas tree

Fall is the perfect season to add cozy, whimsical touches to your home, and what better way than with an Amigurumi Pumpkin Witch House – Free Crochet Pattern?
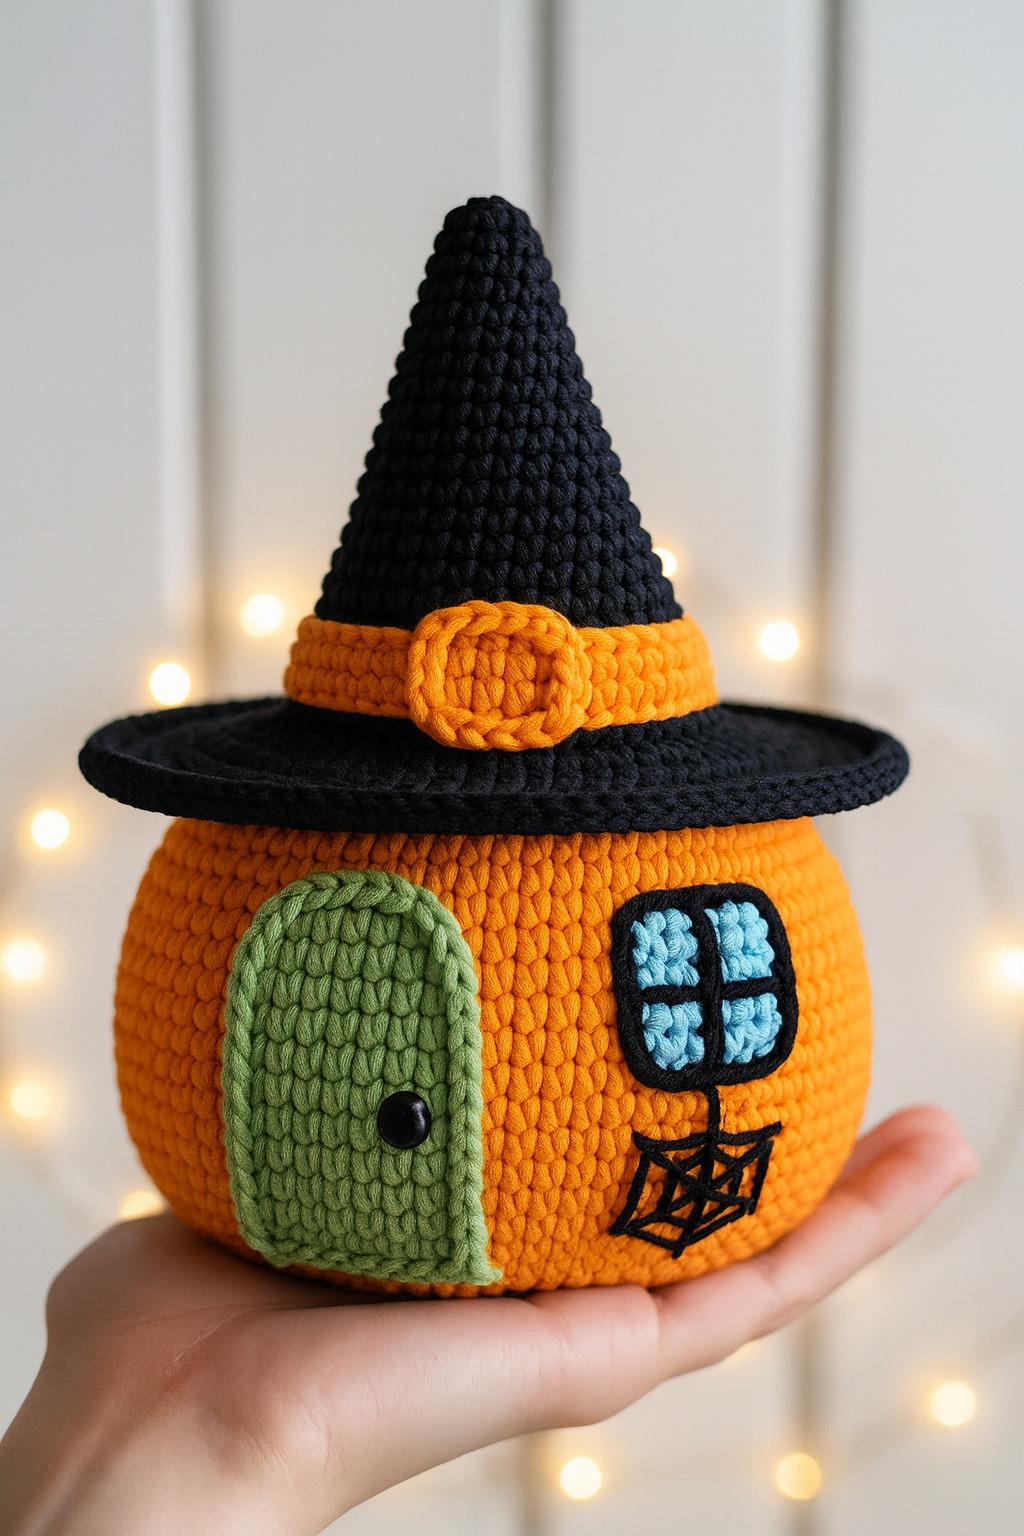
This cute Halloween crochet project brings together the charm of autumn pumpkins and the magic of a tiny witch house, creating a delightful decorative piece.
Whether you are an experienced crocheter or trying amigurumi for the first time, this pattern offers a fun and rewarding challenge.
Creating an amigurumi pumpkin witch house is not just about making a decoration; it’s about crafting a piece of art that reflects your creativity.
You can customize it with different colors, textures, or embellishments like tiny windows, doors, and even miniature pumpkins to make your DIY amigurumi house uniquely yours. This crochet pumpkin house can serve as a centerpiece, gift, or part of your Halloween crochet decor.
In this guide, you’ll learn how to make your own crochet witch house step by step. We’ll cover all the materials you need, assembly instructions, creative customization ideas, and tips for displaying and caring for your finished piece. By the end, you’ll have a magical little house ready to enchant anyone who sees it.
Before you begin your amigurumi pumpkin witch house, gather all the necessary materials to ensure smooth and enjoyable crafting. Having everything ready helps prevent interruptions and makes the process more enjoyable.
Start with medium-weight yarn in colors that reflect fall and Halloween themes. Orange works perfectly for the pumpkin base, while green, brown, and black are ideal for accents, windows, roofs, and the witch house details. Using cotton or acrylic yarn gives your house structure and durability.
Next, select a crochet hook suitable for your yarn. Typically, hooks between 3.5mm and 4.5mm work best for amigurumi. Maintaining even tension is important so that your stitches are firm enough to hold the stuffing but not so tight that they are difficult to work with.
For stuffing, use polyfill or other soft materials. This will shape the pumpkin base and give your DIY amigurumi house a sturdy yet soft structure. Optional materials include small felt pieces for doors and windows or embroidery thread for delicate details.
A yarn needle is essential for sewing parts together, and a stitch marker can help you keep track of rounds. Don’t forget scissors for trimming yarn and small decorative items like beads, buttons, or tiny flowers to add personality to your cute Halloween crochet project.
Finally, patience and creativity are key. Working carefully will ensure your crochet pumpkin house turns out both charming and durable, making it a perfect addition to your Halloween crochet decor.
Creating your amigurumi pumpkin witch house involves crocheting the pumpkin base, house features, and assembly. Even beginners can follow this free crochet pattern with patience and attention to detail.
Start by crocheting the pumpkin base, which forms the foundation of your witch house. Increase stitches in the initial rounds to form a rounded shape, then gradually decrease toward the top. Lightly stuff the pumpkin as you go to maintain its structure.
Next, crochet the house details such as walls, roof, and chimney separately. The roof can be pointed or slightly curved for a whimsical effect. Using contrasting colors enhances the visual appeal of your crochet witch house.
Add windows and doors using either small crocheted rectangles or felt pieces stitched onto the pumpkin base. Embroidery details like curtains or lattice windows give your house more character and depth.
For extra charm, you can create miniature accessories like tiny pumpkins, leaves, or a little broomstick to place next to the house. These small touches elevate your DIY amigurumi house from simple to magical.
Assemble all parts using a yarn needle, attaching the roof, chimney, and any additional features securely. Adjust the placement for a balanced and visually appealing finish.
Finally, step back and admire your creation! You now have a whimsical amigurumi pumpkin witch house that adds charm, fun, and a festive Halloween spirit to your home.
One of the joys of making an Amigurumi Pumpkin Witch House – Free Crochet Pattern is how easily it can be personalized. You can add details and colors that match your style and holiday decor.
Experiment with different yarn colors. Try deep purples, vibrant oranges, or muted greens for a unique effect. Mixing textures, such as cotton for the pumpkin and velvet yarn for the roof, creates a visually interesting piece.
You can also adjust the size. Using thicker yarn and a larger hook creates a bigger house perfect for display, while smaller yarn and a smaller hook produce mini houses suitable for shelves or as gifts.
Adding festive accessories is a fun way to make your house stand out. Crochet tiny pumpkins, leaves, or flowers to decorate the roof or garden. You can even add a miniature black cat or tiny spider for a whimsical touch.
Consider lighting options. Small battery-operated LEDs inside the pumpkin can illuminate your crochet pumpkin house, making it a captivating centerpiece for Halloween.
Finally, you can adapt this pattern for other seasons by swapping colors and decorations. A Christmas-themed pumpkin house or spring-themed fairy house is a creative twist on this versatile cute Halloween crochet project.
Once your amigurumi pumpkin witch house is complete, knowing how to display and care for it will ensure it remains charming year after year.
For Halloween decor, place your house on shelves, mantels, or tables surrounded by fall decorations such as real or artificial pumpkins, leaves, and candles. Multiple houses create a whimsical miniature village.
Avoid prolonged exposure to direct sunlight, which can fade yarn colors. Dust gently with a soft brush or lint roller to keep your DIY amigurumi house clean.
If your pumpkin base loses its shape over time, gently restuff or reshape with your hands. The yarn and stuffing are forgiving and allow for easy adjustments.
When storing after the season, wrap your house in tissue or place it in a dry box to prevent dust and moisture from damaging the yarn or details.
For gifting, include a note explaining that it’s handmade and part of a free crochet pattern, making it a thoughtful and unique present.
By following these tips, your crochet pumpkin house will remain a beloved decoration that brings joy every fall.
1. Is this pattern suitable for beginners?
Yes! The free crochet pattern uses basic stitches like single crochet, increase, and decrease, making it beginner-friendly.
2. How long does it take to make an amigurumi pumpkin witch house?
It generally takes 6–10 hours depending on skill level and customization. Beginners may take longer, while experienced crocheters can finish faster.
3. Can I sell the finished pumpkin witch house?
Yes! Handmade creations are perfect for craft fairs or online shops. Always credit the original amigurumi pumpkin witch house pattern if required.
4. What yarn works best for this project?
Medium-weight acrylic or cotton yarn is ideal. It is durable, easy to work with, and maintains the shape of your DIY amigurumi house.
5. Can I add lights to my crochet pumpkin house?
Yes! Small battery-operated LED lights can be placed inside the pumpkin to illuminate your house for a magical effect.
6. Can I customize colors and accessories?
Absolutely! Changing yarn colors, adding leaves, mini pumpkins, or even tiny crochet animals makes each house unique and festive.
Creating an Amigurumi Pumpkin Witch House – Free Crochet Pattern is a fun, creative, and rewarding project that brings festive Halloween spirit to your home. You’ve learned how to select materials, crochet each component, assemble your pumpkin house, and add whimsical customizations.
Now it’s your turn! Grab your yarn, follow this crochet witch house pattern, and bring your magical miniature home to life.
We’d love to hear from you—leave your honest opinion and suggestions in the comments below. Your feedback inspires new creative projects and helps fellow crocheters craft their own cute Halloween crochet masterpieces!


