
Crocheted house-shaped cookie for Christmas tree

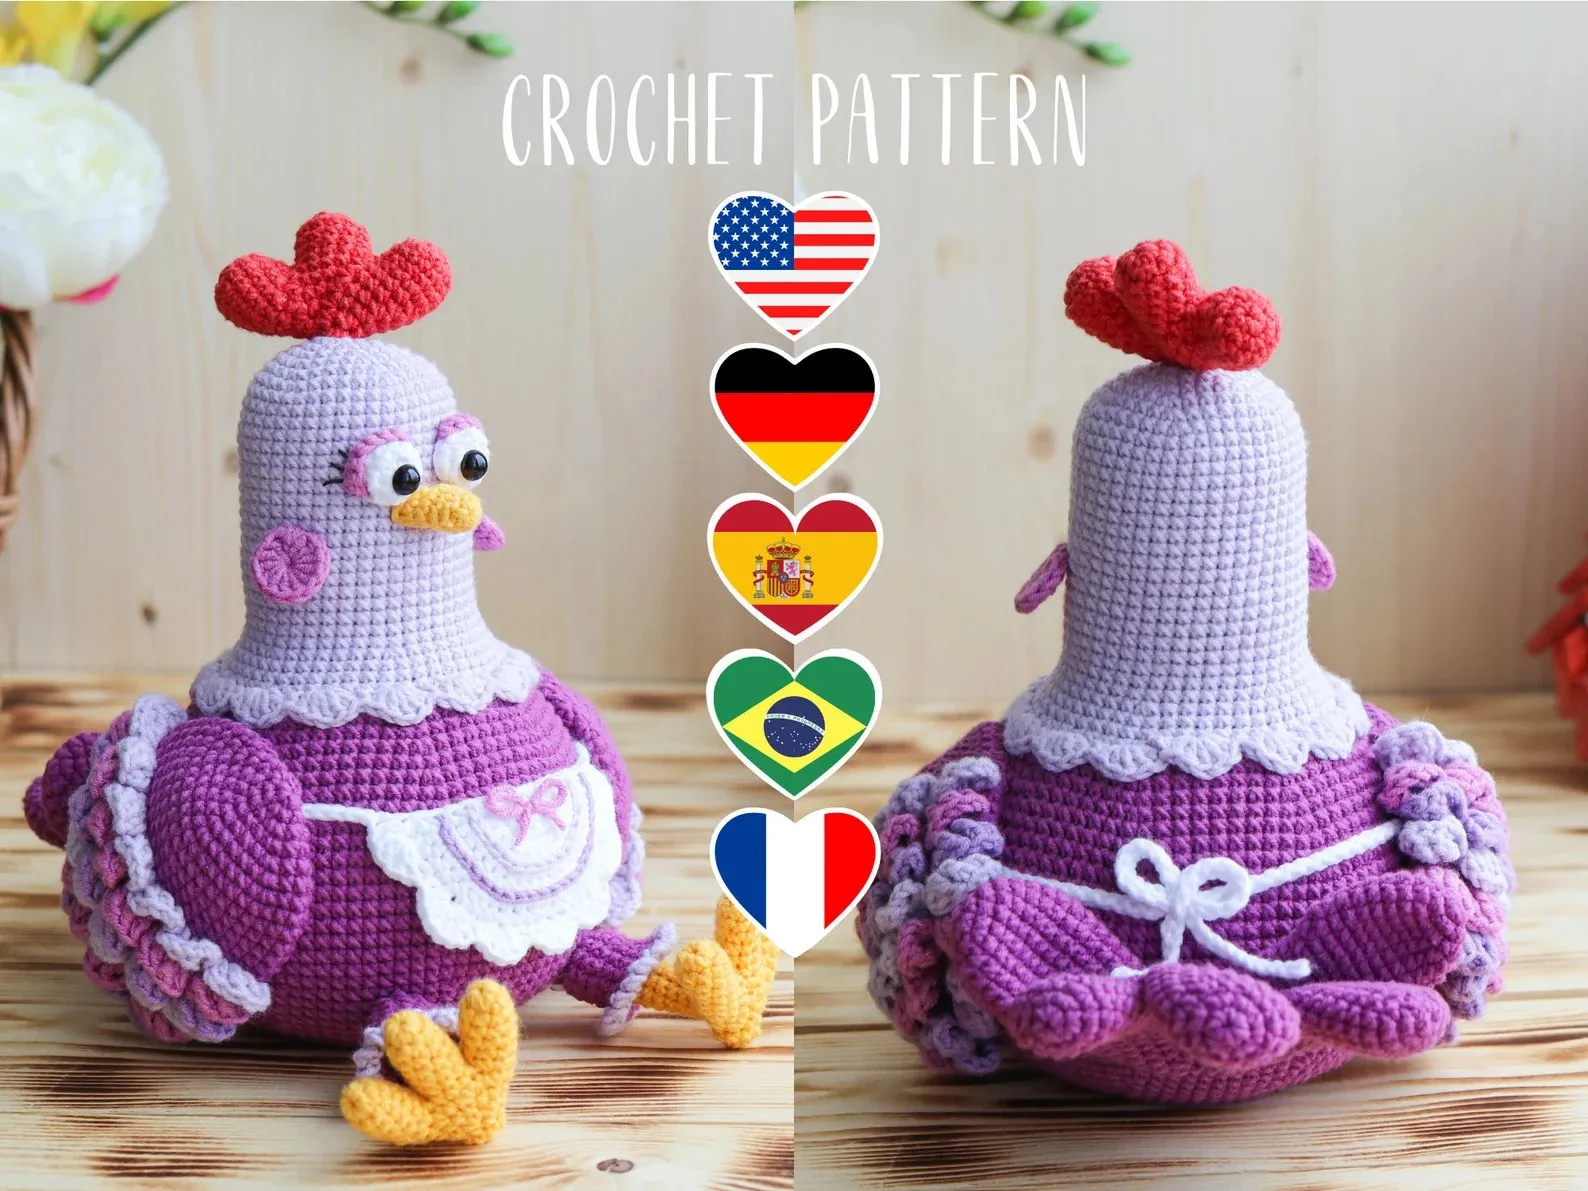
If you are looking for a fun and creative project, the Adorable Chicken Crochet Pattern – Amigurumi Chicken Toy is the perfect choice.
This delightful pattern is not only a great way to practice your crochet skills, but it also allows you to create a charming handmade toy that will bring joy to anyone who sees it.
Whether you are a beginner or an experienced crocheter, this Amigurumi Chicken Toy offers a rewarding crafting experience that can be shared with family and friends.
Crocheting has become an increasingly popular hobby for people who enjoy making handmade items that are both functional and decorative.
The Adorable Chicken Crochet Pattern is designed to be approachable for all skill levels, using basic stitches that are easy to follow. With clear instructions and helpful tips, this pattern ensures that even beginners can successfully create their own Amigurumi Chicken Toy. Plus, completing this project gives a wonderful sense of accomplishment.
Not only is this Adorable Chicken Crochet Pattern enjoyable to make, but it also makes a perfect gift for children, friends, or anyone who appreciates cute and unique handcrafted items. The Amigurumi Chicken Toy can be used as a playful decoration, a companion for children, or even a charming addition to your home décor. Its small size and soft texture make it ideal for cuddling, and the cheerful design brings a smile to anyone who holds it.
To get started with the Adorable Chicken Crochet Pattern – Amigurumi Chicken Toy, you will need a few basic materials. These supplies are easy to find and affordable, making this project accessible to everyone. The main material is yarn, preferably in colors that mimic a chicken, such as yellow, red, white, and orange. Choosing high-quality yarn ensures that your finished toy is soft and durable.
A suitable crochet hook is essential for achieving the right tension and stitch consistency. Most Amigurumi Chicken Toy patterns recommend a hook size that works well with the yarn you have selected. In addition to yarn and a hook, you will also need safety eyes or embroidery thread to create the chicken’s facial features. These small details are what bring your crochet toy to life.
Stuffing is another critical element for your Adorable Chicken Crochet Pattern. Polyester fiberfill is commonly used because it is lightweight, easy to shape, and maintains the toy’s structure over time. You will also need a yarn needle for sewing parts together and weaving in loose ends. These tools make assembling your Amigurumi Chicken Toy a smooth and enjoyable process.
Crochet markers can be helpful, especially for beginners, to keep track of rounds and stitches. They prevent mistakes and ensure your Adorable Chicken Crochet Pattern turns out as intended. Lastly, scissors are needed to cut yarn cleanly, giving your toy a professional finish. With these materials in hand, you are ready to start creating your adorable chicken.
Creating your Adorable Chicken Crochet Pattern – Amigurumi Chicken Toy begins with the head. Start by making a magic ring and crocheting in rounds to shape the head. Gradually increase the number of stitches to form a round, plump head. Using the proper stitch count is crucial to achieving a symmetrical and balanced look for your chicken.
Next, focus on the body of your Amigurumi Chicken Toy. Similar to the head, you will crochet in rounds, gradually shaping the body with increases and decreases. Make sure to stuff the head and body firmly with fiberfill as you go, so the toy holds its shape and feels soft yet structured. The stuffing process is key to making your chicken cuddly and huggable.
Once the head and body are complete, it’s time to create the wings and tail. These smaller pieces require fewer stitches but are essential for giving your Adorable Chicken Crochet Pattern its characteristic charm. Attach the wings and tail securely to the body using a yarn needle, ensuring they are evenly positioned for a balanced appearance.
The beak and comb are crucial for adding personality to your Amigurumi Chicken Toy. Use contrasting yarn colors to make these features stand out. Crocheting them separately and sewing them onto the head is recommended, as it allows for better control over placement and shape. The beak should be centered, and the comb should sit neatly on top of the head for a cute, lifelike look.
Finally, add the eyes to complete your Adorable Chicken Crochet Pattern. Safety eyes are popular for their polished appearance and secure attachment, but embroidered eyes are also a safe choice for toys intended for young children. Ensure the eyes are evenly spaced to create a friendly and expressive face that brings your chicken to life.
To ensure your Adorable Chicken Crochet Pattern – Amigurumi Chicken Toy turns out beautifully, attention to detail is essential. First, maintain consistent tension throughout your project. Uneven stitches can affect the shape and overall appearance of your chicken. Practicing tension on a small swatch before starting the full toy can help achieve a uniform result.
Another tip is to take your time with stuffing. Adding too much fiberfill can stretch the stitches, while too little may cause the toy to lose shape. Aim for a balance that gives your Amigurumi Chicken Toy a firm yet squeezable texture. Stuffing gradually and evenly is the key to a polished final product.
Pay careful attention to stitching parts together. The wings, tail, comb, and beak should be attached securely to prevent them from coming loose. Using pins or clips to hold pieces in place before sewing ensures that your Adorable Chicken Crochet Pattern is neat and symmetrical.
Color choice also makes a difference. Using bright, cheerful colors for the chicken body and subtle tones for details can enhance its appeal. Don’t be afraid to experiment with variations to create a unique Amigurumi Chicken Toy that reflects your style.
Keep your pattern instructions close and follow them step by step. Rushing can lead to mistakes, so work patiently. Mistakes can usually be fixed by carefully unraveling and redoing stitches, which is part of the learning process in crochet.
Lastly, adding small embellishments like tiny embroidered feathers or patterns on the wings can personalize your Adorable Chicken Crochet Pattern. These finishing touches make your toy extra special and showcase your creativity as a crocheter.
One of the most common mistakes when making an Adorable Chicken Crochet Pattern – Amigurumi Chicken Toy is inconsistent stitch tension. Uneven stitches can make the toy look lopsided or affect how the parts fit together. Regularly counting stitches and checking your work helps prevent this issue.
Another mistake is overstuffing or understuffing the toy. Too much stuffing can stretch the stitches, while too little can leave the chicken floppy. Using the right amount of fiberfill and adjusting as you go ensures a properly shaped Amigurumi Chicken Toy.
Incorrect placement of the eyes, beak, or comb can also affect the toy’s appearance. Measure and mark positions before attaching to achieve symmetry. Even small misalignments can make a noticeable difference in the final look.
Skipping essential steps in the pattern is another issue. Follow the instructions carefully to ensure all pieces are crocheted, stuffed, and sewn correctly. Omitting steps may result in an incomplete or unstable Adorable Chicken Crochet Pattern.
Choosing the wrong yarn or hook size can impact the size and texture of your chicken. Make sure to use the recommended materials to achieve the desired result. Substituting yarn types is possible, but test your gauge first to avoid surprises.
Finally, rushing the project often leads to sloppy stitching and uneven shaping. Patience is essential when creating your Amigurumi Chicken Toy, and taking breaks can help maintain precision and quality.
Q1: Is this pattern suitable for beginners?
Yes, the Adorable Chicken Crochet Pattern – Amigurumi Chicken Toy is beginner-friendly, using basic stitches and clear instructions.
Q2: What materials do I need?
You will need yarn in yellow, red, orange, and white, a crochet hook, fiberfill stuffing, safety eyes or embroidery thread, a yarn needle, and scissors.
Q3: How long does it take to complete?
The time depends on your experience, but most beginners can finish in 4–6 hours over multiple sessions.
Q4: Can I wash my finished Amigurumi Chicken Toy?
Yes, hand washing in cold water is recommended to preserve shape and color. Avoid machine washing for longevity.
Q5: Can I sell the toys I make?
Yes, you can sell your handmade Amigurumi Chicken Toy, but the pattern itself is for personal use and cannot be distributed commercially without permission.
Q6: Can I customize the colors or size?
Absolutely! You can use different yarn colors and adjust hook size to change the size and appearance of your Adorable Chicken Crochet Pattern.
Creating the Adorable Chicken Crochet Pattern – Amigurumi Chicken Toy is a delightful way to practice your crochet skills while making something cute and meaningful. From gathering materials to stitching the final details, this project offers a rewarding and enjoyable crafting experience. Following the tips, instructions, and guidance in this article ensures your chicken will look charming, be well-made, and bring joy to anyone who receives it.
We hope you enjoyed this detailed guide on making your Amigurumi Chicken Toy. Share your thoughts, successes, and any suggestions for future patterns. Your feedback helps improve crafting communities and inspires others to try new creative projects.


