
Hunter's Star Quilt Block - Quick & Easy Tutorial

The Best Friends Forever – Quilt Pattern is a heartfelt project that celebrates friendship, creativity, and the timeless art of quilting. Whether you are a beginner or an experienced quilter, this DIY quilt tutorial allows you to craft a meaningful and beautiful gift that will be cherished for years.
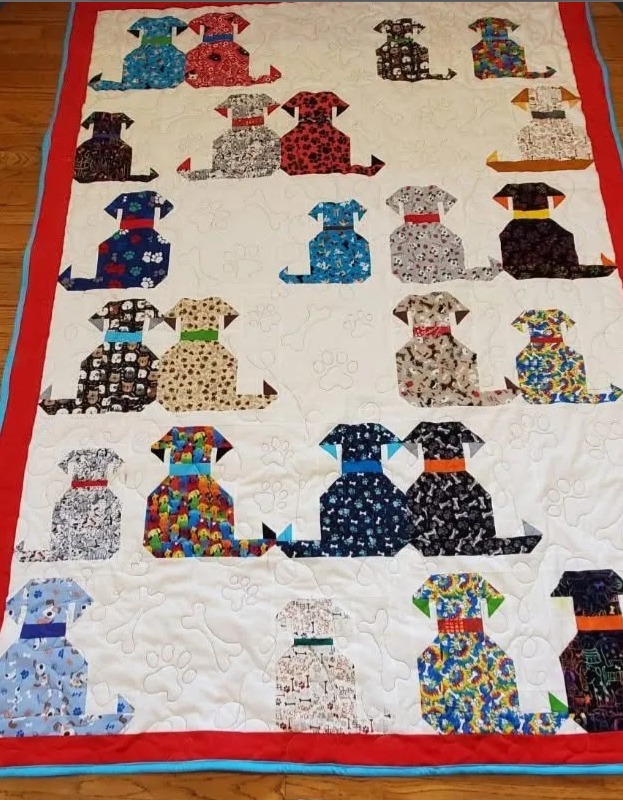
Using a free quilt pattern, you can design a quilt that reflects the personalities of the friends it celebrates, combining color, texture, and pattern in a harmonious way.
Creating a quilt is more than just sewing fabric together; it is an expression of love and care. The Best Friends Forever quilt is ideal for commemorating special occasions such as birthdays, anniversaries, or simply to surprise a dear friend.
This quilt tutorial is designed to be easy to follow, ensuring that even novice quilters can produce a professional-looking result. By using a free quilt pattern, you save time and gain guidance while still having the freedom to personalize your design.
The beauty of the Best Friends Forever – Quilt Pattern lies in its versatility. You can choose fabrics that represent memories, favorite colors, or shared interests, creating a quilt that tells a story. From vibrant modern prints to soft pastels, the choice of fabric adds personality and depth to your creation. With careful planning and attention to detail, this DIY quilt can become a treasured keepsake and a lasting symbol of friendship.
The first step in creating your Best Friends Forever quilt is selecting the right fabrics and materials. Cotton is the most popular choice due to its softness, durability, and ease of handling. Quilting cotton comes in a wide array of patterns and colors, making it perfect for a DIY quilt that celebrates friendship. For a quilt that will see heavy use, you may also consider blending cotton with polyester for extra strength.
Next, gather all essential tools. You will need a rotary cutter, cutting mat, quilting rulers, pins or clips, and a sewing machine. Additionally, thread in coordinating colors and an iron will help you achieve precise seams and professional results. By having all materials and tools ready, your quilt tutorial will proceed smoothly, reducing frustration and mistakes.
Pre-washing your fabric is crucial to prevent shrinkage and bleeding of colors. Iron each piece flat before cutting to ensure accurate shapes according to your quilt pattern. Taking the time to prepare fabrics properly guarantees that your quilt will maintain its quality and alignment over time.
Consider coordinating fabrics with your free quilt pattern. If your design includes blocks, borders, and sashing, select colors and prints that complement each other. You can mix solids with patterns to add depth, or use gradients of a single color for a harmonious effect.
Don’t forget the batting, which adds warmth and thickness to your quilt. Batting can be made from cotton, polyester, or wool, each providing a different feel. Choose one that suits your desired texture and the intended use of your quilt.
Finally, pick a backing fabric that complements your quilt top. The backing can either match the theme or provide a contrasting surprise element. Together with the top, batting, and finishing touches, your DIY quilt will soon take shape beautifully.
Once your fabrics are ready, use your free quilt pattern to cut the pieces precisely. Lay your fabric flat and pin the paper pattern carefully, paying attention to grain lines. Use a sharp rotary cutter or scissors for clean edges. Accuracy in this step is critical for smooth assembly.
Start with the quilt blocks. Many Best Friends Forever quilt designs use squares or rectangles that can be pieced together to form a cohesive design. Label each cut piece to avoid confusion during assembly. Following the quilt tutorial ensures all blocks are aligned correctly, making the quilt symmetrical and professional-looking.
Sew the pieces together using a 1/4-inch seam allowance. Press each seam as you go to maintain flat and even edges. Consistent seam allowances are vital for the quilt to lie flat and for all blocks to fit together properly.
After assembling individual blocks, arrange them according to your quilt pattern. Step back and review the layout before stitching the blocks together. You can make minor adjustments to color placement or pattern alignment to achieve the best visual impact.
Add borders if your DIY quilt design includes them. Borders frame your quilt and enhance its aesthetic appeal. Carefully measure, cut, and sew the border strips to ensure uniformity and clean edges.
Finally, piece together the quilt top completely and press it one last time. Your quilt top is now ready to be layered with batting and backing, moving toward the final quilting stage.
With the quilt top assembled, it’s time to quilt your layers together. Lay your backing fabric flat, place the batting on top, and then layer the quilt top. Smooth out wrinkles and pin or baste the layers together. This preparation ensures that your Best Friends Forever quilt will quilt evenly without puckering.
Decide on a quilting method. Hand quilting provides a traditional touch, while machine quilting saves time and allows for intricate designs. Stitch along the seams of your quilt blocks or create free-motion patterns for a personalized look. Each stitch enhances durability and adds texture to your DIY quilt.
Trim any excess batting and backing once the quilting is complete. Ensure edges are straight and neat to prepare for binding. Accurate trimming results in a professional, polished finish that will last.
Create the binding by cutting strips of fabric, folding them, and sewing around the quilt edges. The binding secures all layers and gives the quilt a finished appearance. Match the binding color to your quilt’s palette for a cohesive look or choose a contrasting color for added visual interest.
Finally, inspect your quilt for loose threads or uneven seams. Make small adjustments as needed. Iron the quilt lightly to remove any creases and showcase the vibrant patterns and textures. Your quilt tutorial is now complete, and your Best Friends Forever quilt is ready to share or gift.
The magic of a Best Friends Forever – Quilt Pattern lies in personalization. Embroidery is a popular method for adding names, initials, or special dates to your quilt. You can embroider directly on the quilt blocks or on a dedicated panel. This makes your DIY quilt extra meaningful and one-of-a-kind.
Add appliqué shapes or motifs that reflect shared interests. Hearts, stars, or even custom designs make the quilt unique and celebratory. Combining appliqué with embroidery creates layered textures that enhance visual appeal.
Consider color symbolism when personalizing your quilt. Choose fabrics that resonate with friendship—warm tones for warmth, cool tones for calmness, or vibrant mixes for energy and fun. These thoughtful choices make your quilt a true reflection of the bond it celebrates.
Add pockets or extra features for practical use. Some friendship quilts double as cozy lap quilts, throw blankets, or even display pieces. A pocket can hold small keepsakes, making your DIY quilt both beautiful and functional.
For a more playful approach, include patterned fabrics with messages or quotes that celebrate friendship. Fabrics with printed sayings or graphics bring joy and personality to your quilt pattern.
Finally, gifting your quilt adds emotional value. Present it to your friend wrapped carefully with a handwritten note explaining the meaning behind each fabric choice and design element. A Best Friends Forever quilt becomes not just a blanket, but a treasure of memories.
1. What is the best fabric for a friendship quilt?
Cotton is ideal due to its softness, durability, and ease of handling. For extra warmth or strength, consider cotton-polyester blends or wool batting.
2. Can beginners make a quilt using this pattern?
Yes! The Best Friends Forever – Quilt Pattern is designed to be accessible, with clear instructions and simple block designs suitable for beginners.
3. How do I find a free quilt pattern?
Many quilting websites and communities offer free quilt patterns that can be downloaded and printed for personal use. Choose one that matches your desired size and style.
4. Can I personalize the quilt?
Absolutely! Add embroidery, appliqué, special colors, or themed fabrics to make your DIY quilt uniquely yours.
5. How should I care for my quilt?
Machine wash on a gentle cycle in cold water and air dry if possible. For delicate embellishments, hand washing is recommended. Regular care ensures the quilt remains vibrant and intact.
The Best Friends Forever – Quilt Pattern offers a meaningful way to celebrate friendship while developing your quilting skills. By following this quilt tutorial, you can create a beautiful and functional DIY quilt that embodies love, creativity, and shared memories. From selecting fabrics to personalizing the design, each step allows you to craft a quilt that will be treasured for years.
We hope this guide inspires you to start your own quilt project. Share your thoughts, experiences, and suggestions below—we love hearing how your Best Friends Forever quilt turns out!


