
Crocheted house-shaped cookie for Christmas tree

Creating a practical crochet block runner is a rewarding experience for both beginners and experienced crocheters. The complete step by step guide provided here will help you craft a beautiful, functional piece that can enhance any home decor.
Whether you are looking for a cozy table runner or a decorative accent, this project combines handmade charm with practical use. Throughout this guide, we will break down every step, explain key techniques, and give tips to ensure your crochet project turns out perfect.
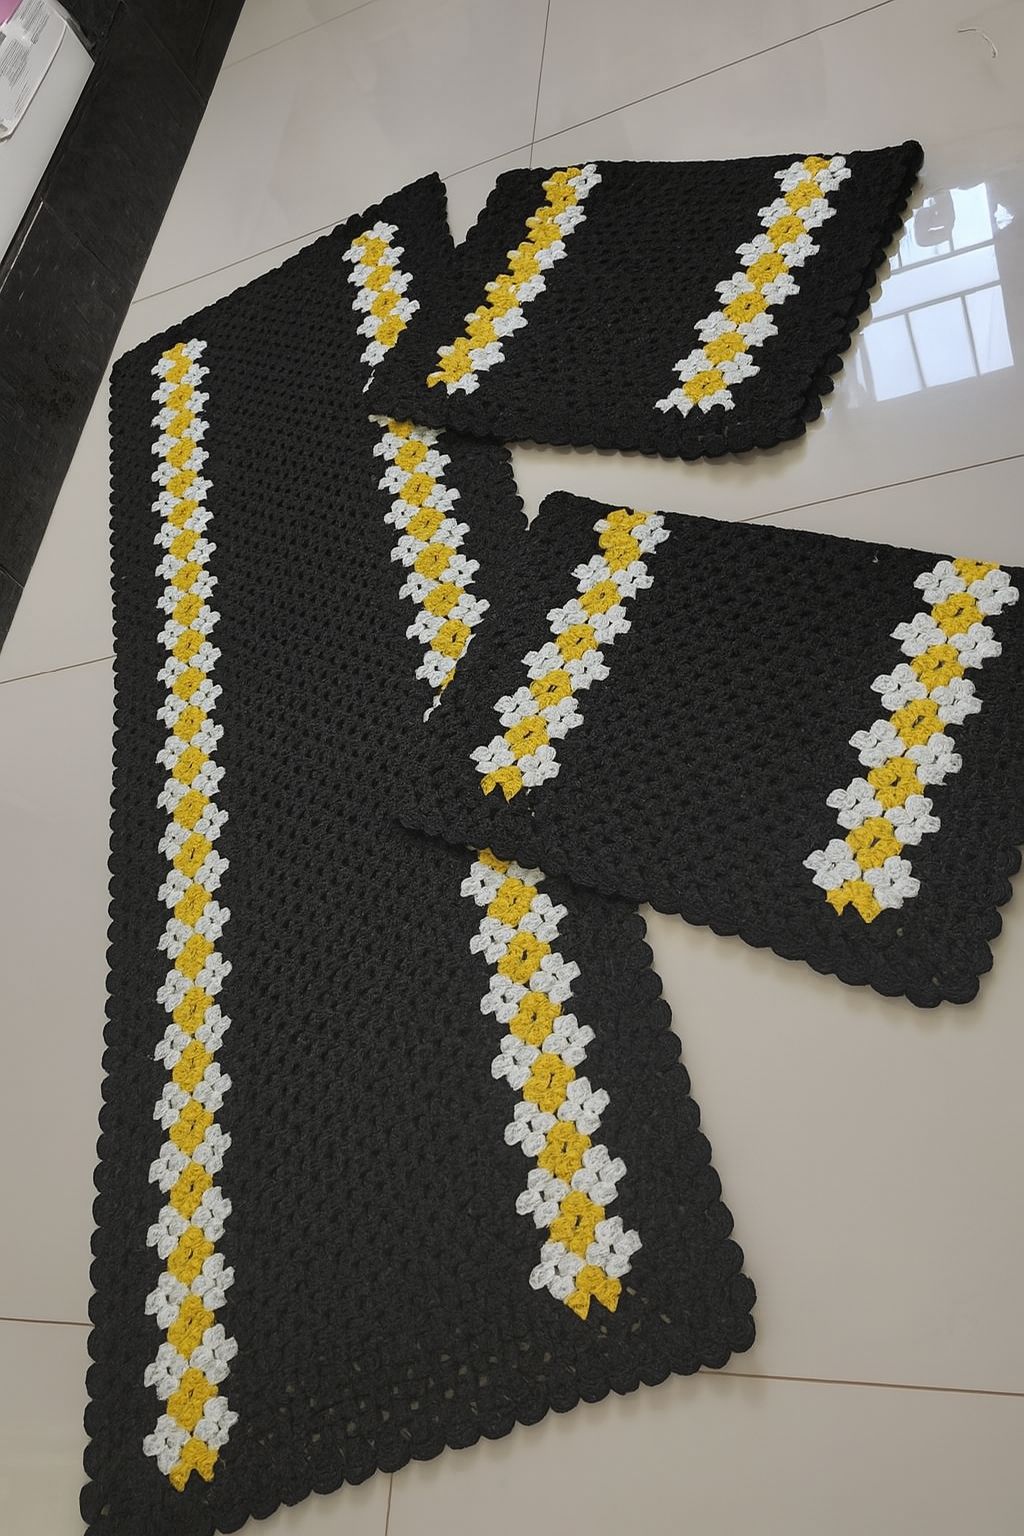
Practical crochet block runners are versatile. They can be used as table runners, bed accents, or even decorative wall hangings. With a focus on flower motifs, these runners bring warmth and charm to any space.
The modular nature of block crochet allows you to experiment with patterns, colors, and textures. Each block becomes a small piece of art, contributing to a larger, visually stunning handmade home decor item.
Many crocheters wonder how to start such projects, especially when combining multiple motifs into a single runner. By following this complete step by step guide, you will learn how to manage multiple blocks, maintain consistent tension, and join pieces seamlessly. Not only will you gain technical skills, but you will also have a tangible piece of craftsmanship that reflects your dedication and creativity.
Selecting the right materials is essential for creating a practical crochet block runner. Start by choosing a soft, durable yarn that complements your home decor. Cotton or cotton-blend yarns are ideal because they provide structure while remaining soft to the touch. Acrylic yarns are another great option for beginners due to their ease of care and wide color availability.
The hook size is another critical factor. Using a hook that matches your yarn weight ensures even stitches and a professional finish. For most medium-weight yarns, a 4mm to 5mm hook works perfectly. Remember, tension consistency is key to keeping your blocks uniform.
Choosing the right color palette can enhance your flower motifs and overall aesthetic. Consider contrasting colors for the flowers and background to make each motif stand out. Soft pastels can create a delicate look, while bold hues make a statement in modern home decor.
In addition to yarn and hooks, having essential tools like stitch markers, scissors, and a tapestry needle will make assembling your runner easier. Keeping your workspace organized ensures smoother progress.
Think about the runner’s size before starting. Measuring your table or intended surface helps determine how many blocks you will need. Planning in advance prevents running out of yarn mid-project.
Finally, decide whether you want a border around the runner. A simple edging can provide a polished finish and unify all the blocks into a cohesive design. This step adds to the overall elegance of your handmade crochet piece.
The core of any practical crochet block runner is its motifs. Flower motifs are popular because they add visual interest and charm. Start by creating a magic ring, which serves as the foundation for your flower. Work a series of basic stitches, such as chains, single crochets, and double crochets, to form petals.
Once your first round of petals is complete, build additional rounds to increase the motif’s size. Pay attention to stitch counts to maintain symmetry. Each petal should be evenly spaced for a balanced look.
After completing the central flower, consider adding decorative touches like picots or small leaf accents. These details make your motifs unique and visually appealing. You can also experiment with color changes between rounds to create a layered, textured effect.
Blocking your motifs before joining them ensures they lay flat and maintain their shape. Pin each piece to a foam board and lightly steam or wet it to set the stitches. Proper blocking prevents distortion when assembling the runner.
Practice consistency across all motifs. Using the same yarn, hook, and tension settings guarantees uniformity. This step is particularly important for a complete step by step project like a crochet block runner.
Finally, make as many flower motifs as needed to reach your desired runner length. Arrange them in a pattern before joining to visualize the final look. Experimenting with layout helps achieve the best composition for your home decor piece.
Joining the motifs is a crucial step in completing your practical crochet block runner. Several techniques are available, including whip stitch, slip stitch, or joining as you go. Choose the method that suits your skill level and desired aesthetic.
Lay out your motifs in the chosen pattern. Align edges carefully to prevent gaps or uneven spacing. Using stitch markers can help keep motifs in place while you join them.
When joining, maintain even tension. Pulling too tightly can warp motifs, while loose joins may create gaps. Consistency is key to a professional finish.
Adding a border at this stage helps unify all blocks into a cohesive runner. Consider a simple single crochet border or a scalloped edge for decorative flair. The border also reinforces the edges, increasing durability.
After assembly, check for loose ends. Weave in all yarn tails securely using a tapestry needle. This ensures your runner is both beautiful and functional.
Finally, block the completed runner to smooth edges and shape the piece. Proper finishing enhances the appearance and longevity of your handmade crochet project.
For beginners, creating a practical crochet block runner may seem daunting. Start with a small number of motifs to gain confidence before attempting a larger piece. Patience and practice are key.
Keep a detailed stitch count for each motif to avoid inconsistencies. Using a notebook or app to track your progress helps maintain uniformity across all blocks.
Experiment with yarn textures and colors to find combinations you love. Even small changes in yarn type or color placement can dramatically affect the final look.
Joining motifs can be tricky for beginners. Practice on scrap squares first to understand the joining technique. Once comfortable, you can apply the method to your actual runner.
Don’t hesitate to use online tutorials or video demonstrations for challenging stitches. Visual guides can clarify techniques that are difficult to grasp from written instructions alone.
Finally, enjoy the process! A handmade crochet block runner is more than just a project—it’s a creative expression. Celebrate small milestones as you complete each motif and join them together.
Q1: How long does it take to make a crochet block runner?
A: The time depends on the runner’s size, motif complexity, and your experience. Beginners may take several weeks, while experienced crocheters can finish in a few days.
Q2: Can I use different yarn types in the same runner?
A: Yes, but ensure they have similar thickness and care instructions to maintain consistency and durability.
Q3: How do I prevent motifs from curling?
A: Proper tension and blocking each motif before joining prevent curling and ensure a flat, professional finish.
Q4: Can I make the runner longer or shorter?
A: Absolutely! Simply adjust the number of motifs or add extra rows to reach the desired length.
Q5: What is the easiest way to join crochet motifs?
A: Slip stitch joining or whip stitch is recommended for beginners. Joining as you go is efficient but requires more skill.
Q6: How do I wash a crochet block runner?
A: Use gentle hand washing or a delicate cycle with cold water. Lay flat to dry to preserve shape and texture.
Creating a practical crochet block runner is a fulfilling project that blends creativity with functionality. By following this complete step by step guide, you can produce a beautiful, durable, and personalized piece for your home. From selecting the right materials and crafting flower motifs to joining blocks and finishing with a polished border, each step contributes to a professional result.
We hope this guide inspires you to explore handmade crochet projects and experiment with your own designs. Your feedback and suggestions are invaluable—please leave a sincere opinion and share your experience with this project.
By sharing your insights, you help others on their crochet journey and contribute to a community of creativity and learning.


