
Crocheted house-shaped cookie for Christmas tree

If you’re looking for a fun and creative project, the Crochet Chick in Egg – Tutorial is perfect for adding a playful touch to your crochet collection.
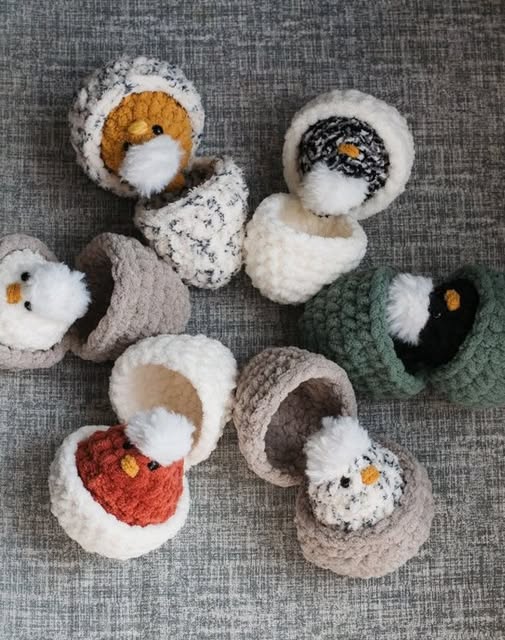
This adorable amigurumi pattern allows you to make a small, charming chick emerging from an egg, ideal for Easter decorations, gifts, or simply as a whimsical addition to your home. Following this Crochet Chick in Egg – Tutorial, you can create a soft, huggable toy that brings joy to both children and adults.
The appeal of this project lies not only in its cuteness but also in its versatility. The Crochet Chick in Egg – Tutorial can be customized in colors, sizes, and accessories to fit your personal style or the occasion.
You can make bright yellow chicks for a traditional Easter look or experiment with pastel or multicolored yarn for a more whimsical effect. This tutorial is designed to guide beginners and experienced crocheters alike, ensuring a smooth and enjoyable crafting experience.
Crocheting the Crochet Chick in Egg – Tutorial also offers several benefits beyond the final product. Working on small amigurumi projects like this improves hand-eye coordination, patience, and concentration. It’s also an eco-friendly hobby because you can use leftover yarn from other projects. This step-by-step tutorial ensures that every stitch contributes to a polished, professional-looking chick in an egg that you’ll be proud to display or gift.
Before starting your Crochet Chick in Egg – Tutorial, selecting the right materials is essential. Yarn choice impacts the softness, structure, and appearance of your finished chick. Soft acrylic or cotton yarn is ideal, as it is easy to work with and creates smooth, uniform stitches. Yellow yarn is traditionally used for the chick, while white or pastel shades are suitable for the egg shell.
Your crochet hook should correspond to the yarn weight to achieve the correct stitch size. Using the recommended hook ensures your stitches are even, which is crucial for creating a smooth, round chick and egg. Beginners may prefer a slightly larger hook for easier handling, while experienced crocheters can experiment with smaller hooks for tighter, more detailed stitches.
Stuffing is another important factor for your Crochet Chick in Egg – Tutorial. High-quality polyester fiberfill works best for giving the chick its shape while remaining soft and huggable. Avoid overstuffing, as it can stretch the stitches and distort the shape of the chick and egg shell. Proper stuffing ensures a neat, professional-looking result.
Color selection is key to making your amigurumi visually appealing. Bright yellow for the chick, white or light pastel for the egg, and small accents like an orange beak or feet will make your project pop. Gathering all your materials beforehand will make the crafting process smoother and more enjoyable.
Accessories such as safety eyes, embroidery thread, or felt pieces can be used for facial features and details. Preparing these in advance ensures you can add the finishing touches neatly and safely, especially if the toy will be handled by children.
The first step in your Crochet Chick in Egg – Tutorial is creating the chick’s body. Start with a magic ring and work single crochet stitches in continuous rounds. Gradually increase the number of stitches to form a rounded, even body. Accuracy at this stage is key to a proportional and cute chick.
Next, work on the chick’s head if it is separate from the body. Using the same technique, create a slightly smaller sphere for the head and attach it securely to the body. Reinforcing the attachment point ensures durability, especially if the toy will be played with frequently.
The wings and feet are small but essential details. Crochet tiny ovals for the wings and flat shapes for the feet, then attach them symmetrically. Proper placement enhances the overall cuteness and realism of the Crochet Chick in Egg – Tutorial.
The egg shell is the final major component. Crochet two halves or a cracked shell design, depending on your preference. The chick should fit snugly inside, with the top half slightly tilted to give the appearance of hatching. Attach the shell pieces securely to prevent them from coming apart during handling.
Adding facial features like eyes and a beak completes the chick. Use safety eyes, embroidery, or small felt pieces to achieve the desired look. Attention to detail in these finishing touches ensures your Crochet Chick in Egg – Tutorial is expressive and charming.
Finally, weave in all loose yarn ends, trim excess threads, and check the stability of all attachments. A neat finishing step ensures that your chick in an egg is both durable and visually appealing.
One of the joys of the Crochet Chick in Egg – Tutorial is customization. You can change the colors, sizes, and even accessories to suit your project. For example, using pastel shades can make the chick perfect for Easter, while bright colors make it a cheerful, year-round decoration.
Adding accessories like tiny bows, hats, or embroidered details can give your chick a unique personality. You can also experiment with different yarn textures—fuzzy yarn for a plush look or smooth yarn for a clean, neat finish. These variations make each chick one-of-a-kind.
Adjusting the size of your project is easy by using different yarn weights or crochet hook sizes. Small chicks can be used as keychains or ornaments, while larger versions make perfect cuddly toys. This flexibility makes the Crochet Chick in Egg – Tutorial suitable for a variety of purposes.
Mixing and matching shell designs allows for creativity. You can create a cracked shell, a fully intact egg, or multiple color layers. This enhances the visual interest and uniqueness of your amigurumi.
Finally, consider gifting options. Handmade crochet chicks make thoughtful presents for birthdays, baby showers, or holiday decorations. Personalized touches, combined with careful crafting, make your Crochet Chick in Egg – Tutorial a meaningful and cherished gift.
Q1: Is this project suitable for beginners?
Yes! The Crochet Chick in Egg – Tutorial includes step-by-step instructions and simple shapes, making it beginner-friendly.
Q2: What yarn is recommended?
Soft acrylic or cotton yarn works best for smooth stitches and durability.
Q3: How do I attach small parts like wings and beak?
Use matching yarn and a yarn needle, and reinforce with extra stitches to ensure durability.
Q4: Can I customize the colors?
Absolutely! Yellow is traditional for the chick, but pastel or multicolored options are great for creativity.
Q5: How do I clean the finished chick?
Hand wash in cold water with gentle soap and let air dry to maintain shape.
Q6: Can I make multiple chicks of different sizes?
Yes! Adjust yarn weight and hook size to create small ornaments or larger huggable toys.
The Crochet Chick in Egg – Tutorial is a delightful, versatile, and rewarding crochet project. From selecting materials to creating the chick, wings, egg, and finishing touches, each step allows you to develop your crochet skills while crafting a charming amigurumi toy. Customizations like color, size, and accessories make this pattern adaptable for gifts, decorations, or personal enjoyment.
We hope this tutorial encourages you to try your own Crochet Chick in Egg – Tutorial and explore your creativity. Don’t forget to leave a sincere opinion and suggestions in the comments—your feedback inspires others and helps improve future crochet projects.
With a little patience and imagination, you can bring this adorable chick in an egg to life and create a treasured handmade piece.


