
Crocheted house-shaped cookie for Christmas tree

Creating a beautiful and practical Emerald Oval Rug – Free Pattern is a rewarding project for both beginner and experienced crafters.
This unique rug adds a touch of elegance to any room while providing functionality. Using simple crochet techniques, you can craft a durable and stylish rug that brightens your home. With this free pattern, anyone can enjoy the satisfaction of making a handmade piece that is both decorative and useful.
The Emerald Oval Rug – Free Pattern allows for creative freedom with colors and yarn textures. While emerald green is a classic choice, you can mix shades or combine multiple colors for a personalized design.
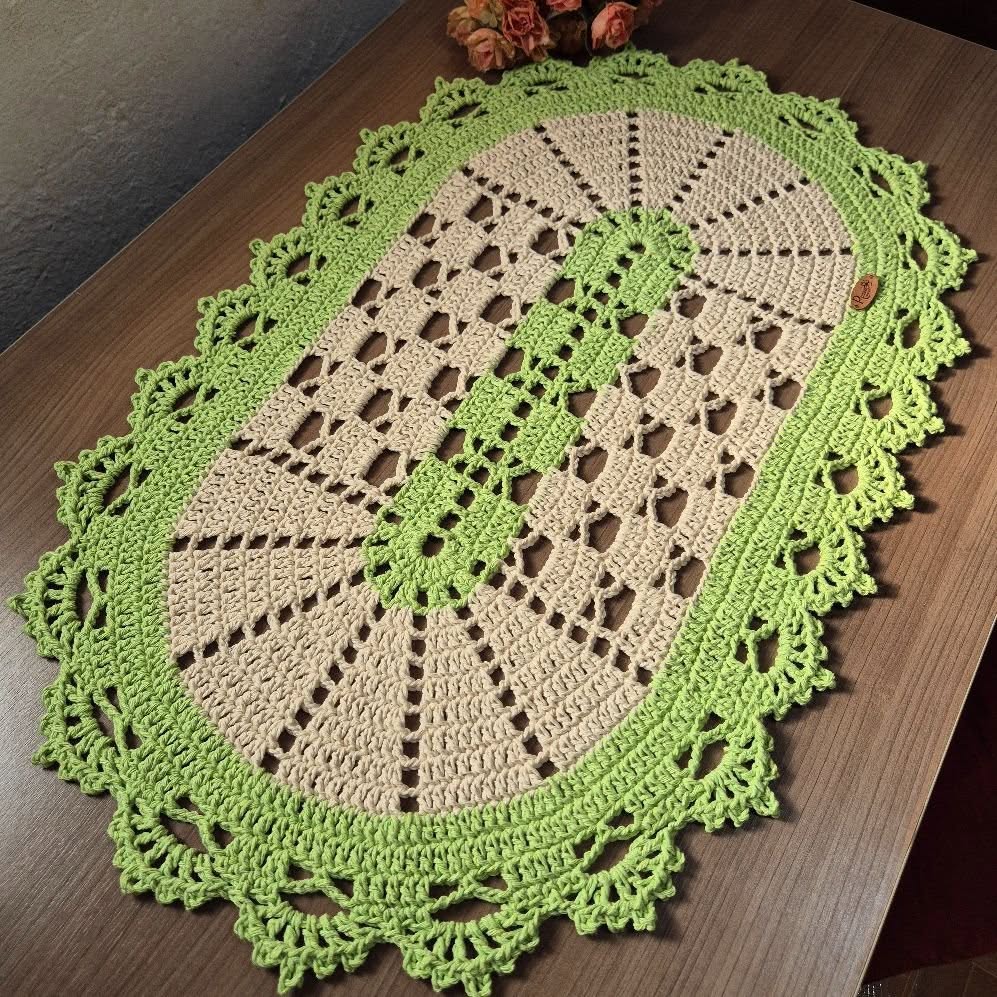
This pattern emphasizes simplicity and versatility, making it an ideal project for those looking to enhance their home decor with handmade charm.
Making your own Emerald Oval Rug also helps develop your crochet techniques. Following the pattern encourages precision, patience, and attention to detail, all essential skills for creating high-quality crochet items. Whether you are crafting a rug for your living room, bedroom, or hallway, this project is both fulfilling and practical.
To begin your Emerald Oval Rug – Free Pattern, it is important to gather all necessary materials. Having everything ready ensures a smooth crafting process without interruptions.
You will need medium-weight yarn in emerald or your preferred color, a suitable crochet hook (usually recommended on the yarn label), scissors, a yarn needle, and stitch markers if needed. High-quality yarn ensures durability and a professional finish.
Optional materials include non-slip rug backing or felt to enhance safety and prevent slipping, especially for rugs placed on smooth floors. These additions increase the rug’s longevity and usability.
Choose yarn that is soft yet durable. Cotton yarn is ideal for rugs because it is absorbent, easy to clean, and maintains its shape over time. Blended yarns can also work well, offering extra texture and softness.
A printed or digital copy of the pattern is recommended to guide your work. Following the pattern carefully ensures symmetry and consistent stitch tension, both crucial for achieving a polished oval shape.
Finally, having measuring tools helps you track the rug’s dimensions as you work. Accurate measurement guarantees the final product matches the desired size and shape.
Start your Emerald Oval Rug by creating a foundation chain according to the size indicated in the free pattern. The chain determines the length of the oval, so measure carefully before beginning.
Next, work in rounds to form the oval shape. Begin with single or double crochet stitches, increasing at the ends to create the curved edges. Maintaining consistent stitch tension is crucial for a smooth and even shape.
Continue crocheting in rounds, following the pattern for increases and stitch variations. Adding texture through different stitch techniques enhances the rug’s visual appeal and creates a cozy, cushioned surface.
After completing the main body, finish the edges with a decorative border. Popular options include scalloped or shell stitches, which give the rug a professional and polished appearance.
Weave in all yarn ends using a yarn needle to secure them. Properly finishing the ends prevents unraveling and extends the life of your Emerald Oval Rug.
Finally, block the rug if necessary. Blocking helps even out stitches, ensuring that the rug lies flat and maintains its oval shape. This final step enhances both the aesthetics and durability of your handmade project.
One of the joys of the Emerald Oval Rug – Free Pattern is personalization. You can experiment with yarn colors to create a rug that matches your home decor or expresses your style.
Mixing yarn textures adds depth and interest. For example, combining soft cotton with plush chenille can create a luxurious feel, while maintaining durability.
Try varying the stitch patterns for additional texture. Combining shell, bobble, or puff stitches can give your rug a distinctive look and tactile appeal.
Consider adding subtle embellishments like fringe, tassels, or contrasting border colors. These details can make the rug feel unique and handcrafted, enhancing its charm and visual impact.
Adjust the size to suit your space. Larger rugs can serve as statement pieces in living rooms, while smaller versions are perfect for entryways, bathrooms, or bedside areas.
Lastly, maintain consistent stitch tension throughout the project. Consistency ensures that the rug’s shape remains symmetrical and professional-looking, making your Emerald Oval Rug a standout piece in any room.
Even experienced crafters can encounter challenges when making an Emerald Oval Rug – Free Pattern. Awareness of common mistakes can help prevent frustration and ensure a successful project.
One common error is uneven stitch tension. Inconsistent tension can distort the rug’s shape, resulting in an uneven or lopsided oval.
Miscounting stitches during increases and rounds is another frequent issue. Carefully track stitch placement to maintain symmetry and a smooth curve.
Using incompatible yarn can also be problematic. Very thin or slippery yarn may not hold the shape well, while overly thick yarn can make rounds bulky and difficult to work.
Neglecting to weave in ends properly can lead to unraveling over time. Securely finish all yarn ends to extend the rug’s durability.
Rushing through the border finishing is another mistake. Take time to complete decorative edges neatly, as they significantly impact the rug’s overall appearance.
Finally, skipping blocking can affect the rug’s final shape. Proper blocking ensures the oval lies flat, giving a professional and polished finish to your handmade project.
Q1: Is this pattern suitable for beginners?
Yes, the Emerald Oval Rug – Free Pattern is beginner-friendly. Instructions are clear, and the project helps develop essential crochet techniques.
Q2: What materials should I use?
Medium-weight yarn, a crochet hook suitable for the yarn, scissors, and a yarn needle are recommended. Optional materials include non-slip backing and embellishments.
Q3: How long does it take to complete one rug?
Completion time varies by size and skill level. Smaller rugs may take 4–6 hours, while larger rugs can take 10+ hours.
Q4: Can I customize the size?
Yes, you can adjust the foundation chain and rounds to create a rug of any size, making it suitable for different spaces in your home.
Q5: How do I ensure durability?
Use high-quality yarn, weave in ends securely, and consider a non-slip backing if needed. Proper blocking and finishing also enhance longevity.
Q6: Can I use colors other than emerald?
Absolutely. The pattern allows for any color combination, letting you match your rug to your home decor or personal style.
The Emerald Oval Rug – Free Pattern is a versatile and rewarding project that combines practicality with elegance. By following the step-by-step instructions, crafters of all skill levels can create a durable, stylish, and personalized rug. This pattern encourages creativity, allowing for color variations, textured stitches, and decorative borders to make each rug unique.
Creating your own Emerald Oval Rug is not only fulfilling but also enhances your home with a handmade accessory that combines beauty and functionality. By avoiding common mistakes, personalizing with creative touches, and following the free pattern carefully, anyone can craft a rug that is both stunning and long-lasting.
We encourage you to try this project, share your results, and offer suggestions. Your feedback and creative ideas help inspire the crafting community and make handmade projects even more enjoyable.


