
Crocheted house-shaped cookie for Christmas tree

Knitting Baby Booties – Step by Step Tutorial for Beginners is an essential guide for anyone looking to create adorable, handmade footwear for newborns.
Whether you are a complete novice or someone who has tried knitting scarves or hats, this tutorial will help you master the art of crafting baby booties with confidence.
Knitting baby booties is not only a charming way to gift something personal but also an enjoyable hobby that sharpens your knitting skills and allows you to explore various patterns, yarns, and techniques.
For beginners, understanding the basics of knitting and selecting the right materials is crucial. Baby booties require soft, comfortable yarn to ensure the delicate feet of newborns remain cozy and protected.
Choosing the right knitting needles, yarn weight, and stitch pattern will make your project smoother and more enjoyable. This tutorial emphasizes clear instructions and visual guidance to ensure even those who have never held knitting needles can follow along successfully.
Beyond practicality, knitting baby booties allows crafters to experiment with creativity. From classic designs to playful patterns featuring animals, flowers, or geometric shapes, there is no limit to what you can create. This article provides step-by-step guidance to ensure you complete a beautiful pair of baby booties while also improving your overall knitting technique. By the end, you will not only have handmade gifts ready for a newborn but also gain skills that will enable you to explore more complex knitting projects in the future.
Selecting appropriate materials is the first step in knitting baby booties. You need soft, gentle yarn that will not irritate a newborn’s skin. Common choices include cotton, acrylic, or soft merino wool, each providing warmth and comfort. Cotton yarn is breathable and easy to care for, while merino wool offers exceptional softness and warmth. Acrylic yarn is durable and machine washable, which makes it ideal for practical everyday use.
The choice of knitting needles also affects your project. Smaller needles, usually size US 3-5 (3.25-3.75 mm), are suitable for delicate baby booties, ensuring tight stitches that maintain the shape and fit of the footwear. Circular or double-pointed needles are recommended depending on the pattern and the knitter’s comfort. Beginners may prefer straight needles for simpler designs.
Patterns vary in complexity. Some baby booties feature simple garter or stockinette stitches, while others incorporate cables, lace, or ribbing. Beginners are encouraged to start with straightforward designs, gradually exploring more intricate patterns as they gain confidence. This approach ensures success and reduces frustration.
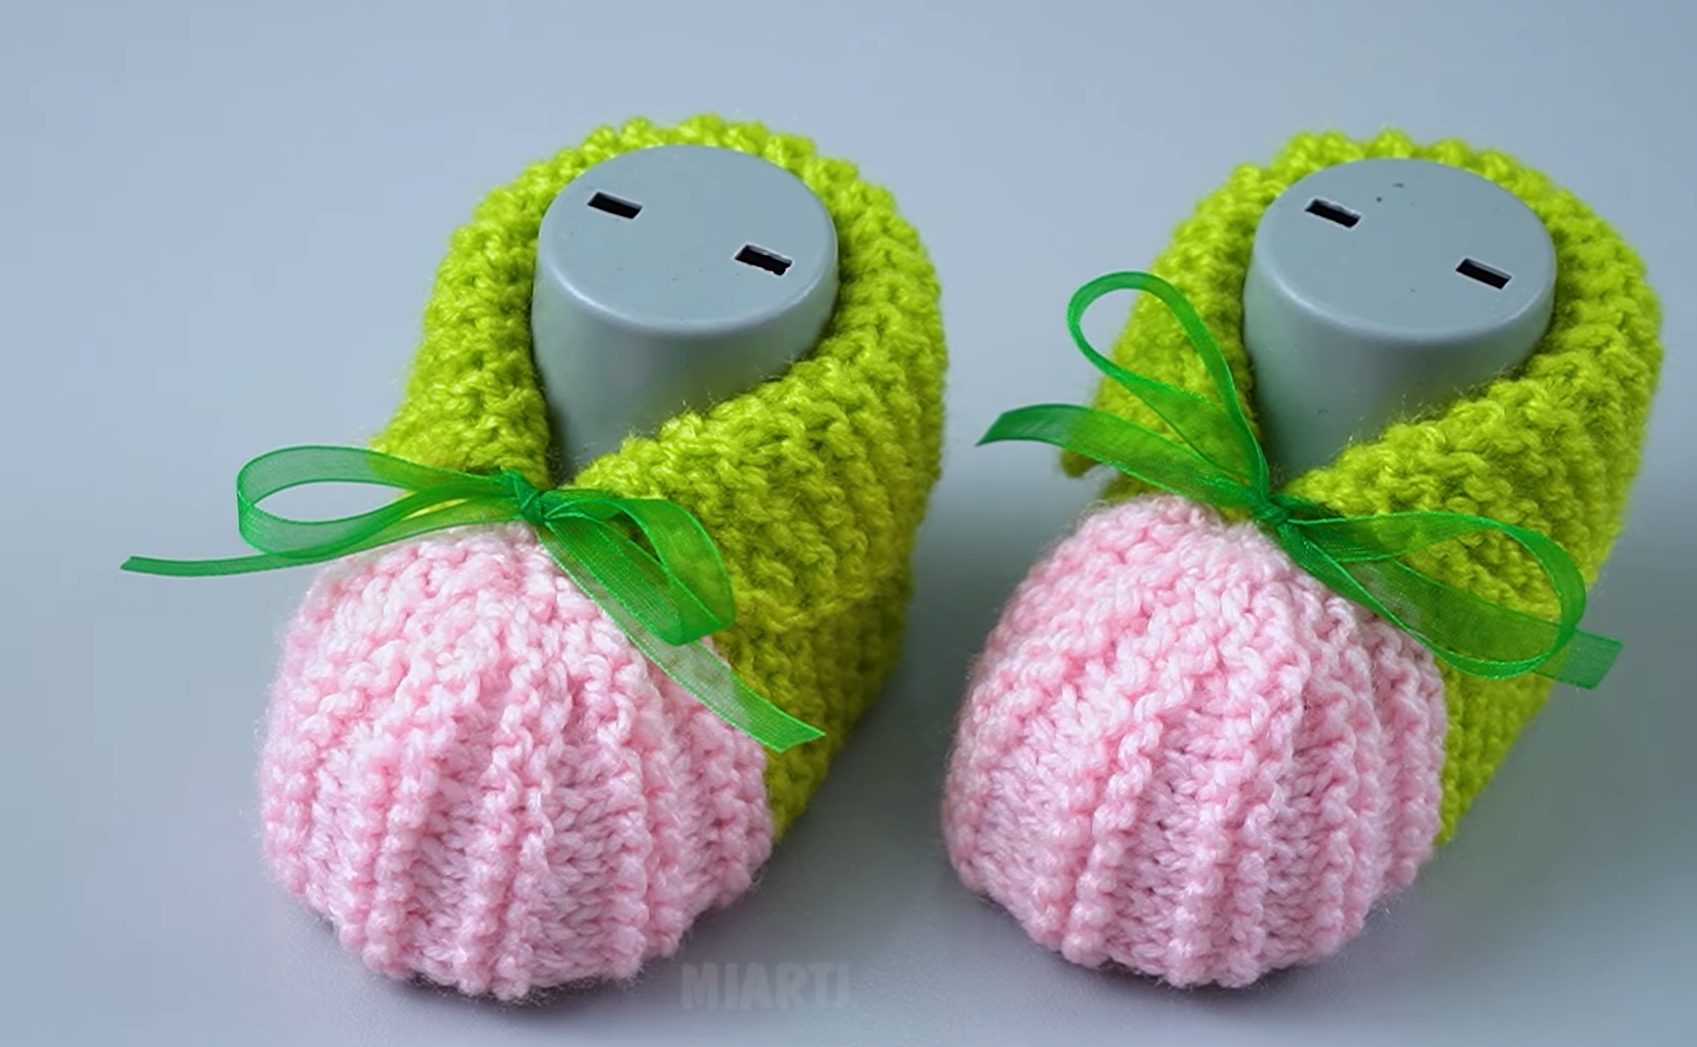
Yarn color selection also plays a role in your project. Soft pastels like baby blue, pink, or cream are traditional, but bold colors or multi-colored yarns can make your baby booties stand out. Ultimately, the goal is to combine soft yarn, comfortable fit, and appealing design.
Washing and care instructions should be considered before knitting. Babies need footwear that is easy to clean, so choosing machine-washable yarn is often preferable. This reduces stress for parents and ensures the baby booties remain in perfect condition over time.
Finally, don’t forget about additional accessories. Buttons, ribbons, or embellishments can enhance the aesthetic of your baby booties, but they must be securely attached to prevent any safety hazards for infants.
Before starting your baby booties, it is essential to familiarize yourself with basic knitting techniques. The most common stitches are knit and purl, which form the foundation of most patterns. Practicing these stitches on a small swatch can help beginners gain confidence and consistency in their tension.
Casting on is the first step in creating baby booties. The long-tail cast-on method is popular because it is stretchy and easy to manage. A well-executed cast-on ensures the starting edge of your booties is neat and elastic, which is crucial for comfort.
Shaping the booties requires increasing and decreasing stitches. Increases add width to accommodate the baby’s foot, while decreases help shape the toe and heel. Simple techniques like yarn-over increases or knit-two-together decreases are beginner-friendly and create professional-looking results.
Reading a knitting pattern is another essential skill. Patterns often include abbreviations such as K for knit, P for purl, CO for cast-on, and BO for bind-off. Understanding these abbreviations allows you to follow any pattern accurately, ensuring your baby booties come out as intended.
Seaming and finishing are the final steps in most projects. For baby booties, seaming may involve joining the sides or creating a heel flap. Mattress stitch is a preferred method for invisible seams, giving a clean, professional look to the booties.
Lastly, blocking is an optional but beneficial technique. Wetting or steaming your baby booties and shaping them to the desired dimensions can smooth out stitches and enhance the overall appearance. Blocking ensures the booties fit perfectly and look polished.
Now that you are familiar with materials and techniques, it’s time to start knitting your baby booties. Begin by measuring the baby’s foot length to ensure a proper fit. Standard newborn booties are typically 3.5-4 inches long, but adjustments can be made for premature or older infants.
Following these steps carefully will result in a beautifully crafted pair of baby booties that are soft, comfortable, and adorable.
Knitting baby booties can be a fun and rewarding experience, but beginners often encounter common challenges. One tip is to maintain even tension throughout your knitting. Uneven tension can result in misshapen booties that do not fit properly.
Choosing the right yarn weight is equally important. Fingering or sport-weight yarn is ideal for small, delicate baby booties, while heavier yarns may make the booties bulky and uncomfortable. Always check the pattern recommendations for optimal results.
Measuring frequently during knitting helps ensure proper fit. Babies grow quickly, so making slight adjustments can make your baby booties wearable for longer periods.
Stitch markers are a handy tool for tracking increases, decreases, or pattern repeats. They prevent mistakes and make knitting more manageable for beginners.
Patience is key. Knitting baby booties requires time and attention, especially when working on tiny stitches. Take breaks if needed, and enjoy the process of creating something handmade.
Finally, experiment with textures and colors. Combining different stitches, yarns, or embellishments adds character to your baby booties and showcases your creativity. Each pair can be a unique gift that brings joy to both the giver and the receiver.
Q1: What type of yarn is best for baby booties?
A1: Soft, hypoallergenic yarns like cotton, acrylic, or merino wool are best. They ensure comfort and are gentle on the baby’s skin.
Q2: How do I measure a baby’s foot for knitting booties?
A2: Measure from the heel to the tip of the longest toe. Standard newborn booties are usually 3.5-4 inches, but adjust based on your measurement.
Q3: Can I machine wash knitted baby booties?
A3: It depends on the yarn. Acrylic and some cotton yarns are machine washable, while delicate wool may require hand washing.
Q4: Are buttons or embellishments safe on baby booties?
A4: Only if they are securely attached. Avoid small parts that can come off and pose a choking hazard.
Q5: How long does it take to knit a pair of baby booties?
A5: For beginners, it can take 4-6 hours, depending on complexity. Experienced knitters may finish in 2-3 hours.
Q6: Can I customize the size or pattern?
A6: Absolutely! Adjust stitch counts and lengths for different sizes and experiment with patterns, colors, or textures for unique results.
Knitting baby booties is a delightful and rewarding craft that allows beginners to create functional, beautiful gifts for newborns. From selecting the right yarn and needles to mastering basic knitting techniques, this step-by-step tutorial covers everything you need to start your project with confidence. By following the instructions and tips provided, anyone can knit a cozy, stylish, and safe pair of baby booties.
We hope this guide inspires you to pick up your needles and yarn and begin your own knitting journey. Your handmade creations will bring warmth and joy to babies and their families.
Don’t forget to share your experience, leave your honest opinions, and provide suggestions for future tutorials. Every stitch you make contributes to a cherished gift and a lifelong love of crafting.


