
Crocheted house-shaped cookie for Christmas tree

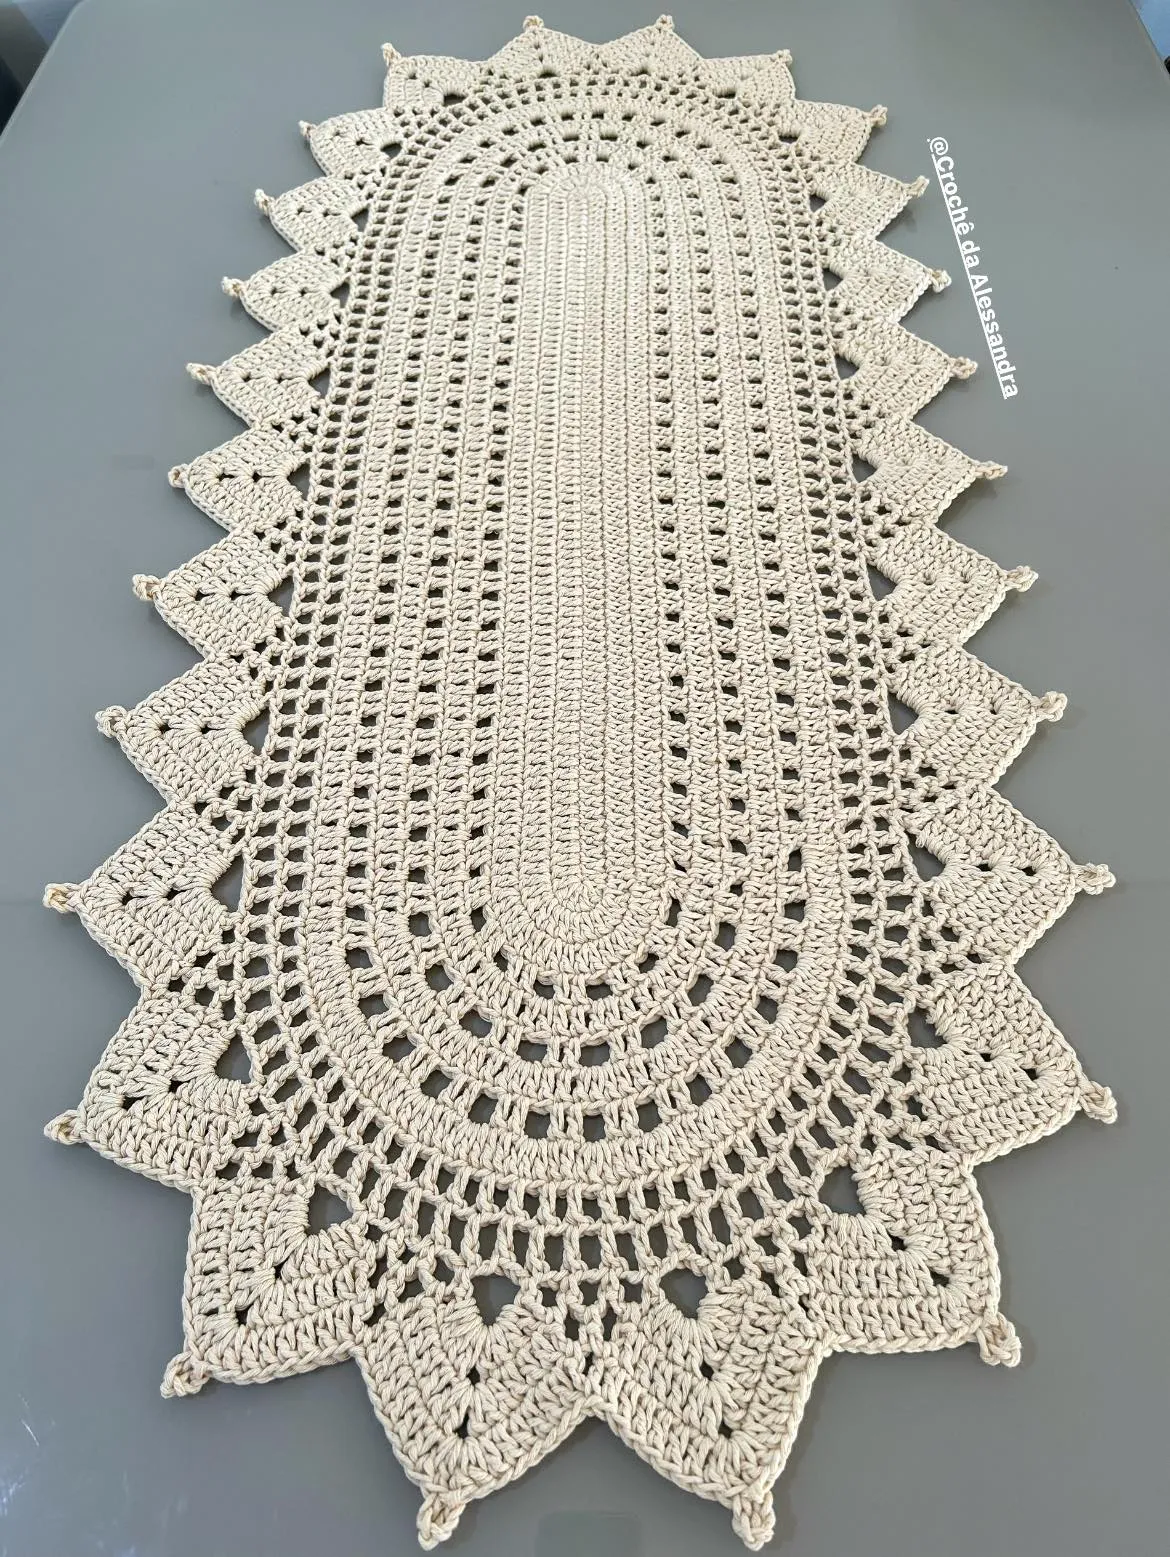
Crochet table runner in natural color – step by step is a charming, timeless project that fits perfectly into modern, minimalist, boho, and farmhouse décors.
If you’re drawn to calm, neutral tones and handmade details, this guide will walk you through the process clearly and kindly.
In this article I’ll explain the materials, stitches, pattern ideas, and finishing touches so you can create a beautiful table runner that showcases the soft texture of natural color yarn while following a simple step by step approach.
Throughout the article I’ll highlight important terms like crochet, table runner, natural color, pattern, cotton yarn, hook size, and blocking in bold so search engines and readers can quickly spot the main ideas.
A Crochet table runner in natural color – step by step project is ideal for makers of all levels: beginners can practice basic repeats and gauge control, while more experienced crocheters can add lace inserts, decorative edgings, or textured stitches. Choosing a natural color yarn—think undyed or oatmeal-toned cotton, linen blends, or soft wool—creates a neutral backdrop that lets table settings, centerpieces, and seasonal decor stand out. This neutral palette is also SEO-friendly for craft blogs because searchers often look for terms like DIY table runner, natural cotton runner, and easy crochet pattern; I’ll weave those phrases naturally into the instructions and explanations so your content remains useful and discoverable.
Before we begin the practical step by step instructions, I’ll outline the supplies and tools, explain the key stitches and techniques you’ll use, then present a clear pattern with measurements and stitch counts. I’ll finish with blocking, finishing, and styling suggestions so the completed table runner looks professional on the table. Read through the intro sections, and when you’re ready, follow the step-by-step pattern section closely—each stage is intentionally incremental so you won’t feel overwhelmed.
For a polished Crochet table runner in natural color – step by step, choose yarn that drapes well and is easy to care for. A popular choice is 100% cotton or a cotton-linen blend in an undyed or oatmeal shade; these fibers give a soft matte finish and hold stitch definition. Use a worsted or sport-weight yarn depending on the look you want: heavier for a chunky, rustic runner; finer for a delicate lace effect. Always bold the key ingredients in your pattern text such as cotton yarn and natural color to match search queries and improve on-page SEO.
Select the right hook size for your yarn—check the label recommendation first and then make a small swatch. For worsted-weight cotton, a 4.0 mm (G/6) to 5.0 mm (H/8) hook is common; for sport or DK, consider 3.0–4.0 mm. Include hook size in your pattern header and repeat it when describing gauge so readers can reproduce the size accurately. Keep both imperial and metric equivalents to be helpful to international readers.
Other essentials include a measuring tape, stitch markers, yarn needle for weaving in ends, scissors, and a blocking mat with pins. If you plan to wash the runner frequently, mention care instructions on the pattern: machine wash gentle for cotton, or hand wash for linen blends. These small SEO-friendly details—care instructions, wash gentle, and blocking tips—help the article answer common search queries and increase user satisfaction.
Decide the finished dimensions before you start. A typical table runner for a medium dining table is about 30–40 cm wide and 150–180 cm long (12–16 in by 60–72 in). Offer a short note on customizable lengths—crocheters appreciate knowing how to extend the pattern repeat to fit larger tables. Put these measurement options in bold like finished dimensions to make it easy for skimming visitors to find the specifics.
Finally, prepare a clean work area and good lighting—natural or warm desk lighting improves stitch accuracy and photo quality if you plan to document your step by step process. If you share the pattern on a blog or social feed, include alt text suggestions for images (e.g., “neutral cotton crochet runner laid on wooden table”) to follow image SEO best practices.
This Crochet table runner in natural color – step by step uses a small set of reliable stitches so you can focus on rhythm and texture rather than memorizing dozens of techniques. The most common stitches you’ll rely on are chain (ch), single crochet (sc), double crochet (dc), and a shell or V-stitch for decorative repeats. When writing or reading patterns, bold the stitch names like double crochet to guide beginners quickly through instructions.
If you want a lacy look, learn a simple filet mesh pattern using ch and dc combinations; for a textured, cozy runner, repeat a shell stitch or cluster stitch across the width. Offer both alternatives—lacy and textured—to match different decor styles. Include short descriptions of how each stitch affects drape and stability: lace increases drape; textured stitches create structure.
Gauge is important: make a 10 cm x 10 cm swatch using your chosen stitch repeat and measure the number of stitches and rows. Note the swatch gauge in the pattern (e.g., 16 sts x 12 rows = 10 cm). Explaining gauge in bold helps readers avoid surprises: if their gauge is different, tell them to adjust hook size accordingly. This small step can save hours of rework later.
Techniques like joining new yarn, invisible join, and weaving in ends are essential for a polished finish. Describe the invisible join for rounds or the mattress stitch for seaming edge panels if your design uses panels. Keep these technique explanations short and clear—linked to the step where they’re needed—so the reader follows the step by step flow without losing context.
Finally, practice the stitch repeat a few times on scrap yarn before starting the runner. Suggest keeping a stitch marker at the beginning of each row to track repeats and avoid miscounting. These small practical tips improve success and reduce frustration, and including them in a helpful tone increases the article’s usefulness for both beginners and intermediates.
Begin the Crochet table runner in natural color – step by step pattern with a foundation chain that matches your desired width. For a 35 cm (14 in) wide runner using worsted cotton, try a multiple of 12 + 4 chains; that gives room for a decorative edge and consistent repeats. Bold the foundation info like foundation chain and multiple of 12 so readers can quickly adapt the width. Provide a short note on adjusting multiples for different stitch patterns.
Row 1: Work a base row of double crochet across the foundation chain to create a stable edge. Turn, chain 3 (counts as first dc). This first row sets the base height and helps the runner lay flat. Emphasize double crochet in bold and remind readers to check stitch counts at the end of each row to avoid drift.
Row 2–N: Introduce the main stitch repeat—for example, shell row: skip 2, 5 dc in next stitch, skip 2, sc in next stitch repeat across. Alternate this with a row of single crochet to tighten the fabric and stabilize the shells. Provide explicit stitch counts for a sample 150 cm length: “Repeat shell row 120 times or until runner reaches desired length.” Keeping both incremental counts and the option to measure physically gives flexibility.
Add a decorative border after the main repeats: a simple single crochet border followed by a picot or small shell edging frames the runner nicely. Describe how to work around corners if you plan a rectangular finish: add extra chains at corner points to prevent puckering. Use bold terms like border, picot, and frame the runner so scanners find finishing cues fast.
If you prefer a lace version, switch the repeat to a filet grid: alternate dc, ch 2, skip rows with dc across rows to make open squares. Explain how to count mesh squares instead of stitches and show how to translate a charted motif (e.g., a simple leaf repeat) into the grid. Offer a short tip on chart-reading basics for beginners. Throughout the pattern, remind readers to keep their natural color yarn tidy—the neutral tone shows uneven tension quickly, so consistency matters.
Finally, include a short troubleshooting section inside the pattern: if edges ripple, change hook size or add a row of sc for stability; if center pulls, check gauge and adjust tension. These immediate fixes keep the maker moving forward and help the pattern finish beautifully with minimal rework.
After completing the final repeat of your Crochet table runner in natural color – step by step, weave in ends with a blunt yarn needle and trim carefully. Cotton and linen blends show ends plainly, so take time to bury yarn tails through several stitches. Bold weave in ends and trim carefully to highlight this important finishing step. A neat finish elevates the overall look and increases longevity.
Blocking is the single most transformative finishing step for a table runner. For cotton, wet-block or steam-block on a flat surface to set the shape and open lacework. Pin lightly if using mesh or shell patterns so edges straighten evenly. Include explicit blocking guidance—temperature, pin spacing, and dry time—so makers are confident. Bold blocking and offer alternatives for different yarns: skein-dyed vs. bleached natural yarns may react slightly differently.
Styling the runner on the table: suggest center placement with a simple centerpiece of greenery, candles, or ceramics in complementary natural tones. Mention color-contrast ideas—pairing a natural color runner with darker tableware for drama or with muted pastels for a soft, cohesive look. These styling suggestions help readers imagine end use and inspire sharing on social channels, which increases engagement and reach.
Care and maintenance: recommend washing instructions based on yarn fiber, and note that some cotton may shrink slightly—advise washing a swatch first. For runners expected to get heavy use, suggest a more robust stripe in the pattern or a tighter stitch for durability. Include bolded care keywords like wash gentle, shrinkage, and durability so readers searching for maintenance tips find them quickly.
If you plan to sell or share the pattern online, include a short SEO checklist: use the full phrase Crochet table runner in natural color – step by step in the title and within the first 100 words, include alt text for photos, and list materials with clear measurements. These on-page optimizations follow Google’s best practices for clarity and relevancy without keyword stuffing.
Q: What yarn weight is best for a Crochet table runner in natural color – step by step?
A: For a balance of drape and structure, worsted (aran) or DK/sport weight cotton works well. Worsted gives a chunkier, more rustic look; DK or sport creates finer lace and more delicate drape. Choose based on the aesthetic you want and remember to make a gauge swatch.
Q: How do I adjust the runner length?
A: Simply repeat the central stitch pattern until the runner reaches your desired length. Track the number of repeats and measure periodically. If your pattern is based on a multiple, maintain that multiple while increasing length so the stitch repeat remains consistent.
Q: Can I machine wash a natural cotton table runner?
A: Many cotton runners can be machine washed on a gentle cycle, but always test a swatch first. Use cool water and reshape while damp. For linen blends or delicate lace patterns, hand washing and flat drying are safest.
Q: My edges ripple—what can I do?
A: Rip back a row or two and try a different hook size to fix tension issues. You can also add an edging row of single crochet to stabilize rippling. Blocking will often smooth small waves, but gauge adjustments may be necessary for persistent ripples.
Q: How do I make the runner wider or narrower?
A: Change the foundation chain by adding or subtracting multiples specified in the pattern (for example, a multiple of 12). Keep the edge stitches consistent and adjust the border so the final proportions remain balanced.
Q: Can I add color accents to a natural runner?
A: Absolutely—thin stripes, embroidered accents, or tasseled ends in muted tones complement a natural color base beautifully. Use color strategically to maintain the calm, neutral feel if that’s your goal.
This Crochet table runner in natural color – step by step guide gave you a complete roadmap: a clear materials list, essential stitches and techniques, a flexible pattern you can adapt, and finishing and styling advice to make your runner look professional. You learned how to choose the right cotton yarn, check gauge, work repeat patterns, and finish with careful blocking. If you follow the step by step instructions and use the troubleshooting tips, you’ll finish a beautiful, functional piece for your table or as a heartfelt gift.
Please leave an honest opinion below—tell me what worked, what needs clearer explanation, and any adjustments or alternative stitch patterns you’d like to see next. Your suggestions help make future patterns clearer, more helpful, and better tailored to what makers actually need.


