
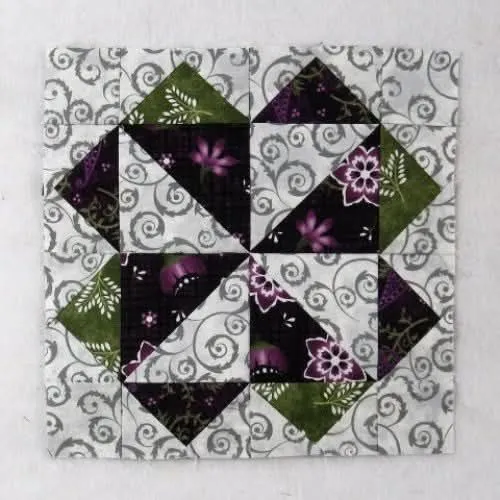
Hunter's Star Quilt Block - Quick & Easy Tutorial

Accurate cutting is key to a successful Orion’s Wheel Quilt Block. This design features curved and straight pieces that fit together seamlessly, so precision will ensure that the final block lies flat and maintains its shape. Use a rotary cutter, quilting ruler, and self-healing mat to achieve clean, sharp edges.
Each section of the Orion’s Wheel contributes to the illusion of rotation, so even a small deviation in size can affect the overall look. Always double-check your measurements before cutting, and make sure your ruler doesn’t slip.
To create the curved sections that form the wheel, you can use templates or specialized quilting rulers. These curves may seem intimidating at first, but with a little practice, you’ll find them enjoyable to sew.
Pin the curved pieces carefully before stitching, matching notches and easing the fabric as needed to avoid puckering.
Pressing your seams as you go will make assembly smoother. Use a hot iron with steam and press seams toward the darker fabric to minimize shadowing. For curved seams, gently press without stretching the fabric to keep the shape intact.
If you’re new to curved piecing, consider practicing on scraps first. This allows you to test your stitch length and tension settings before working on your main fabric. Once you’re confident, you can begin assembling your Orion’s Wheel Quilt Block with ease.
Label your cut pieces clearly. Keeping your parts organized ensures that when it’s time to sew, you can focus on precision and creativity rather than sorting through fabric piles.
Once all your pieces are prepared, it’s time to assemble the Orion’s Wheel Quilt Block. Begin by sewing the smaller units together, such as the curved components, before joining them into larger sections. This modular approach helps maintain alignment and ensures that your seams match at each junction.
Use a consistent ¼-inch seam allowance, the quilting standard. This uniformity keeps your block square and helps all pieces fit together accurately. Take your time and sew steadily—rushing can lead to uneven seams or misaligned corners.
After joining each section, press your seams flat. Pressing is as important as stitching in quilting; it sets the seams and prevents bulk buildup. Alternate the direction of seam pressing in adjacent rows to help them nest neatly together.
When assembling the central “wheel” of the Orion’s Wheel Quilt Block, pay close attention to how the curves meet. The beauty of this design lies in the symmetry of its circular pattern. Aligning the seams precisely will give your block that smooth, flowing look reminiscent of a spinning wheel.
Once the central portion is complete, attach the corner and border units. These square sections frame the wheel and complete the illusion of motion. At this stage, your block should be perfectly square—measure it to ensure accuracy before joining it with other blocks in your quilt.
Finally, give your block a thorough pressing. The crisp finish not only enhances the look of your work but also prepares it for quilting or further assembly. Admire your finished Orion’s Wheel Quilt Block—it’s a piece of craftsmanship that reflects both skill and creativity.
The final stage of this free quilt block tutorial involves deciding how you want to showcase your work. You can use a single Orion’s Wheel Quilt Block as a decorative pillow cover or wall hanging, or combine multiple blocks for a full-sized quilt. The versatility of this design makes it suitable for all kinds of home décor projects.
Quilting your finished piece adds texture and depth. Simple straight-line quilting emphasizes the geometric structure, while free-motion quilting can enhance the circular illusion. Choose a thread color that complements your fabrics—neutral tones for subtlety, or metallic threads for a touch of sparkle.
Adding a border can also elevate the design. A narrow frame in a contrasting color draws the eye inward toward the central wheel, while a wider border creates a balanced composition for larger quilts. Experiment with different border styles to personalize your project.
If you enjoy exploring creative variations, try scaling the block up or down. A larger version can serve as a statement piece in a quilt, while smaller ones can be used for patchwork bags or table runners. You can also alternate blocks with solid squares or star blocks to create visual rhythm across the quilt top.
Another fun option is to invert your color scheme. Use light fabrics for the wheel and dark fabrics for the background to achieve a glowing, celestial appearance. Reversing colors can completely transform the mood of your quilt.
Remember, the Orion’s Wheel Quilt Block is a foundation—you’re free to build upon it with your imagination. Whether you follow the traditional layout or experiment with modern twists, the result will always reflect your creativity and attention to detail.
1. What is the finished size of the Orion’s Wheel Quilt Block?
Most patterns create a 12-inch finished block, but you can adjust the size by scaling your template pieces to fit your project.
2. Is this block suitable for beginners?
Yes! While the curves may seem challenging at first, this tutorial breaks down each step so even confident beginners can follow along successfully.
3. Do I need special tools to make the Orion’s Wheel Quilt Block?
You’ll need a rotary cutter, quilting ruler, and optional curved templates. These tools help ensure precision and make the cutting process faster.
4. Can I make this quilt block without curves?
If you prefer a simpler version, you can adapt the design using half-square triangles and wedges to mimic the circular effect.
5. What fabrics work best for this design?
High-quality cotton fabrics are recommended for stability and durability. Choose contrasting colors to emphasize the wheel pattern.
6. How do I join multiple Orion’s Wheel blocks together?
Arrange them in rows and sew with consistent seam allowances. Press seams open or to one side, depending on your quilting style.
7. Can I sell items made using this pattern?
Yes, handmade quilts created from this tutorial can be sold, provided you credit the pattern source if required by the designer.
Creating the Orion’s Wheel Quilt Block is a rewarding experience that combines precision, creativity, and artistry. From fabric selection to the final stitch, every step invites you to explore new quilting techniques and express your unique style. This free tutorial equips you with the knowledge to master curved piecing and achieve professional-looking results.
Exploring the Orion’s Wheel Quilt Block also offers an opportunity to experiment with quilting techniques beyond basic piecing. For instance, adding appliqué elements, embroidery, or fabric painting to the block can create a truly one-of-a-kind piece. You can highlight the “spokes” of the wheel with subtle quilting lines or even metallic thread to mimic the shimmer of stars, giving the quilt a dynamic, three-dimensional effect. This approach not only enhances the visual appeal but also allows quilters to inject their personal touch, turning each block into a unique work of art that reflects both skill and creativity.
We hope this guide inspires you to create your own version of the Orion’s Wheel Quilt Block. Whether you use it as a single decorative piece or part of a larger quilt, the result will surely be something you’re proud of.


