
Hunter's Star Quilt Block - Quick & Easy Tutorial

The Milky Way Quilt Block Diagram is a captivating and timeless design that beautifully blends creativity, geometry, and storytelling through fabric. This star-inspired block takes its name from the galaxy itself, symbolizing light, motion, and harmony.
Whether you are a beginner eager to explore patchwork or an advanced quilter seeking inspiration for your next project, the Milky Way Quilt Block Diagram offers a perfect balance of structure and imagination.
This pattern is a favorite among quilting enthusiasts because it allows endless customization in colors, fabrics, and layouts. The Milky Way Quilt Block can be used as a single centerpiece or combined in multiples to create a stunning full-size quilt.
The diagram serves as a visual guide, showing how each triangle, square, and star point aligns to create a symmetrical celestial effect. Accessible both in printed form and as a PDF download, this design empowers you to start crafting immediately—no waiting, just pure creativity.
The Milky Way Quilt Block Diagram not only provides a layout but also helps quilters understand fabric placement, color coordination, and piecing order. Learning how to read and follow a quilt block diagram is an essential skill that improves accuracy and boosts confidence in your sewing projects. In this article, we’ll explore what makes this quilt block special, how to interpret its diagram, and helpful tips to bring your version of the Milky Way to life.
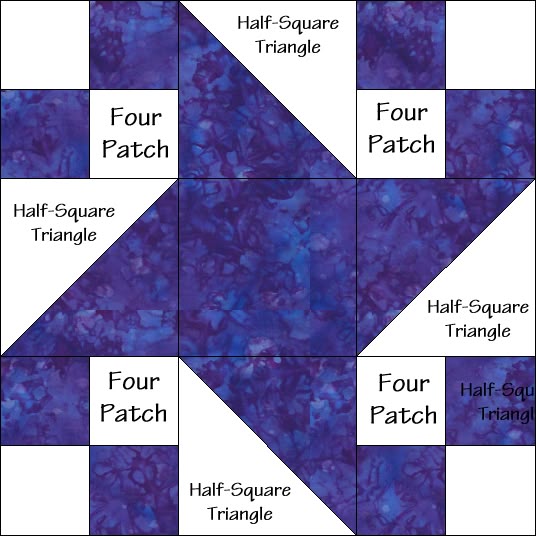
The Milky Way Quilt Block is built on a star-based structure, typically composed of squares, half-square triangles (HSTs), and flying geese units. Its composition creates a dynamic starburst that mimics the swirling, luminous motion of the Milky Way galaxy.
One of the most appealing aspects of this block is its visual rhythm. Each piece connects harmoniously, and the repeated shapes form a balanced and radiant pattern. Quilters love this design because it combines symmetry with movement, allowing endless creative interpretations.
In most versions of the Milky Way Quilt Block Diagram, you’ll find eight-pointed stars radiating from a central square. The surrounding triangles provide depth and energy, while alternating fabric values—light, medium, and dark—help the stars pop against the background.
Using a diagram simplifies the construction process. It visually breaks down the design, showing where each fabric piece belongs. This makes the block easier to assemble, especially for visual learners who prefer seeing each step mapped out clearly.
Another reason the Milky Way Quilt Block is beloved is its flexibility. You can enlarge or reduce the pattern to fit any project—wall hangings, table runners, pillows, or full quilts. This adaptability keeps it fresh and fun for every level of quilter.
Finally, the symbolism of the Milky Way resonates with many crafters. Stars have always represented guidance, inspiration, and dreams, making this pattern not only beautiful but also meaningful.
Understanding the Milky Way Quilt Block Diagram is key to achieving precision and visual harmony in your quilt. The diagram usually includes color-coded sections and labeled measurements for each component, such as squares, triangles, and borders.
Begin by studying the overall layout. Identify the center square, which anchors the design. From there, notice how the triangles radiate outward to form the star’s points. The outermost shapes often create a frame that ties the entire block together.
Each symbol or color in the diagram corresponds to a specific fabric tone—light, medium, or dark. Following this guide ensures you maintain contrast and depth throughout your block. Remember: the correct placement of values makes the star shine vividly against the background.
When you look at the Milky Way Quilt Block Diagram, pay attention to the direction of seams and grainlines. These details prevent distortion when sewing and pressing your pieces. Proper alignment also ensures that the points of the stars meet cleanly in the final assembly.
Many quilters like to print the diagram and color it in before cutting fabric. This helps visualize the finished block and prevents mistakes in fabric placement. You can even experiment digitally, adjusting shades until you find your favorite combination.
Lastly, use the diagram as both a construction tool and an artistic guide. It’s not just a technical resource—it’s your map to a celestial masterpiece that reflects your personal style.
Creating a flawless Milky Way Quilt Block requires patience, precision, and a few smart quilting techniques. Even though the design looks intricate, following the right steps will ensure professional-looking results.
Start by selecting fabrics that contrast well. A combination of light backgrounds and dark star points enhances visibility and drama. For a softer look, choose analogous colors like blues and purples; for a striking modern quilt, experiment with black and white or bold jewel tones.
Cutting accuracy is essential. Use a sharp rotary cutter and a clean cutting mat. Measure twice before cutting to avoid waste. Each piece in the Milky Way Quilt Block Diagram fits together like a puzzle, so precise dimensions ensure perfect alignment later.
When assembling the block, press seams carefully. Press, don’t iron—pressing flattens seams without stretching the fabric. Alternate the direction of your seam allowances to reduce bulk and help points match neatly.
If you’re new to quilting, consider chain piecing—a time-saving technique that lets you sew multiple components in one continuous motion. It’s especially useful for repetitive shapes like half-square triangles.
Remember that consistency is more important than speed. Take your time, refer to your diagram often, and enjoy the process. Quilting isn’t just about finishing—it’s about mindfulness and expression.
Finally, once your block is complete, square it up with a ruler to ensure it matches the correct finished size. This small step makes a huge difference when you join multiple blocks together later.
The Milky Way Quilt Block Diagram isn’t limited to a single purpose—it’s a versatile template that can be adapted into countless creative projects. Whether you’re making a full quilt or a small decorative piece, this block shines in any format.
One idea is to create a wall hanging using a single enlarged Milky Way block. Frame it with a bold border or metallic fabric for a celestial glow that lights up any room.
You can also turn smaller versions of the block into pillow covers. Mixing different color schemes in each pillow adds a coordinated yet diverse aesthetic to your living space.
For a more advanced project, use multiple blocks to form a Milky Way quilt top. When arranged strategically, the stars appear to swirl across the fabric, creating the illusion of a night sky in motion.
If you prefer practical quilting projects, incorporate a block or two into a table runner or tote bag. These smaller creations are perfect for showcasing your skills and make wonderful handmade gifts.
Another creative approach is using ombre fabrics to represent the Milky Way’s glowing gradient. Transitioning from dark navy to pale silver produces an ethereal cosmic effect.
Lastly, try mixing patterns and textures—combine solids, batiks, and prints to give your Milky Way quilt a dynamic and contemporary feel.
1. What size is the Milky Way Quilt Block typically made in?
Most versions range from 8 inches to 12 inches finished, but you can resize it according to your project needs.
2. Is the Milky Way Quilt Block suitable for beginners?
Yes! Although it looks complex, the Milky Way Quilt Block Diagram breaks the design into manageable parts, making it approachable for all skill levels.
3. What fabrics work best for this design?
High-contrast cotton fabrics are ideal. Solid or tone-on-tone fabrics make the star points stand out more clearly.
4. Can I sew this block by hand instead of using a machine?
Absolutely. Hand piecing is slower but offers precise control. Just make sure to use small, even stitches.
5. How do I ensure my points match perfectly?
Pin carefully where seams meet and press after each step. Using a ¼-inch seam allowance consistently is key to clean intersections.
6. Can I use scraps for this pattern?
Yes, the Milky Way Quilt Block is scrap-friendly! Mixing different shades of similar colors adds depth and movement to your quilt.
7. Do I need special tools to follow the diagram?
A rotary cutter, quilting ruler, and accurate measuring tools are sufficient. Optional tools like a design wall can help visualize layout.
8. How do I assemble multiple Milky Way blocks into a quilt?
Align and sew them row by row, pressing seams alternately between rows. Adding sashing between blocks can create a more defined look.
9. Is there a recommended color scheme for a galaxy-inspired look?
Try deep blues, purples, silvers, and hints of gold or white to mimic the cosmic glow of the Milky Way.
10. Can I download the Milky Way Quilt Block Diagram as a PDF?
Yes! Many patterns are available as a convenient PDF download, allowing you to print, store, and reference it easily.
The Milky Way Quilt Block Diagram is more than just a sewing pattern—it’s a creative journey through fabric and imagination. With its stunning star design and endless customization options, it captures the spirit of the galaxy while offering a rewarding quilting experience for every level of maker.
By understanding the diagram, choosing the right fabrics, and applying careful techniques, you can create a masterpiece that reflects your personal style and craftsmanship.
If this article helped you understand the Milky Way Quilt Block Diagram, feel free to share your thoughts below. Leave a sincere opinion or suggestions about what you’d like to learn next. Your feedback inspires future quilting guides and creative content for the community!


