
Hunter's Star Quilt Block - Quick & Easy Tutorial

Creating a snowflake block is a delightful and creative way to celebrate the winter season, whether you’re a quilting enthusiast, a DIY craft lover, or simply looking to add a festive touch to your home.
How to make a snowflake block involves a combination of precise cutting, careful piecing, and a little bit of artistic flair.
This craft allows you to explore unique patterns, play with colors, and even experiment with textures to produce a beautiful winter-inspired design. With the right techniques and materials, making a snowflake block can be both enjoyable and rewarding.
Before you start, it’s important to gather all the necessary supplies. Typically, you will need fabric, a rotary cutter, a cutting mat, quilting rulers, pins, and a sewing machine or needle and thread for hand-sewing.
Choosing fabrics with contrasting colors can help your snowflake block stand out, while soft and cozy fabrics can give it a warm and inviting feel. Proper preparation and planning will ensure that your block looks polished and professional once completed.
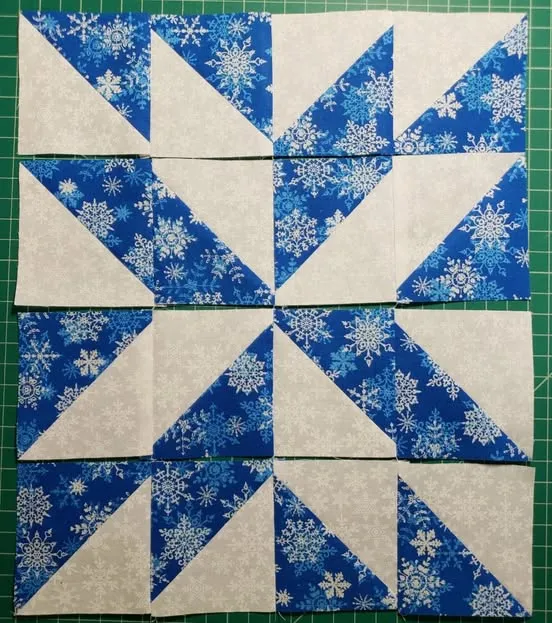
Additionally, understanding the basic principles of block construction is essential for creating a successful snowflake design. A snowflake block is usually made up of several smaller pieces of fabric, arranged in a symmetrical pattern. Accuracy in cutting and sewing is key to maintaining symmetry and achieving a visually appealing result. By carefully following step-by-step instructions and practicing your techniques, you will gain confidence in crafting beautiful snowflake blocks for quilts, wall hangings, or other decorative projects.
To begin your project on how to make a snowflake block, you first need to gather the right materials. Having everything prepared will make the crafting process smooth and enjoyable.
Start with high-quality fabric in your desired colors. Traditional snowflake blocks often feature white or light-colored fabrics contrasted with darker backgrounds to highlight the intricate pattern. However, you can experiment with unconventional colors for a modern or playful twist. Fabric scraps from previous projects can also work well for a patchwork-style snowflake block.
Next, a rotary cutter and cutting mat are essential for precise cutting. Quilting requires accuracy, and using these tools will help you achieve clean edges for each piece of your block. Pair these with a quilting ruler to measure and cut fabric accurately.
Pins or clips are important to hold fabric pieces together before sewing. This ensures your pieces stay aligned during the sewing process, preventing gaps or misaligned seams.
A sewing machine is highly recommended, though hand-sewing is also possible. Choose a fine needle suitable for your fabric, and ensure your thread matches or complements your fabric colors.
Lastly, consider using a design template or pattern for your snowflake block. Templates provide clear guidance on the shapes and sizes of pieces needed, making it easier to assemble the block correctly. Having a visual reference can save time and reduce mistakes during construction.
Once your materials are ready, the next step in how to make a snowflake block is cutting and piecing the fabric. Accuracy is crucial to ensure all the pieces fit together seamlessly.
Begin by cutting your fabric according to the chosen pattern or template. A snowflake block typically consists of triangles, squares, and sometimes more intricate shapes. Take your time to measure each piece carefully before cutting.
After cutting, arrange the pieces according to the snowflake design. Laying out your pieces on a flat surface allows you to visualize the final block and make any adjustments to color placement or symmetry.
Start piecing by sewing smaller sections together first, such as triangles or units that form the snowflake arms. Press each seam flat with an iron to create crisp edges, which will make assembling the full block easier.
As you sew each section, check alignment frequently. Even small discrepancies can affect the overall symmetry of the snowflake block, so taking extra care at this stage is worthwhile.
Once all smaller sections are sewn, join them together to complete the block. Use pins to hold pieces in place and sew slowly to maintain accuracy. After assembly, press the finished block to set the seams.
A beautifully finished snowflake block can be enhanced with decorative details that add dimension and charm. Embellishments are optional, but they can elevate your project significantly.
Consider adding embroidery or stitching along the edges of your snowflake. Simple stitches like backstitch or running stitch can outline the pattern, adding definition and texture.
Appliqué is another option. Small fabric shapes can be sewn onto the block to highlight certain areas of the snowflake, creating a layered, three-dimensional effect.
Fabric paint or markers can also be used to add delicate accents, such as tiny dots or lines, mimicking the natural patterns of snowflakes. Be careful to use materials that are compatible with your fabric to avoid damage.
Adding beads or sequins can provide a sparkling, icy effect. This technique works well for holiday-themed projects, giving your snowflake block a festive sparkle.
Remember that balance is key. Too many embellishments can overwhelm the design, while subtle details can enhance its beauty. Test your decorations on scrap fabric first to see how they will look before applying them to the final block.
After sewing and decorating, it’s time to finish your snowflake block. Proper finishing ensures durability and prepares the block for use in quilts, wall hangings, or other craft projects.
Trim any excess threads and fabric to give your block clean edges. This simple step makes a big difference in the overall appearance of the finished piece.
Consider adding a backing fabric and batting if your snowflake block is part of a quilt. This provides stability and a professional finish, especially if the block will be handled frequently.
Press the block one final time with an iron to set the seams and flatten any wrinkles. A well-pressed block will look crisp and polished, enhancing the beauty of your snowflake design.
If you plan to combine multiple blocks into a larger project, measure and align each block carefully. Consistent block size and alignment are essential for a professional-looking quilt.
Finally, label your block if you wish. Adding the date, your name, or a short note can make your project a cherished keepsake for years to come.
Q1: What fabrics work best for a snowflake block?
A1: Cotton quilting fabrics are ideal because they are easy to cut and sew. You can use light colors for the snowflake and darker backgrounds to create contrast.
Q2: Can I make a snowflake block without a sewing machine?
A2: Yes, hand-sewing is possible, though it may take longer. Use a sharp needle and small, even stitches for the best results.
Q3: How do I maintain symmetry in my snowflake block?
A3: Careful cutting, pinning, and frequent checking of alignment while sewing will help maintain symmetry. Templates and patterns are very helpful.
Q4: Are embellishments necessary?
A4: No, embellishments are optional. They can enhance the visual appeal, but a simple pieced block can also look beautiful on its own.
Q5: How can I use my snowflake block?
A5: Snowflake blocks can be used in quilts, wall hangings, table runners, pillow covers, or as standalone decorative pieces.
Q6: Can I mix colors and patterns in one block?
A6: Yes, mixing fabrics can add visual interest. Just ensure that the snowflake remains distinguishable from the background.
Learning how to make a snowflake block is a fun and rewarding craft that combines precision, creativity, and artistry. From selecting materials and cutting fabric to piecing, embellishing, and finishing the block, each step contributes to a beautiful final piece. Snowflake blocks are versatile, allowing for endless creative possibilities in color, pattern, and decoration. We hope this guide has provided clear instructions and inspiration for your next winter craft project. Feel free to share your experience, suggestions, and ideas on how you made your snowflake block unique, and let us know what techniques worked best for you!
With just a few basic tools and materials, you can transform ordinary fabric or yarn into stunning snowflake-inspired art.
What’s more, this design can easily be customized with your favorite colors or materials, making each creation unique. Many crafters enjoy experimenting with shades of blue, white, or silver to capture the sparkle of real snow.


