
Crocheted house-shaped cookie for Christmas tree

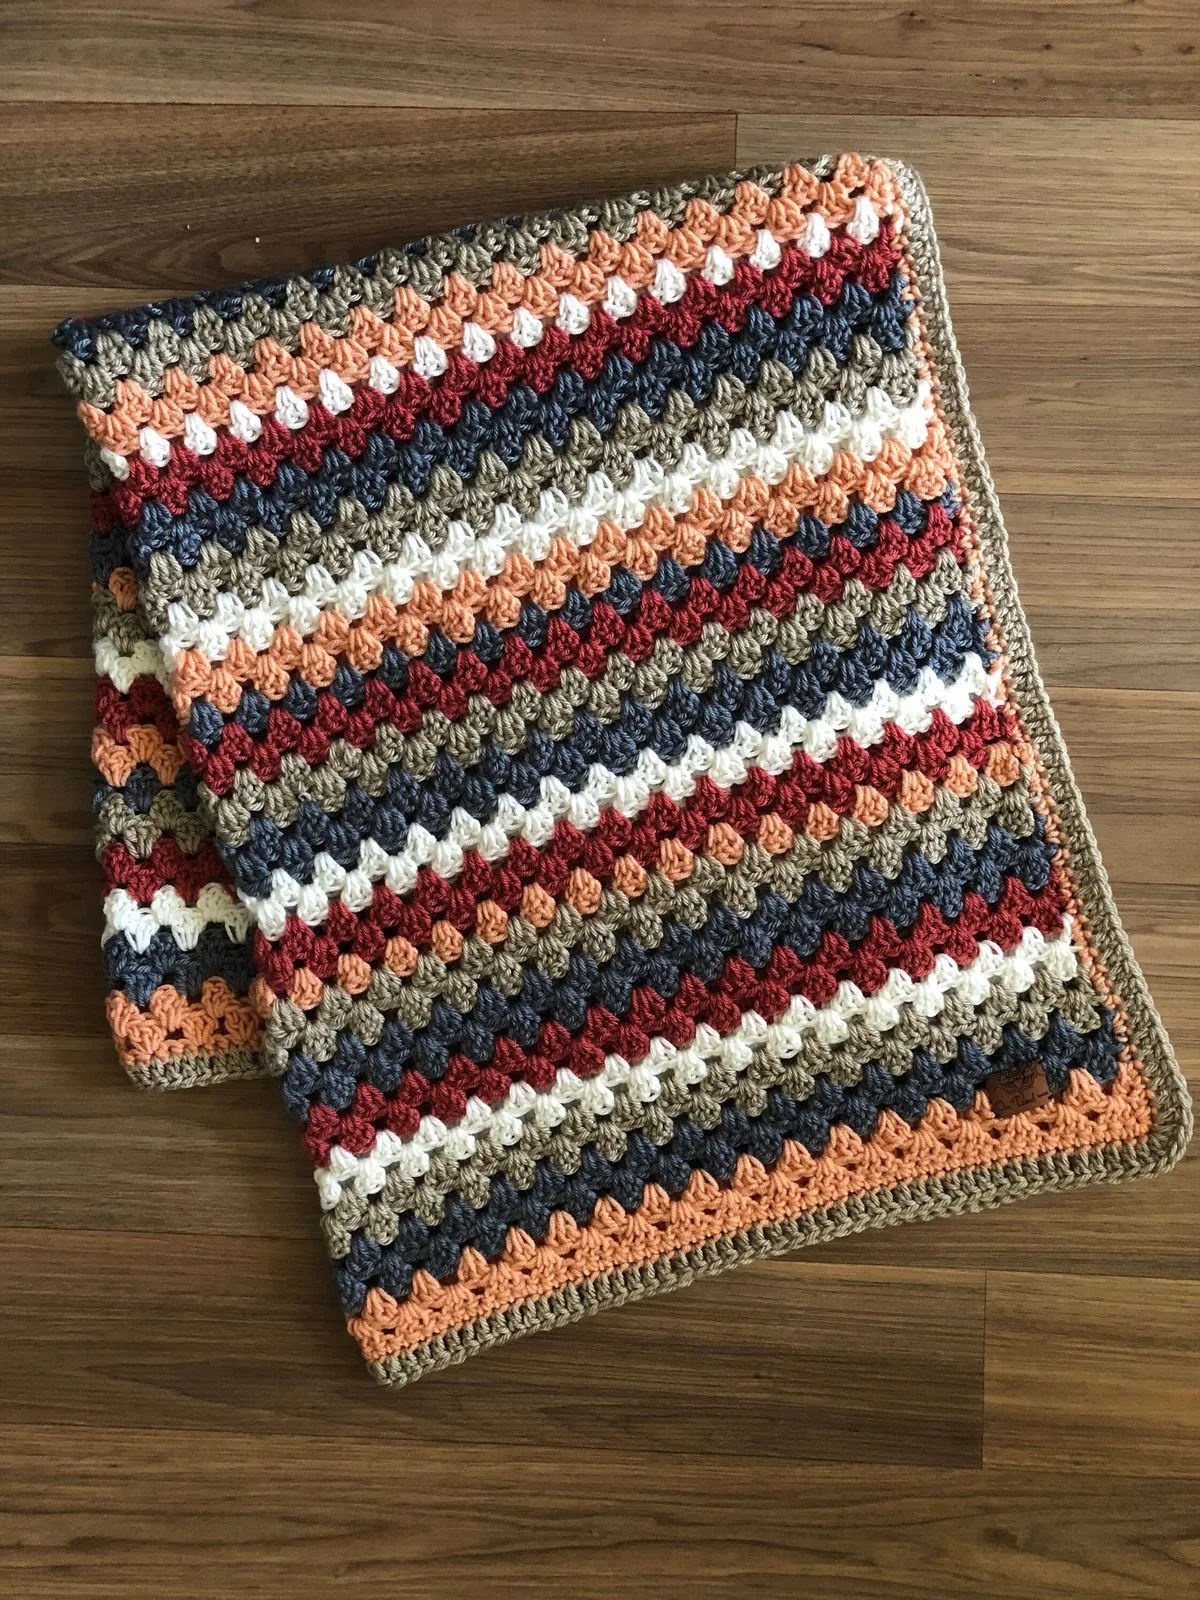
The Granny Stripe Stitch is one of the most versatile and beloved crochet techniques among crafters. This stitch combines the timeless appeal of traditional granny squares with the flexibility of stripes, creating a stunning, textured pattern perfect for blankets, scarves, cushion covers, and more.
In this crochet tutorial, we will guide you step by step through the process of mastering the Granny Stripe Stitch, explain essential terms, and provide tips for creating projects that are both beautiful and functional.
Crocheters love the Granny Stripe Stitch because it’s easy to learn yet offers endless design possibilities. By alternating colors or adjusting the stitch height, you can create modern or classic looks.
Unlike regular granny squares, the granny stripe allows you to work in long rows, making it faster to create large projects. This tutorial is perfect for beginners eager to learn new techniques and experienced crocheters looking for a fresh pattern to add to their repertoire.
Whether you are making a cozy blanket for a loved one or a stylish accessory for yourself, the Granny Stripe Stitch adds a handmade touch that cannot be replicated by mass-produced items. With this guide, you’ll learn how to crochet the stitch efficiently, understand the necessary materials, and discover creative ways to use this versatile pattern in your projects.
One of the best aspects of the Granny Stripe Stitch is its adaptability. You can easily mix traditional and modern color palettes, add textured yarns for a three-dimensional effect, or even combine the stitch with other patterns like shell or puff stitches. This flexibility makes it ideal for seasonal projects, gifts, and home décor, allowing each creation to reflect personal style and creativity. Whether you are crafting for yourself, a loved one, or a special occasion, the Granny Stripe Stitch offers endless opportunities to experiment and innovate, making every finished piece a unique work of art.
Before starting your Granny Stripe Stitch, gather the essential materials. Having the right supplies ensures a smooth crafting experience and professional-looking results.
Having these materials ready ensures your Granny Stripe Stitch project begins smoothly and progresses without interruptions.
The Granny Stripe Stitch combines traditional granny square techniques with a striped row format. Follow these steps carefully to master the stitch.
Start with a foundation chain of your desired length. This will determine the width of your project. Make sure the chain is a multiple of 3 plus 2 extra chains for turning.
Work your first row by skipping 3 chains from the hook (this counts as the first double crochet). Then, double crochet 2 more times into the same chain. Skip 2 chains, and in the next chain, make 3 double crochets. Repeat across the row. End with a double crochet in the last chain.
Chain 3 at the end of the row. This will serve as your turning chain and count as the first double crochet of the next row.
Work 3 double crochets into each space created by the 2-chain gaps from the previous row. Continue across the row, maintaining the 3 double crochets per space pattern. End with a double crochet in the top of the turning chain from the previous row.
If you want a striped effect, change colors at the end of a row by completing the last double crochet with the new color. This allows for seamless transitions and beautiful colorwork.
Repeat rows 2 through 5 until your project reaches the desired length. Consistency in stitch placement ensures a neat and uniform appearance.
The Granny Stripe Stitch is incredibly versatile and can be adapted for various projects. Here are some ideas:
Using different color combinations and yarn textures makes each Granny Stripe Stitch project unique and suited to your style.
To ensure your Granny Stripe Stitch projects are neat and professional, consider these tips:
Following these tips ensures your Granny Stripe Stitch projects are both beautiful and long-lasting.
Q1: Is the Granny Stripe Stitch suitable for beginners?
Yes, it is beginner-friendly, especially if you are familiar with double crochet stitches and basic chain techniques.
Q2: Can I use any type of yarn?
You can, but medium-weight cotton or acrylic yarns work best for consistent results.
Q3: How do I change colors neatly?
Complete the last double crochet of a row with the new color to transition smoothly.
Q4: Can this stitch be used for clothing?
Absolutely! Scarves, shawls, and even cardigans look fantastic with granny stripes.
Q5: How do I prevent edges from curling?
Maintain consistent tension and consider blocking the finished piece to flatten edges.
Q6: Can I adjust the size of the stitch?
Yes, changing hook size or yarn thickness will result in larger or smaller stitches.
The Granny Stripe Stitch – Crochet Tutorial is an excellent resource for both beginners and experienced crocheters. This versatile stitch allows for endless creative possibilities, from blankets and scarves to cushions and bags. By mastering the stitch, understanding color changes, and experimenting with different yarns, you can create unique handmade items that combine texture, pattern, and charm.
Share your creations, leave honest feedback, and suggest future tutorials to inspire the crafting community. Your contributions help keep the art of crochet alive and vibrant.


