
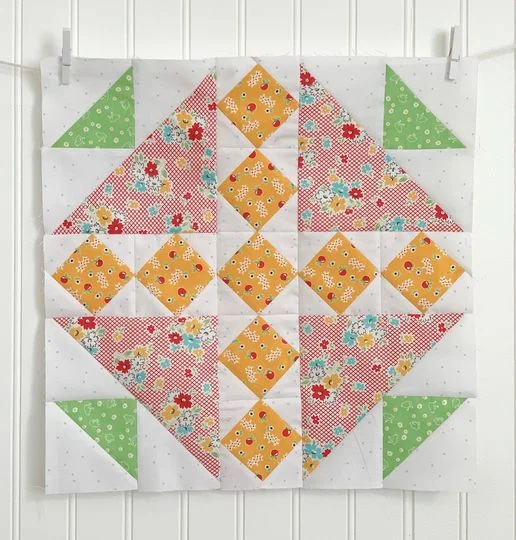
Hunter's Star Quilt Block - Quick & Easy Tutorial

The Around the Corner Quilt Block Tutorial is a fantastic guide for quilters looking to create a visually striking and versatile quilt block. Known for its geometric charm and subtle movement, this block design adds both depth and sophistication to any quilt project.
The “around the corner” concept refers to the arrangement of fabric strips or shapes that create a visual pathway, guiding the viewer’s eye across the quilt.
It’s an ideal pattern for both beginners eager to learn precision piecing and experienced quilters looking for a fresh, modern twist on traditional designs.
Creating a quilt with the Around the Corner Quilt Block allows for endless creativity. The block’s modular nature means it can be repeated, rotated, or combined with other blocks to form larger, intricate quilts.
The contrast between light and dark fabrics emphasizes the corner-turning effect, giving the quilt a dynamic and three-dimensional appearance. Using this block, you can craft everything from cozy throws to statement bed quilts.
This tutorial provides step-by-step instructions to help you master the Around the Corner Quilt Block, covering fabric selection, cutting, assembly, and finishing touches. By the end of this guide, you’ll be able to confidently create this block and integrate it seamlessly into your quilting projects, whether traditional or contemporary.
Selecting the right fabrics is essential for making the Around the Corner Quilt Block visually impactful. The block relies on contrast between light and dark fabrics to create the signature corner-turning effect. Traditional choices include a mix of solids, prints, and tone-on-tone fabrics to emphasize the geometry of the design.
Start by choosing a light fabric for the center or focal area of the block. Darker shades can then be used for the “corner” strips or surrounding areas to make the pattern pop. Pre-washing your fabrics is recommended to avoid color bleeding or shrinkage after assembly.
Cotton quilting fabrics are ideal because of their durability, ease of handling, and wide variety of prints and colors. Mixing small-scale patterns with solids or larger prints creates visual interest without overwhelming the block’s structure.
Lining up fabrics by color intensity before cutting can help you visualize the final block layout. Consider arranging your pieces on a design wall to test different combinations, ensuring that the transitions appear smooth and the corner effect is pronounced.
Additional elements like tone-on-tone quilting, metallic fabrics, or subtle embroidery can enhance the block’s depth. Using coordinating fabrics for multiple blocks in a quilt creates a cohesive overall design, maintaining balance while highlighting individual blocks.
Finally, keep in mind the scale of your quilt. Using a consistent fabric palette for several blocks ensures harmony and reinforces the distinctive “around the corner” visual effect across the quilt.
Accurate cutting and piecing are crucial for the success of the Around the Corner Quilt Block. Begin by pressing all fabrics to remove wrinkles and ensure clean edges. Use a rotary cutter, ruler, and cutting mat for precise measurements. Blocks are typically cut to standard sizes, such as 12 inches square, but you can adjust based on your quilt dimensions.
Cut the center square or rectangle, which will serve as the focal point. Then cut the strips or triangles that will wrap “around the corner” of the center piece. Alternate between light and dark fabrics according to your layout plan to emphasize the directional flow.
Assembling the block involves sewing strips to the center piece, starting from one side and progressing around the corner. Press seams toward the darker fabric to reduce bulk and maintain crisp edges. Accuracy in stitching and pressing ensures that the corner alignment appears seamless.
Once one side is complete, continue adding strips to the opposite sides, maintaining the corner-turning visual. Check alignment frequently to avoid distortion. Each strip should match the corresponding corner, ensuring a balanced and professional finish.
After completing the block, trim excess fabric and square it to your desired size. Accurate trimming guarantees that multiple blocks will align perfectly when sewn together in a larger quilt layout.
Finally, repeat these steps for each block, maintaining consistency in color placement and seam allowance. This consistency is key to achieving a cohesive and visually appealing quilt.
Once all Around the Corner Quilt Blocks are pieced, it’s time to assemble the quilt top. Lay out your blocks on a flat surface or design wall to visualize the overall pattern. Rotate or reposition blocks as needed to create a harmonious flow and maintain the corner-turning effect throughout the quilt.
Sew blocks together row by row, matching seams carefully to maintain alignment. Press seams between rows to reduce bulk and create a flat, even surface. This careful assembly ensures that the distinctive design of each block is showcased and that the overall quilt looks professional.
Consider adding sashing or borders to frame the quilt blocks, enhancing the geometric effect and providing visual separation between blocks. Borders can be solid or coordinated with fabric patterns to tie the quilt design together.
After completing the quilt top, layer it with batting and backing fabric to prepare for quilting. Pin or baste the layers securely to prevent shifting during quilting. Proper preparation ensures a smooth, professional finish.
Finally, quilt the layers using your preferred method, such as free-motion quilting, straight-line quilting, or hand quilting. The quilting design can enhance the “around the corner” effect, emphasizing the dynamic movement of the blocks.
Finishing your Around the Corner Quilt Block project involves trimming, binding, and final pressing. Trim excess batting and backing fabric to align with the quilt top edges. Choose a binding fabric that complements your quilt colors and sew it around the edges using a neat, consistent stitch.
Press the quilt thoroughly to flatten seams and remove wrinkles, ensuring a polished presentation. Labels or personalized embroidery can be added for a finishing touch, marking the quilt with your name, date, or a special message.
Careful attention to detail in the finishing stage highlights the precision and effort invested in each block. Proper finishing elevates the quilt from a simple project to a cherished handmade piece suitable for gifting or display.
Finally, store or display the quilt in a way that preserves its structure and colors. Gentle washing or spot cleaning ensures longevity, keeping your Around the Corner Quilt Block beautiful for years to come.
The Around the Corner Quilt Block offers many possibilities for personalization. Experimenting with different fabric combinations, sizes, or rotations creates unique effects. Adding borders, sashing, or accent blocks enhances the quilt’s visual complexity.
Incorporating tonal gradients or ombre fabrics can emphasize the corner-turning effect. Alternating blocks in contrasting directions creates dynamic patterns that are both modern and visually engaging.
You can also embellish blocks with applique, embroidery, or decorative stitching to add texture and personal flair. Customizing fabrics with themes, prints, or meaningful colors makes the quilt uniquely yours.
Creating smaller or larger blocks affects the quilt’s final scale, allowing you to craft throws, wall hangings, or full-sized bed quilts. Combining Around the Corner Quilt Blocks with other block patterns adds versatility and innovation to your projects.
This quilt block is also suitable for themed quilts, such as seasonal or color-specific projects. By carefully selecting fabrics and arranging blocks strategically, you can craft a quilt that reflects your style while maintaining the corner-turning illusion.
Finally, mixing traditional and modern elements provides a fresh interpretation of the Around the Corner Quilt Block, making it suitable for contemporary or classic quilt aesthetics.
1. Is the Around the Corner Quilt Block suitable for beginners?
Yes, the block is manageable for beginners with basic quilting skills. Following precise measurements and steps ensures a professional outcome.
2. What fabrics are best for this quilt block?
Medium-weight cotton fabrics are ideal. Using contrasting light and dark fabrics highlights the corner-turning effect.
3. What size should I cut my blocks?
Blocks are often 12 inches square but can be adjusted depending on quilt dimensions.
4. Can this block be combined with other patterns?
Absolutely. It pairs well with traditional or modern blocks, adding variety and dynamic movement to your quilt.
5. What quilting technique works best?
Straight-line quilting, free-motion quilting, or simple hand quilting enhances the geometric and corner-turning effect.
6. How can I make my quilt more visually striking?
Use contrasting fabrics, rotate blocks strategically, and consider gradient color transitions to emphasize movement.
7. Is this quilt block machine washable?
Yes, most cotton quilts are machine washable on a gentle cycle. Spot clean or hand wash delicate finishes to preserve details.
The Around the Corner Quilt Block is a versatile and visually appealing block that brings both elegance and movement to any quilt project. Its geometric design allows for endless customization while maintaining the classic corner-turning effect. By carefully choosing fabrics, accurately cutting and piecing, and thoughtfully assembling your quilt, you can create a beautiful, professional-looking piece that stands out.
We hope this tutorial has inspired you to try the Around the Corner Quilt Block and experiment with your own creative variations. Share your experience, leave honest feedback, and suggest ideas for new adaptations. Your input encourages innovation and helps keep the art of quilting vibrant and engaging.


