
Crocheted house-shaped cookie for Christmas tree

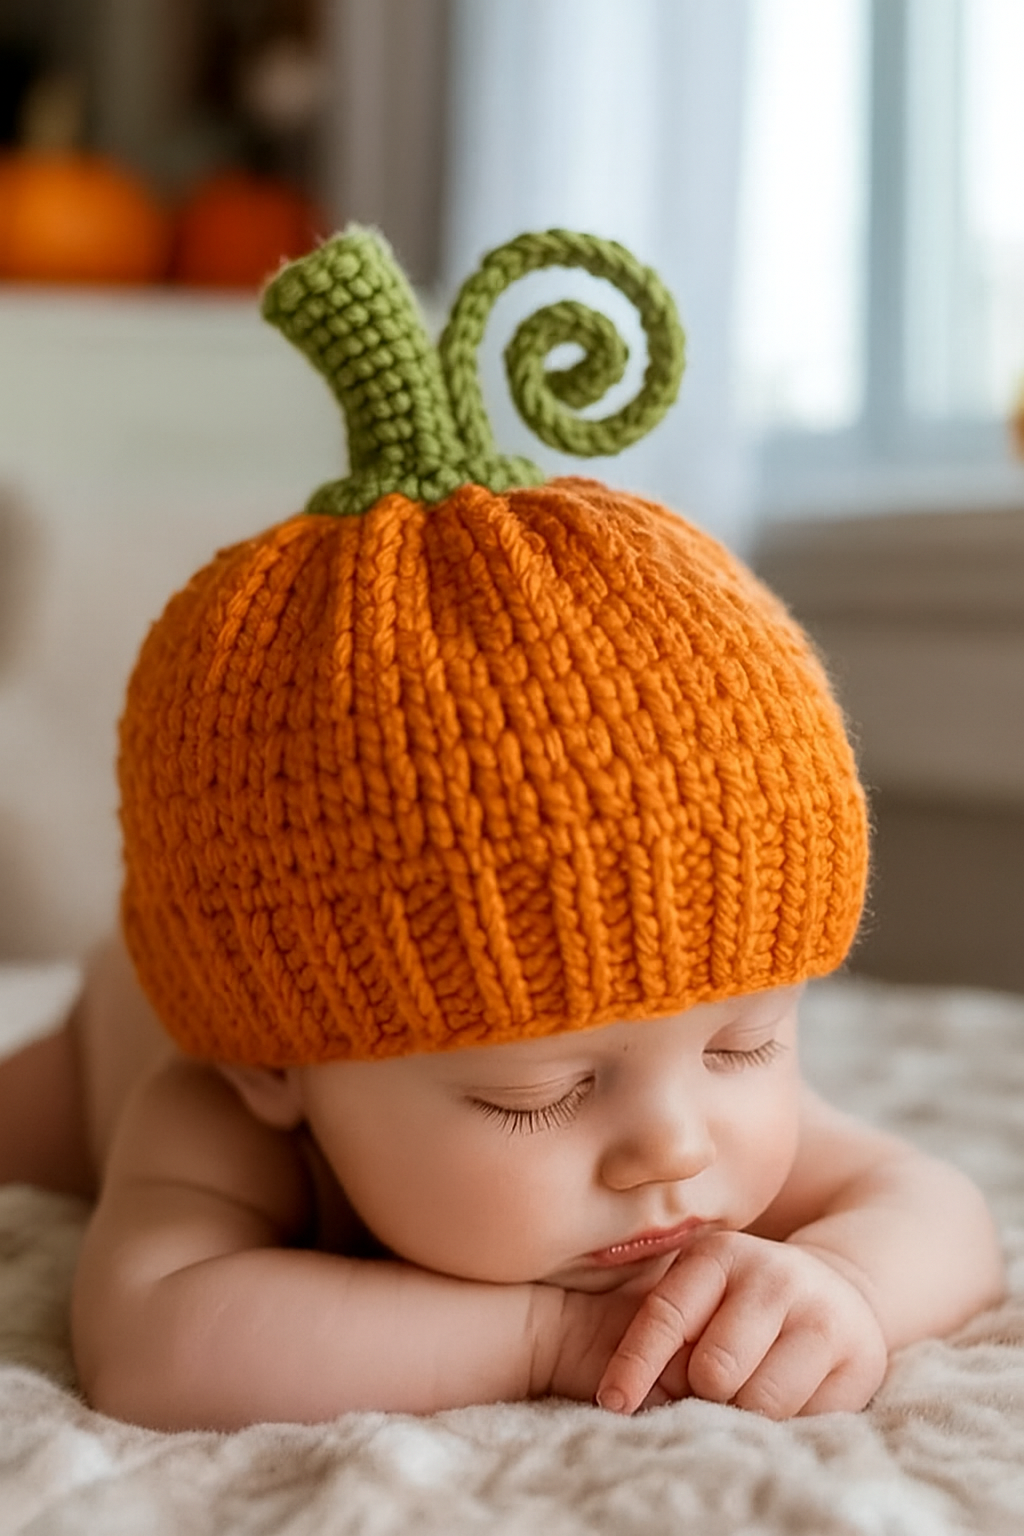
Pumpkin Baby Hat – FREE Crochet Pattern is the perfect seasonal project for both beginner and experienced crocheters. This adorable crochet hat captures the warm charm of autumn while keeping little ones cozy and comfortable.
Designed to resemble a plump pumpkin, this hat is ideal for Halloween, fall photoshoots, or simply as a cute everyday accessory.
With this free crochet pattern, you can create a soft, wearable piece that combines style, comfort, and handmade love. Whether gifting to a newborn or making one for your own child, this pumpkin hat is both functional and festive.
Making a pumpkin baby hat is a satisfying project because it works up quickly and allows for creative customization. You can choose from a variety of yarn colors, such as classic orange, pastel pumpkin shades, or even soft creams for a unique twist.
By following this pattern, you’ll learn how to shape the hat to fit snugly on a baby’s head, and the small details — like a crocheted stem on top — add character and charm. This project is also a great way to practice basic crochet stitches while creating something tangible and useful.
Another benefit of the Pumpkin Baby Hat – FREE Crochet Pattern is its versatility. It can be sized for newborns, infants, or toddlers by simply adjusting the number of stitches and rounds. This hat can also be paired with matching booties, mittens, or even a tiny pumpkin-themed outfit for a complete autumn look. Handmade items like this crochet pumpkin hat make wonderful gifts for baby showers or holiday presents, and because they are handcrafted, each one is unique.
Before starting your Pumpkin Baby Hat – FREE Crochet Pattern, gather all necessary materials to ensure a smooth crafting process.
First, select a soft, baby-friendly yarn. Cotton or acrylic yarn is ideal because it’s gentle on delicate skin and easy to wash. Choose classic orange for the pumpkin body, with green for the stem.
Next, pick the right crochet hook size. Usually, a 3.5 mm to 4 mm hook works well with medium-weight yarn, producing a tight but soft fabric. Check your yarn label for recommended hook size.
You’ll also need a yarn needle for weaving in ends and sewing on the stem, as well as a pair of scissors to trim yarn neatly. Optional items include a stitch marker to track rounds, especially when working in continuous circles.
To create the stem, you can use leftover green yarn or add a tiny piece of felt or ribbon for decoration. A blocking mat is optional but helps shape the hat and make the stitches look even.
Lastly, set up a well-lit, comfortable workspace. Organizing your materials beforehand ensures the project is more enjoyable and helps maintain consistent tension throughout the hat.
Now it’s time to follow the Pumpkin Baby Hat – FREE Crochet Pattern step by step. This guide will help you create a cozy, pumpkin-shaped hat for your little one.
Step 1: Start with a magic ring and make 6 single crochets into the ring. Pull tight to close. This forms the top of the hat.
Step 2: Round 2 – Make 2 single crochets in each stitch (12 stitches total). Round 3 – 1 single crochet, 2 single crochets in next stitch around (18 stitches). Continue increasing in this manner until the circle reaches the desired hat diameter.
Step 3: Once the crown is complete, crochet several rounds in single crochet without increasing. This creates the hat’s body, ensuring a snug fit on the baby’s head.
Step 4: For the pumpkin effect, you can add vertical lines using front post and back post stitches. These stitches give the hat its characteristic ribbed pumpkin texture.
Step 5: To create the stem, crochet a small tube using green yarn. Attach it securely to the top of the hat. You can also embroider tiny leaves around the stem for extra detail.
Step 6: Weave in all ends using a yarn needle. Trim excess yarn and, if desired, block the hat lightly to even out stitches and enhance the pumpkin shape. Your pumpkin baby hat is now ready to wear!
Once you’ve mastered the basic Pumpkin Baby Hat – FREE Crochet Pattern, there are many ways to customize your design.
Try different color combinations. Use pastel pumpkin shades for a softer look, or deep orange for a classic autumn theme. Add a green or brown gradient to the stem for a realistic effect.
Experiment with stitch textures. Incorporate bobble stitches, puff stitches, or ribbing to give the pumpkin a more dimensional look.
You can add embellishments like tiny crochet leaves, embroidered vines, or even small felt patches for a whimsical touch.
Consider making matching accessories, such as pumpkin booties, mittens, or a mini scarf, to create a full autumn outfit.
Adjust the size by increasing or decreasing the number of rounds in the crown and body. This makes the pattern suitable for newborns, infants, or toddlers.
For holiday-themed outfits, you can combine the pumpkin hat with costumes, such as a tiny scarecrow or woodland creature, adding extra fun for photoshoots or parties.
To achieve the best results with your Pumpkin Baby Hat – FREE Crochet Pattern, follow these expert tips.
Keep your stitches even to ensure the pumpkin shape stays symmetrical and the hat fits properly. Uneven tension can distort the lines and texture.
Check your round count carefully when shaping the crown and body. This ensures consistency across multiple hats if making a set.
Use a soft, baby-friendly yarn to avoid irritation. Pre-wash the yarn to prevent shrinking or color bleeding after finishing.
When adding vertical lines, maintain consistent stitch placement for a professional pumpkin appearance. Using a stitch marker can help track each line.
Weave in ends securely with a yarn needle to avoid unraveling, especially around the stem where wear is likely.
Optional: lightly block the hat after finishing to smooth stitches and maintain the pumpkin shape. This step gives a polished, finished look.
Q1: What age group is this pattern suitable for?
A: The pattern can be adjusted for newborns, infants, or toddlers by changing the number of stitches and rounds.
Q2: What type of yarn is best for babies?
A: Soft cotton or acrylic yarn is ideal. Choose hypoallergenic options if the baby has sensitive skin.
Q3: How do I wash the pumpkin baby hat?
A: Hand wash gently with mild detergent and lay flat to dry. Machine washing is possible if yarn is labeled machine washable.
Q4: Can I make the hat in other colors?
A: Yes, pastel, cream, or even multi-colored yarn can be used to create a unique pumpkin look.
Q5: How long does it take to make one hat?
A: Depending on experience, it typically takes 2–4 hours to complete the hat from start to finish.
Q6: Can I add extra decorations to the pumpkin hat?
A: Yes! Crochet leaves, embroidery, or tiny vines can be added for extra charm and personalization.
In this guide to the Pumpkin Baby Hat – FREE Crochet Pattern, you’ve learned how to create a cozy, festive, and stylish accessory for babies. From selecting materials to crocheting the pumpkin shape and adding details, this pattern allows you to make a handmade hat that is both practical and adorable. By experimenting with colors, textures, and embellishments, you can create unique hats perfect for gifts, photoshoots, or seasonal celebrations.
Now it’s time to crochet your own pumpkin baby hat and add warmth and charm to your little one’s wardrobe. Share your thoughts, suggestions, or variations — your feedback can inspire others to try this delightful pattern!


